

Introduction: How to Install Boning in a Bodice


Boning. It's a great thing.
Hopefully, because you're here you wont end up like me at prom, with the top of your dress around the bottom of your rib cage on the dance floor!
Let me help you keep you undergarments under you clothes by following this quick and easy Instructable!
This is intended as an instructable to show you how to instal boning into a garment you are sewing yourself. However, by following these steps it is possible to add boning into the structure of a pre-made dress, depending on how it is constructed.
Here's what you'll need!
A bodice A bodice lining Covered plastic boning **See note below about types of boning! Coordinating thread Sewing machine
Notes on Materials:
The bodice and bodice lining should be sewing together per your pattern instructions or whatever plans are in your head! More than likely the zipper will not be installed yet, that's my preferred method and how I will approach it. Did you prewash your fabric?! I hope you did!
Boning
There's two general types of boning, plastic and steel. I prefer plastic and here's why:
Once while browsing the wares at the Renaissance festival i was checking out some corsets and the kind gentleman selling them told me that they were made with plastic boning. I asked why he choose plastic over steel and he told me that while steel boning is nice it is not meant to bend, so when you wear a corset and do things you're not supposed to do while wearing a corset, ie bending, the steel boning can snap and puncture you.
So in short, plastic boning is safer unless you plan on not moving too much.
Now that we decided on plastic boning, there are another two types when you go shopping.
Covered and not covered.
Covered means that the casing for the boning is already made for you. For most of my projects this is the type of boning i buy because it's not much more expensive, and its nice not having to make the casing (or pockets) that the boning will end up in. However if you are making something like a corset when you sew channels to put the boning into buying non covered would be better.
Step 1: Preparing Your Boning

If you are using a pattern follow the instructions or where to place the boning. I like to put the boning on the princess seams and the side seams, for me i don't feel like it's necessary to put it along the back because i am not a very busty individual and that amount offers enough support for me.
However the placement can be effected by a few determined by a few factors including:
The number of pieces you have on your bodice.
The placement of your zipper
I'm using a 7 piece pattern, center front, 2x side front, 2x side back and 2x back, and a pattern that has a center back zipper. I don't think i have ever seen a pattern that has boning on the same seam as the zipper so that's something to keep in mind.
If you are using covered boning you need to remove the boning from the casing and then cut the casing to the length of the seams that you intend to put the boning in. If you are using boning without casing you'll have to make the casing, again the same length as the seams.
I like the cut the pieces and the pin it to the seams just to keep track of everything.
**Note: I do NOT cut the plastic boning yet! Just wait until a few steps later.
Step 2: Sewing the Casing


Now that you have all the pieces cut you will sew the casing to the lining.
You will sew it to the inside of the lining so you will only see the stitching on the inside of the finished garment.
Options:
You can press your seams flat and center the casing over the seam.
Or
You can press the seams to the side and sew the casing just to the side of the seam.
Personally I prefer the second method because i feel pressing the seam open creates a weaker seam and an increased opportunity to break. And really, having the boing off center by a scant 1/4" is not very noticeable in the scheme of things.
So now you sew sew sew.
Sew down the sides of the casing. You'll want to sew over the stitching that is already on the casing or even just outside of it, but sewing over the stitching already there is the safest. Here's why: if you sew inside the stitching you run the risk of not being able to insert the boning because the channel is too narrow. If you sew too far outside the stitching you are risking the stitching not holding down the casing properly an then it could pop off, resulting in a funny looking shape to your outfit.
Sew across the top of the casing, backstitch over the top and sew over it some more. You don't want the boning to pop out of the top so sew sew sew!
***Remember that you will be attaching the lining so don't sew right at the top of the casing, but rather sew about 3/8" to 1/2" down so you will have room sew the lining on without boning getting in the way.
Step 3: Insert and Cut Boning
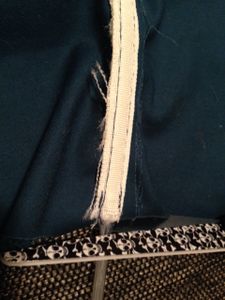
If all went well with sewing the casing on you will be able to slide the boning into the casing, make sure it's pushed all the way up!
Super Important! Don't cut the boning at the bottom of the casing! You still need to sew the bottom of the casing (and possibly sew a skirt onto the bottom of the bodice) So cut the boning about 3/8" to 1/2" shorter than the casing.
Do this for each casing you have. Sometimes i throw a straight pin at the bottom just to keep things orderly.
Step 4: Sew the Casing and Finish


Last step is to sew the bottom of the casing up, and backstitch over it a bunch of times just like the top to prevent it from popping out.
Now you may think well I'm going to attach a skirt and a waistband so i don't need to sew the casing... Take that gamble if you like, but I don't want to forget about the need to backstitch over the boning when I'm attaching the waistband and risk a POTENTIAL BONING BLOWOUT! It's supposed to sound scary when it's in caps...
Congratulations! You have successfully sewn boning into your garment, now just finish it up and get to wearing it!
This instructable comes with the added benefit of the confidence that no one will unintentionally see your undergarments while you dance the night away!


