

Introduction: How to Make Leather Juggling Balls


Hello and welcome to another leather themed instructable! This time I will be teaching you how to make leather juggling balls. I have been juggling for a couple years now and I haven't found a set of juggling balls that really were what I want so I decided to make them. Surprisingly I discovered a website dedicated to making leather juggling balls, Score! So that make this whole process much easier.
Below are some helpful links
How to Make Leather Juggling Balls
The link above is pretty much a complete tutorial on how to make leather juggling balls (obviously) but it doesn't have any pictures or very many details, hence this instructable.
Step 1: Tools and Materials


Tools-
- Awl. Needed for punching holes for stitching.
- Cutting tool of your choice.
- Other tools are helpful, but not necessary.
Materials-
- Thread and Needles
- Something to fill the balls with. I use millet because it is really cheap, easy to find and hold up well enough. You could use plastic pellets, sesame of linseeds. I do not recommend rice because it turns to dust very quickly and doesn't do well with moisture.
- Leather. I am using Econo Suede from Tandy Leather Supply You can use almost any soft, stretchy leather that is relatively thin. The suede I am using is probably a bit thick but, hey, it was on sale and looks great!
Step 2: Pick a Shape


The patterns included above have many, many ball patterns ranging in complexity, size and shape so chose wisely! I found that the tetrahedral (Triangular Pyramid) formed a strange shape that I really wasn't a fan of. (pictured above) For this instructable I am making a cube based ball.
F.Y.I. the two piece pattern and tetrahedron are quite picky about what material they are made from. They need something stretchy.
Step 3: Print and Cut Out the Pattern


There are two ways of cutting out the pattern, either work fine. You can cut out all of the pieces and attach them separately or you can cut just the edges off and attach the whole thing to the leather.
Step 4: Attach Pattern to Leather


Next, glue the pattern to the leather with a weak glue. I use just an Elmer's Purple glue stick. It holds well for punching the holes but peals off pretty easily when you are done.
Step 5: Cut Out the Pieces


No explanation needed. I used a small rotary tool, no reason other than personal preference.
Step 6: Punch the Holes

Use your Awl to punch all the little black dots on the pattern. Make sure the Awl goes completely through the leather, otherwise stitching will be worse than it already is.
Step 7: Stitching! Part One


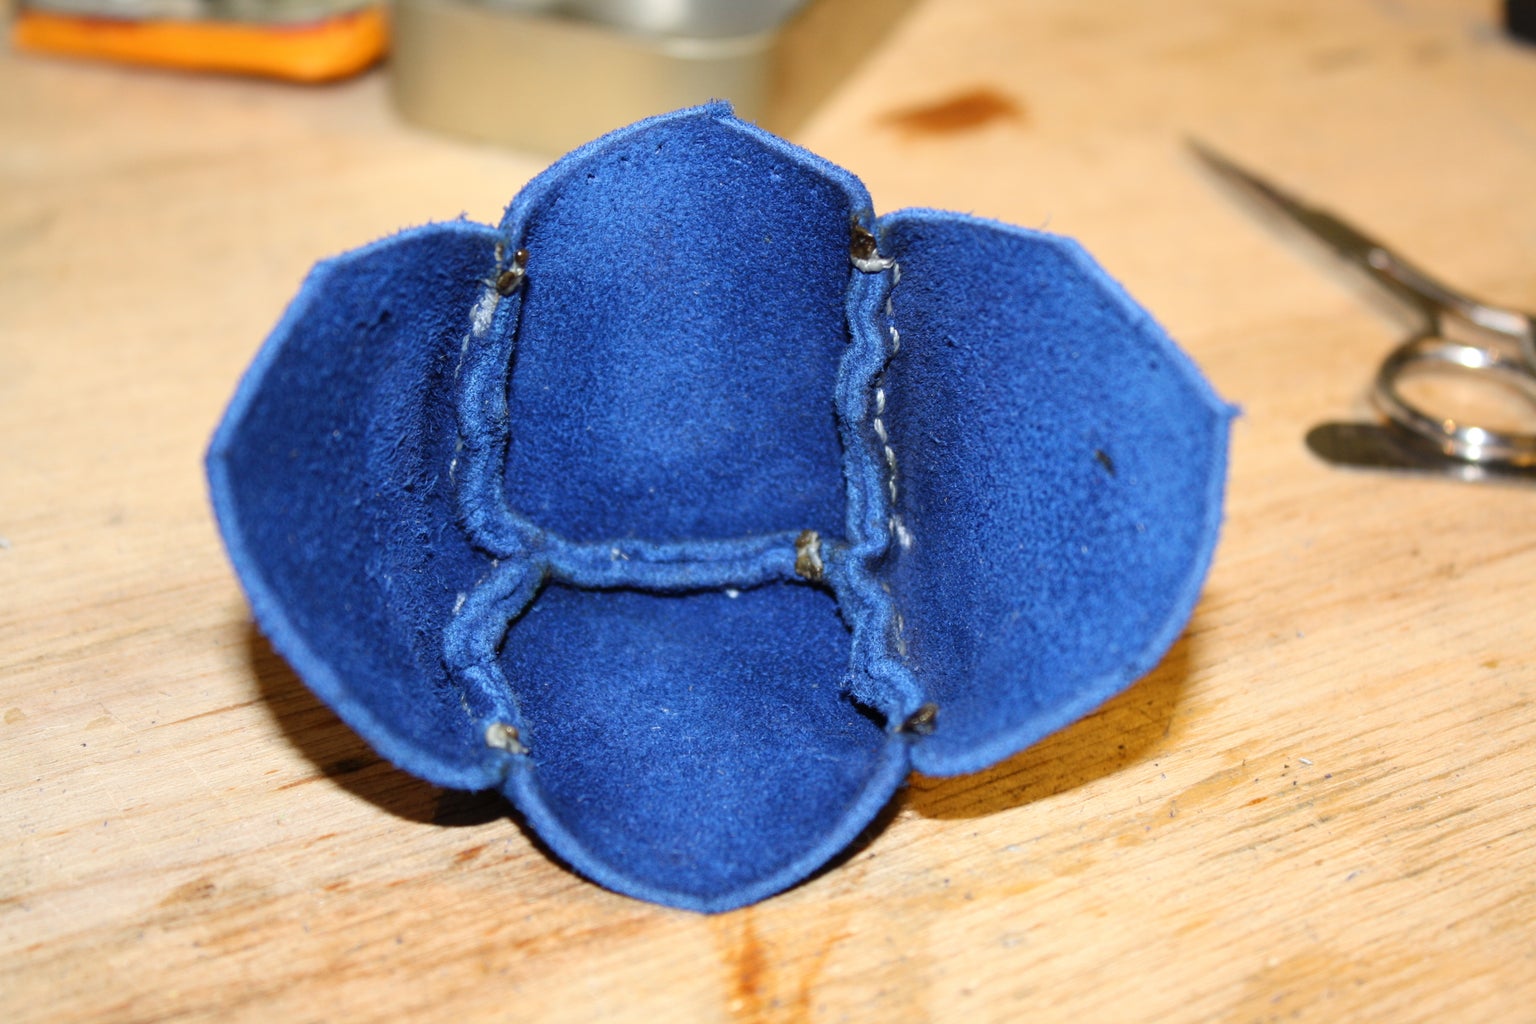
I have a hard time explaining stitching, especially in written words, so I have included this link to help you with it.
You will want to stitch the pieces together one side at a time and inside-out. Sew each corner closed tightly with separate pieces of thread so the seed, or whatever, doesn't leak out. Do this until there are only a couple unsewn seams, then flip the ball right-side-out.
Step 8: Stitching. Part Two


Then continue to sew like you have been, only inside out. (Easy right!) Make sure the last seam is loose enough for you to insert a funnel into it. You will have to be able to tighten the stitches to close the ball. Hopefully the last four images will help make sense of this.
Step 9: Finishing Off and Filling


I used funnel to fill the ball initially. I then filled a deep bowl with the millet and just kept filling the ball until I couldn't. I used an electric scale to make sure all of the balls weighed about the same. Then I tightened up the seam, tied it off and melted the knot to stop it from unraveling. You should then be able to tuck the knot inside of the ball so you can't see it as well.
Now make two more,YAY!
Step 10: Juggle!

Once you have finished the other two, Juggle!
Enjoy!
Step 11: *Update

After finishing off my set of cube based juggle balls, I decided I wanted something a bit more...
So I started my next set, which happen to be around 5 inches in diameter and 500 grams each. I am going to use different colors of suede for each ball so I can't make the other two yet. I will keep this updated as I go.

Participated in the
Tandy Leather Contest 2016

Participated in the
Maker Olympics Contest 2016


