

Introduction: How to Make Springs


Springs are nice to have in the shop for your projects but how many should you carry and what size or type should you have.
Buying springs can add up and sometimes it is difficult to find the exact one you need. Wouldn't it be nice to make your own.
Making springs may seem intimidating but with a few basic tools and simple instruction anyone can make them.
In this article I will show you how to make some, first the easy way then I will move on to some other tools but still keeping things easy.
Step 1: Types of Springs

Here are just some of the springs I will show you how to make.
From left to right,
- Tension spring
- Compression spring
- Tapered spring
- Torsion spring
Step 2: Start With These Tools

An easy way to start is to use the tools shown below. With these few tools you will be able to safely make many different types of springs.
- 1/2" dowel
- piano wire
- pliers with wire cutters
- saw
- clamps
- cordless drill
Step 3: Cutting a Dowel

First cut a piece of dowel about 5 inches long and cut a small slot in one end, this will be for inserting the wire. 1/2 inch dowel will work best, since this will also fit in the drill chuck. A smaller dowel will not work very well since it may not hold up to the wire.
Step 4: Making a Tension Spring

A cordless drill works better than a drill press because you can control the speed. For Safety always use a pair of pliers. If the wire springs it may cut you.
With the drill mounted onto the workbench with the clamps, one hand is on the trigger and the other hand on the pliers turn as much as you need to make your spring. Keeping the string taut as you feed it, the spring will turn out nicer.
Step 5: Wire Bending

After the spring was made I used some pliers and did some wire bending and made this tension spring. By experimenting you can make many different sizes.
Step 6: Compression Spring


This spring will use a longer dowel and will also have the slot cut in it. When the wire is fed it is spaced just by using your eye. It may take some practice but it is fun to do.
When this spring was complete I tested it out. I put the spring on a dowel and placed a small block on the spring. When I pushed on the small block and quickly let go it shot to the ceiling.
Step 7: Tapered Spring
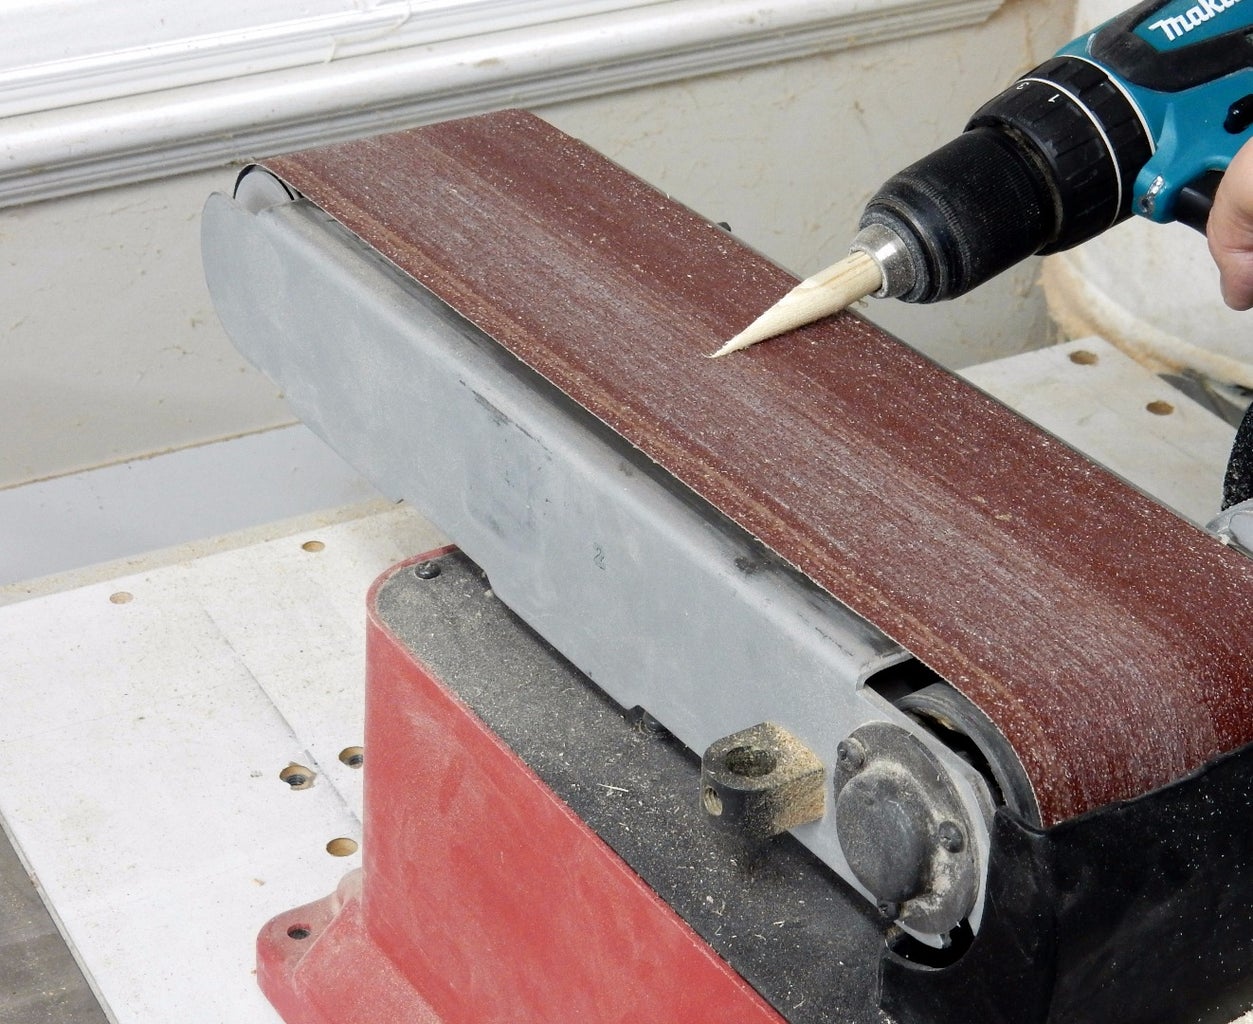


A tapered dowel can be made using a drill and a belt sander.
Using the same technique the wire was fed in the dowel slot. When the spring was fully turned I clipped the ends and the tapered spring was complete.
This one I had to do twice to get the hang of and the second one turned out nicer.
Step 8: Torsion Spring

Torsion spring was made but this time I had to use a brass rod since a smaller wood dowel would not hold up. To make it just make a few coils and space apart as needed. With a little bit of wire bending at the ends you can make yourself a nice torsion spring.
Step 9: Conclusion


Here is a compression spring I made using a brass rod and also a photo of the many different types I made.
I hope that wasn't very hard and I hope it will help you with your projects. This can also help you save money if you have to make a lot of springs.
There are many other types of springs and many other ways to make them, if you know a different way to make them please let me know.


