

Introduction: How to Make a Mini Rabit in a Bottle - Easy Paper Gift!


This project only requires some paper, thread, and a glass jar. In my tutorial I use small cork jars, but the project can be scaled to fit any transparent container by adjusting the size of the paper used.
Supplies

Origami Paper (any square shape paper will work)
Scissors
Glue
Glass Jar
Thread
Glitter, confetti, or any other item for decoration
Step 1:

Fold a traditional origami bunny rabbit. The size of the square paper will depend on the size of your container.
Step 2:
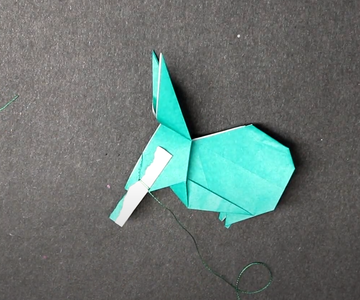


Take a scrap piece of paper and tie a bit of string to it. Then apply some glue and insert the paper at the opening at the back of the rabbit's head. Once the scrap piece of paper is well hidden, press down on the rabbit's head to secure it in place. Make sure the thread comes up from the top of the rabbit's head.
Step 3:

Decorate your container with glitter, confetti, beads, or anything else you have in mind and set it aside for now.
Step 4:


Poke a hole in the middle of the container lid. Take the thread attached to the rabbit, and pull it through the hole. Place the rabbit in the jar and secure the container lid in place. Adjust the size of the thread within the container until the rabbit is freely floating in the jar. Once you are satisfied with the positioning, secure the thread in place using either glue, tape, or by wrapping it around the head of the container. Since I used a cork jar, the thread stayed securely in place as seen in the video.
Step 5:


Once you're finished, decorate the top/outside of the jar as you please. As you can see, I wrapped a long piece of green thread around the neck of the jar. That's it, You're done!

Participated in the
Paper Challenge


