

Introduction: How to Choose, Use and Improve a 3D Printer


This instructable contains a lot of information I have gathered on 3D printers and their use. Some of this information is only relevant for the Prusa Mendel I2, because I only have a Prusa Mendel I2 and thus I know a lot about this type of 3D printer, but I do have experience with other 3D printers and I will try to make this instructable relevant to as many different 3D printers as I can. Furthermore, this instructable is written in both English and Dutch.
First something about me. I am a nineteen years old, first year Mechanical Engineering student at TU Delft. I build my Prusa Mendel I2 about a year and a half ago and ever since I have been working on improvements to get better quality prints. This instructable will tell you a lot about what I have learned in this process.
This instructable is interesting for anybody with a 3D printer, home made or bought, and anybody who is thinking about buying or building one. Every step contains information which should be paid attention to when selecting the right printer to buy or build and information about how to improve a 3D printer and it's use.
In some of the steps of this instructable you find stl files to download or links to Thingiverse with useful parts. If you do not have a 3D printer (yet) and you want some of these files printed, you can order them at my 3DHubs page: Arthur's Hub. Just download the stl from Thingiverse and upload it to 3DHubs, or upload it directly to 3DHubs via the 3D print button beneath the 3D view in this instructable. If you decide to order the parts at my 3DHub, you can pick the parts up in Delft, Netherlands and on the weekends in Noordwijkerhout, Netherlands.
Also do not forget to vote for this instructable in the 3D printing contest of Instructables and 3DHubs! Thanks.
Table of content of this instructable:
Hardware
1. Printable Additions
2. Autonomous Printing
3. Cooling Fan
4. Printing Surface
Maintaining the Machine
5. The Nozzle
6. Axis Maintenance
Software
7. G-code Generators
8. Firmware Customization
Outro
--------------------------------------------------
Deze instructable bevat veel informatie over 3D printers en het gebruik ervan. Sommige informatie is alleen relevant voor de Prusa Mendel I2, omdat ik alleen een Prusa Mendel I2 heb en daar dus het meeste van weet, maar ik heb wel ervaring met andere 3D printers en ik zal zo veel mogelijk informatie in deze instructable relevant maken voor zo veel mogelijk verschillende 3D printers. Verder is deze instructable in het Engels en in het Nederlands geschreven.
Eerst even iets over mijzelf. Ik ben een negentienjarige eerste jaars Werktuigbouwkunde student aan de TU Delft. Ik heb mijn Prusa Mendel I2 ongeveer anderhalf jaar terug gebouwd. Sindsdien ben ik bezig mijn printer te verbeteren om betere kwaliteit printjes te kunnen maken. Veel informatie die ik verzameld heb is in deze instructable te lezen.
Deze instructable is interessant voor iedereen met een 3D printer, zelf gemaakt of gekocht, en iedereen die eraan denkt een 3D printer te gaan kopen of maken. Iedere stap bevat namelijk tips voor waar op gelet moet worden bij het selecteren van een 3D printer om te kopen of maken en tips voor het verbeteren van een 3D printer en het gebruik ervan.
In sommige stappen van deze instructable zult u stl bestanden vinden om te downloaden, of links naar Thingiverse met handige dingen. Als u (nog) geen 3D printer heeft, kunt u deze onderdelen bij mij bestellen via deze link: Arthur's Hub. Om dit te doen, download u het bestand van Thingiverse en u upload het naar 3DHubs, of u upload het direct naar 3DHubs via de 3D print knop onder het 3D model in deze instructable. Als u de onderdelen bij mijn 3DHub bestelt, kunt u de onderdelen ophalen in Delft, Nederland, en gedurende de weekenden in Noordwijkerhout, Nederland.
Vergeet niet op deze instructable te stemmen in de 3D printing wedstrijd van Instructables en 3DHubs! Alvast bedankt.
Inhoudsopgave van deze instructable:
Hardware
1. Printbare uitbreidingen
2. Printen zonder computer
3. Koelventilator
4. Print oppervlak
Onderhoud van de machine
5. Het mondstuk
6. Onderhoud van de assen
Software
7. G-code vormer
8. Firmware aanpassen
Outro
Step 1: Hardware: Printable Additions

This step is the first of the chapter about the hardware of a 3D printer and will focus on printable additions for your printer. There are lots and lots of printable additions ready to be downloaded and printed on Thingiverse. I will be pointing out the ones I found to be very useful.Some of them already come with the 3D printer (which will probably not be the case with home made 3D printers).
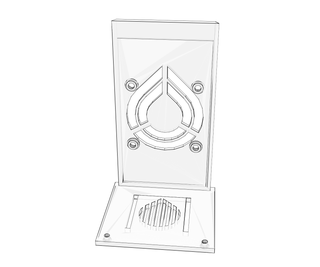
• The first addition I will be paying attention to is the filament spool holder. If your filament spool is just laying next to your printer, the filament can not unroll, so it will twist and form spirals, as can be seen on the first picture. When printing proceeds, the amount of twist will increase and with it the internal stress in the filament. These spirals could get in the way of your printer's axes and block them during printing, which means you will have to print the object all over again. Also the internal stress could increase until the filament breaks, which might result in your printer having no filament while being halfway a print. Enough reason to print a filament spool holder.
There are a lot of different filament spool holders on Thingiverse, so pick one which suits you and goes well with your printer. You could choose a spool holder which supports the spool using four ball bearings. Most of these spool holders are universal. You can use them with any 3D printer, because they stand next to the 3D printer. You could also choose something more specific which is connected to your 3D printer, like a spool holders which is basically a printed rod extending to the side (or sometimes upwards on the topside, but this is only common on delta 3D printers) of the printer, designed to hang the filament spool on. These spool holders are printer-specific, because every 3D printer has another ideal spot to connect such a spool holder. I am currently using this type of spool holder on my Prusa Mendel I2 and I attached the stl file to this step. I personally think this spool holder is better than the last one, because it takes up less space on your table or desk. On Thingiverse you might find some filament spool holders which are placed on top of the 3D printer. With these spool holders it is relatively easy to guide the filament to the extruder, because the spool will always be above the extruder. The big disadvantage of this type of spool holders is that a full filament spool is pretty heavy. Placing this on top of your printer, rises the center of mass of the printer, which will cause it to vibrate more and more intensive. This is why I do not recommend this type of spool holder, unless you are using a delta 3D printer.
When you are using a spool holder which is to the side of your 3D printer, I recommend using a filament guide. Filament guides can also be found on Thingiverse. Choose one you like and goes well with your 3D printer. I included one which is compatible with the Prusa Mendel I2. To make sure my spool holder does not break off or rotate around my frame, I designed a little stand for the outer end, so it is supported at both ends. The end which is connected to frame can be mounded with two rod claps, which are also included.
When choosing a filament spool holder, keep in mind that the filament spool needs to be able to rotate freely. If it can not, your extruder needs to pull to hard and will start slipping. The coefficient of friction between normal PLA spool holders and the spool's plastic is low enough to not cause any problems.
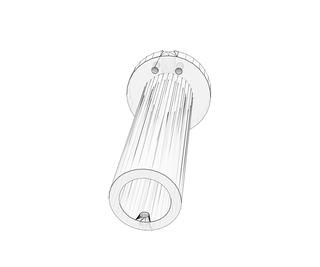
• The second addition I will be paying attention to is the fan holder. I will be discussing the use of the fan itself in step 3. Basically there are 2 locations to connect the cooling fan to: the frame and the extruder. When you have a small fan, connecting it to your extruder is a wise thing to do, because it will not be able to move a lot of air per unit of time. This means you will want to place it as close to your print as possible. When you have a big fan, I recommend you connect it to the frame. Connecting a big fan to your extruder will limit it's movement drastically, because it probably will collide with the printer's frame, printing bed or the print. A bigger fan will be able to move more air per unit of time. This causes it to still be effective when being on a distance from the print. To clear out what size is big and what is small: 60x60 mm and up is big, 40x40 mm and down is small. Since every extruder and frame is different, you will have to look for a suitable fan holder for your printer on Thingiverse, or design one yourself. I included the one I am using on my Prusa Mendel I2. I am using one for a big fan (80x80 mm) connected to the frame. I downloaded this design from Thingiverse, but could not find the original source any more.
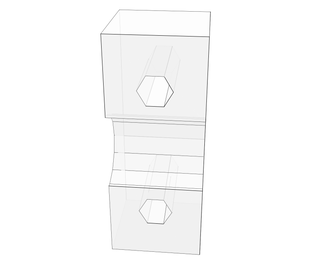
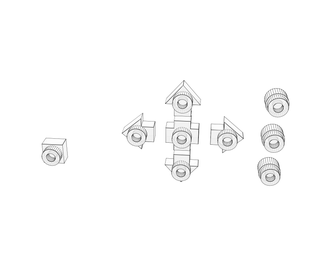
• Then there is this one printable addition every bought printer will have, but every home made printer will not have (at first): an electronic's case. It is an absolute must have, because it protects the electronics of your printer against dust, but even more important is the electrical barrier it forms to protect it from short-circuiting via the surface on which your printer is standing or the frame of the printer. Again I included the case I am using to protect my RAMPS 1.4. It has a rectangular gap on the side of the case, for when you have an SDRAMPS. I downloaded it here. I am also using a separate case for my lcd screen and keypad (which I bought from reprapworld). I modified this case from this thing and this thing, so it has that nice form of the first thing, but also the arrows from the second thing. Furthermore I added a spot for a buzzer at the inside of the keypad part. I also modified the legs a little bit, so it fits on top of my electronics case. All the parts needed to print the entire case are added to this step.
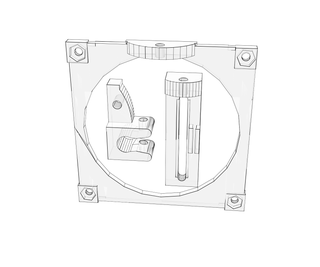
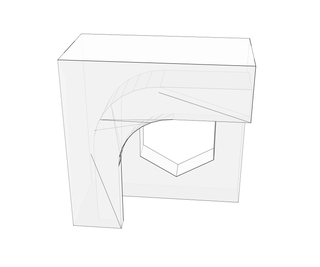
• The last printable additions I will be paying attention to are two additions which are specifically useful for Prusa Mendel I2 users. I moved my Z stepper motors to the bottom of my printer, instead of leaving them at the top of the machine. I did this to lower the center of mass of my printer and to not have all the weight of the extruder and x axis hanging on my z couplers. This resulted in my Z motors hanging just a couple millimetres above the table's surface. That is why I downloaded this dust cap and made the bottom a bit thicker, so my motors were supported by the table's surface. This file with extra thick bottom is also added to this step.
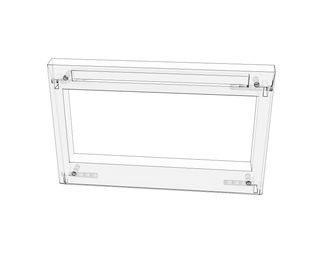
The very last printable addition I would like to discuss is the bed levelling nut holder. I designed this model myself, because I found myself having to level the bed after every print I made. This was because every time I printed something, the nuts underneath my print bed would loosen due to the movement of the bed. I tried to put two nuts really tight to each other, but that did not work. Then I designed these things, printed four of them, put one on each corner of my print bed to keep the M3 nuts from rotating and I never had to level my bed again. This part is also included.
--------------------------------------------------
Deze stap is de eerste stap van het hoofdstuk over de hardware van de 3D printer en het zal zich richten op printbare uitbreidingen voor de printer. Er zijn heel veel printbare uitbreidingen te downloaden op Thingiverse. Ik zal me richten op de uitbreidingen die ik zelf heel handig vind. Sommigen daarvan zullen bij gekochte printers inbegrepen zitten, maar bij zelfbouw printers vrijwel zeker niet.
• De eerste uitbreiding waar ik mijn licht over laat schijnen is de de filament spoel houder. Als de filament spoel plat naast de printer ligt, zal het filament niet goed kunnen afrollen, dus zal het gaan torderen en spiralen vormen, zoals te zien is op de eerste afbeelding. Naarmate het printen vordert, zal de torsiespanning in de filament toenemen, waardoor het aantal rondjes in de spiraal toeneemt. Deze spiraal kan tegen de assen van de printer aankomen en daarmee een as blokkeren. Dat heeft tot gevolg dat het printje weer helemaal overnieuw gestart moet worden. Het zou ook kunnen gebeuren dat de interne torsiespanning in de filament toeneemt totdat de draad breekt. Dit zal resulteren in dat de printer geen toevoer meer heeft en dus zal het printje overnieuw gestart moeten worden. Al met al voldoende reden om aan een filament spoel houder te beginnen.
Er zijn een hele hoop verschillende filament spoel houders te vinden op Thingiverse, dus zoek er een uit die u fijn vind en bij uw printer past. U zou kunnen kiezen voor een spoel houder die de spoel met behulp van vier kogellagers ondersteunt. De meeste van dit soort spoel houders zijn universeel; ze kunnen bij iedere 3D printer gebruikt worden, omdat ze naast de printer staan. U zou ook kunnen kiezen voor een spoel houder die aan uw printer vast zit. Zo zijn er ontwerpen die een soort geprintte stok zijn, die aan de zijkant (of soms bovenkant, maar dat is alleen gebruikelijk bij delta 3D printers) van de printer uitsteekt, bedoeld om de spoel aan op te hangen. Deze spoel houders zijn printerspecifiek, omdat elke printer een andere, ideale plek heeft om zo een spoel houder te bevestigen. Ik gebruik zelf zo een spoel houder op mijn Prusa Mendel I2 en heb het stl bestand bij deze instructable gevoegd. Persoonlijk vind ik dit type spoel houder beter dan de vorige, omdat het minder ruimte in neemt op de tafel of het bureau waar de printer staat. Op Thingiverse zult u misschien ook filament spoel houders vinden die op de 3D printer geplaatst worden. Het fijne van dit type spoel houder is dat het heel makkelijk is om de filament van de spoel naar de extruder te leiden, maar het heeft ook een groot nadeel. Een volle filament spoel is namelijk zwaar, wat tot gevolg heeft dat het zwaartepunt van de hele printer omhoog gaat. Dit veroorzaakt meer en hevigere trillingen in de machine.
Als u een filament spoel houder gebruikt die zich naast uw 3D printer bevind, kan ik u ook een filament geleider aanraden. Filament geleiders zijn ook op Thingiverse te vinden. Kies er een uit die u leuk vind en goed bij uw printer past. Ik heb de filament geleider die ik gebruik om mijn Prusa Mendel I2 bijgevoegd. Om er zeker van te zijn dat mijn filament spoel houder niet bezwijkt onder het gewicht van de spoel, heb ik een poot ontworpen om het uitstekende uiteinde van de spoel houder te ondersteunen, zodat de spoel houder aan twee kanten ondersteund is. Het kan aan de machine vastgemaakt worden met behulp van twee 'rod clamps', die ook bijgevoegd zijn.
Als u een filament spoel houder uitkiest, houd dan in het achterhoofd dat de spoel vrij moet kunnen roteren. Als de spoel dat niet kan, zal de extruder te hard moeten trekken aan de filament en zal de extruder slippen. De wrijvingscoëfficiënt tussen PLA en het plastic van de filament spoel is laag genoeg om geen problemen te veroorzaken.
• De tweede uitbreiding waar ik naar zal kijken is de ventilator houder. De ventilator zelf zal ik in stap 3 verder bespreken. Er zijn eigenlijk twee plekken waar de ventilator goed vast gemaakt kan worden: aan het frame of aan de extruder. Als u een kleine ventilator heeft, is het verstandig deze aan de extruder te bevestigen, omdat hij niet in staat is om veel lucht per tijdseenheid te verplaatsen. Dit betekent dat de ventilator effectiever is als hij dicht bij het printje staat. Het is niet verstandig een grote ventilator aan de extruder te bevestigen, omdat dit de bewegingsruimte van de extruder drastisch verkleint. De ventilator zal dan zeer waarschijnlijk tegen het frame, het print oppervlak of het printje aan komen. Een grotere ventilator is wel in staat veel lucht per tijdseenheid te verplaatsen en kan dus wat verder van het printje af staan en toch effectief zijn. Om even te verhelderen wat groot en wat klein is: 60x60 mm en groter is groot, 40x40 mm en kleiner is klein. Aangezien elke extruder en elk fram anders is, zult u zelf op Thingiverse moeten zoeken naar een handige ventilator houder voor uw printer, of er zelf een ontwerpen. Ik heb de ventilator houder die ik gebruik bijgevoegd. Ik gebruik een 80x80 ventilator. Dit model heb ik gedownload van Thingiverse, maar ik kan de originele maker niet meer achterhalen.
• Dat is er nog die ene printbare toevoeging die iedere gekochte 3D printer zal hebben, maar een zelfbouw 3D printer niet (op het begin): een omhulsel voor de electronica. Dit is absoluut noodzakelijk om te hebben. Het beschermt de elekectronica tegen stof, maar wat nog veel belangrijker is, is de elektrische bariére die het vormt tussen de elektronica en invloeden van buitenaf, zoals de tafel waar de elektronica op ligt, het frame van de printer waar de elektronica per ongeluk tegenaan stoot of een schroevendraaier die je in een onvoorzichtige bui tegen de schakelingen aan houdt. Dit veroorzaakt kortsluiting en kan het volledig onbruikbaar maken. Ik heb het doosje wat ik gebruik voor mijn RAMPS 1.4 inbegrepen. Het heeft een rechthoekig gat aan de zijkant, voor als u een SDRAMPS gebruikt. Ik heb dit doosje hier gedownload. Ik gebruik een appart omhulsel voor mijn lcd scherm en bedieningspanneel (die ik bij reprapworld gekocht heb). Ik heb dit omhulsel gemaakt van deze twee dingen: Thing 27766 en Thing 98597. Ik heb deze twee dingen samengevoegd, zodat ik de mooie display vorm heb van ding 27766 en toch de pijltjes van ding 98597. Ook heb ik ervoor gezorgd dat er een kleine speaker tussen de knoppen kan en dat de poten precies op het doosje van mijn RAMPS passen. Alle onderdelen die nodig zijn om mijn versie te printen zijn ook bij deze instructable gevoegd.
• De laatste printbare uitbreidingen waar ik het over zal gaan hebben zijn twee uitbreidingen die specifiek handig zijn voor de Prusa Mendel I2. Ik heb namelijk mijn z stapper motoren naar de onderkant van mijn machine geplaatst, in plaats van ze aan de bovenkant te laten zitten. Dat heb ik gedaan om het zwaartepunt van mijn printer te verlagen en om niet al het gewicht van de extruder en x as aan de koppeling tussen z spindels en z motors te hebben hangen. Mijn z motoren kwamen net niet bij de grond, dus heb ik deze stofkap voor nema 17 stapper motoren gedownload en ietsje dikker gemaakt, zodat mijn z motoren, en dus mijn x as, direct door de tafel ondersteund worden. De stl bestanden met extra dikke bodem heb ik ook bijgevoegd.
De allerlaatste uitbreiding die ik in deze stap zou willen bespreken is de bed levelling moer houder. Dit model heb ik zelf ontworpen, omdat ik na ieder printje wat ik gemaakt had mijn printbed weer overnieuw moest vlak moest leggen. Dit kwam doordat iedere keer dat ik iets printte, de moertjes aan de onderkant van mijn printbed een beetje los trilden door de bewegingen van het printbed tijdens het printen. Ik heb geprobeerd dit op te lossen door twee moertjes heel strak tegen elkaar aan te draaien, maar dat werkte niet. Toen heb ik dus deze onderdelen ontworpen, vier ervan geprint, op de hoeken van mijn printbed geplaatst om te voorkomen dat de M3 moertjes konden roteren en sinds dien heb ik nooit meer mijn printbed opnieuw moeten levellen. Ook deze onderdelen heb ik bijgevoegd.
Attachments


Step 2: Hardware: Autonomous Printing

Autonomous Printing is when your 3D printer can print on it's own. This means it does not need a computer connected to it while printing. This is absolutely advisable! If your 3D printer does not have this, there must be a computer turned on near your 3D printer at all times during printing. If this computer goes standby, the printing will stop immediately, whether it is finished printing or not. To prevent this from happening, you could adjust your computer's settings, so it will never go stand by, but you would still need a computer near to your 3D printer. It is much better to not have need of a computer near your 3D printer and to be able to control your 3D printer's axes and heaters without the need for a computer.
You can easily see whether a bought 3D printer is able to print on it's own by checking if it can read an SD card. If so, the 3D printer is most likely autonomous. It is possible the 3D printer is able to print from an SD card, but can not start printing without being told to do so by a computer, but this is uncommon with bought 3D printers. To make sure you won't need a computer for that either, you could check if the 3D printer has a display. The most common display on 3D printers is a 20x4 LCD. These displays often come with a rotary encoder to navigate through the menus. Some (more expensive) 3D printers have a full graphic LCD or even a touchscreen display. Of course you can also use this with your home made 3D printer, but a touchscreen is everything but cheap.
With home home made 3D printers you can choose yourself if you want to invest in an LCD, control panel and SD card reader, but I absolutely recommend it. I bought my LCD at reprapworld, just like my keypad. The keypad has a rotary encoder to navigate though the menus, an enter button to select elements in the menu and 8 other buttons. I changed my 3D printer's firmware so that these 8 buttons now control my printer's axes. If you would want to know how I did this, let me know. If I get a lot of requests, I will post how to do this. Furthermore I have connected a buzzer to my 3D printer. Almost every bought, autonomous 3D printer have a buzzer build-in. I strongly recommend to connect a buzzer to your home made 3D printer, not because it will give a small beep every time you press enter, but because it enables you to use the M300 Sf Pm m-code to make the buzzer beep at frequency f for m milliseconds. This is useful because you can use a couple of different frequencies in a row to play a melody. By adding a few extra lines at the end of every gcode, your 3D printer will play that melody every time it's done printing. In chapter Software: Gcode Generators I will explain how to do this.
--------------------------------------------------
Printen zonder computer betekent dat het niet nodig is een computer met de 3D printer verbonden te hebben tijdens het printen. Dit is absoluut een aanrader! Als uw 3D printer dit niet kan, zal tijdens het printen altijd een computer in de buurt van de 3D printer aan moeten staan. Mocht het gebeuren dat de computer in slaapstand valt, dan zal het printen direct stoppen, ook als het printje nog niet af is. Om dit te voorkomen kunt u natuurlijk de instellingen van uw computer aanpassen, waardoor hij nooit automatisch in slaapstand gaat, maar dan nog steeds zal er altijd een computer naast de 3D printer aan moeten staan. Het is veel fijner om dat niet te hoeven en ook de assen en verwarmingselementen los aan te kunnen sturen zonder daar een computer voor nodig te hebben.
Of een gekochte 3D printer zelfstandig is, is het makkelijkst te zien aan de SD kaart compatibiliteit. Als de 3D printer een SD kaart kan lezen, is hij waarschijnlijk zelfstandig. Het kan ook zijn dat er dan alsnog een computer voor nodig is om de 3D printer te laten beginnen met printen, maar dat is niet gebruikelijk bij gekochte printers. Om zeker te weten dat hier ook geen computer voor nodig is, kunt u controleren of de 3D printer een beeldscherm heeft. Bij de meeste 3D printers is dat een 20x4 LCD schermpje. Deze schermpjes komen vaak samen met een draaiknop om het menu te kunnen bedienen. Sommige (duurdere) 3D printers hebben een full graphic lcd scherm, of zelfs een touchscreen. Dit kunt u natuurlijk op uw zelfgebouwde printer ook installeren, maar aan iedere uitbreiding hangt een prijskaartje, en het geval van een touchscreen een prijskaart.
Bij een zelfbouw 3D printer kunt u er natuurlijk zelf voor kiezen of u investeert in een lcd scherm, een bedieningspaneel en een SD kaart lezer, maar ik raad het absoluut aan. Ik heb mijn lcd scherm gekocht bij reprapworld, net als mijn bedieningspaneel. Dit bedieningspaneel heeft een draaiknop om door het menu te kunnen navigeren, een enter knop om een element in het menu te selecteren en nog 8 andere knoppen. Deze 8 knoppen heb ik ingesteld zodat ik mijn x, y en z as ermee kan bedienen. Als u wilt weten hoe ik dit gedaan heb, stuur dan even een berichtje. Als er voldoende vraag naar is, zal ik het aan deze instructable toevoegen. Verder heb ik zelf ook nog een buzzer aangesloten op mijn 3D printer. Een buzzer is een soort kleine speaker en in dit geval kan hij ook rustig vervangen worden voor een speaker uit een oude computer bijvoorbeeld. Vrijwel alle zelfstandige, gekochte 3D printers hebben een speaker of buzzer ingebouwd. Ik raad mensen met een zelfbouw printer ook aan een buzzer aan te sluiten. Deze buzzer zal een geluidje geven wanneer u iets in het menu selecteert. Dat heeft wat mij betreft geen toegevoegde waarde, maar wat wel toegevoegde waarde heeft is dat u met de m-code M300 Sf Pm de buzzer met frequentie f voor m milliseconden geluid kan laten geven. Dit geeft u de mogelijkheid om een melodietje af te spelen zodra de printer klaar is met printen door een paar regels extra achter iedere gcode te schrijven. Hoe dit precies te doen leg ik uit in het hoofdstuk Software: G-code vormer.
Step 3: Hardware : Cooling Fan


A cooling fan is a thing you will absolutely need, unless you are planning on only printing pyramids. A cooling fan will cool the filament coming out of your 3D printer's nozzle, which allows it to solidify faster, which in turn allows you to print longer bridges and more extreme overhang. Every bought 3D printer I know has a cooling fan build in, so nothing to worry about. It is a whole different story with home made 3D printers. Kits sometimes come with a small fan, but in order to connect this fan to the extruder, you will need a printed part which is rarely delivered with the kit. Luckily you could build the printer without fan at first, then print a fan holder and then connect the fan to your printer.
Like I already explained in chapter Hardware: Printable additions, a cooling fan can be connected to the extruder or to the frame of the 3D printer. If you have a big cooling fan (60x60 mm and up), it is better to connect it to the frame, not the extruder. When connected to the extruder, it might collide with the printers frame, print bed or the object it is printing. A small fan (40x40 mm and down) can be connected to the extruder. A small fan will not be able to move a lot of air per unit of time. This is why you will want to have a small fan as close to your print as possible and so you need to connect it to the extruder. On the other side, a big fan is able to move a lot of air per unit of time and so it will still be useful if it is placed further from the print. Therefore it is wise to connect a big fan to the frame in stead of the extruder. This also allows a big fan to cool the entire print at once, while a small fan will only cool the filament coming out of the hot end.
--------------------------------------------------
Een koelventilator is iets wat u absoluut nodig heeft op uw 3D printer, tenzij u van plan bent alleen piramides te printen. Een koelventilator zal de filament die uit de spuitmond van uw 3D printer komt direct koelen, waardoor het plastic eerder stolt en u dus langere bruggen en steiler overhangende delen kunt printen. Iedere gekochte 3D printer die ik ken heeft zo een koelventilator, dus niets om u zorgen over te maken. Bij zelf gebouwde 3D printers is dat vaak anders. Soms wordt bij een kit wel een ventilator geleverd, maar slechts zelden zit daar ook een ventilatorhouder bij. Gelukkig kunt u natuurlijk de 3D printer zonder ventilator helemaal in elkaar zetten, dan een ventilatorhouder printen en daarna de ventilator aan uw 3D printer hangen.
Zoals ik ook al in het hoofdstuk Hardware: Printbare uitbreidingen heb uitgelegd, kan een koelventilator aan de printkop of aan het frame opgehangen worden. Wanneer u een grote ventilator heeft (60x60 mm en groter), is het onverstandig deze aan de printkop op te hangen. Deze zal namelijk in de weg komen te zitten met het frame, het printbed of het printje. Het is in ieder geval onhandig. Een kleine ventilator (40x40 mm en kleiner) kunt u beter wel aan de printkop hangen. Deze zal namelijk minder snel in de weg komen te zitten. Ook kan een kleine ventilator niet zoveel lucht per tijdseenheid verplaatsen, wat betekent dat u de ventilator zo dicht mogelijk op het printje wilt hebben staan, zodat hij ten minste merkbaar effect heeft. Een grote ventilator kan meer lucht per tijdseenheid verplaatsen en zal dus ook op grotere afstand nuttig zijn. Een grote ventilator kunt u dus beter aan het frame hangen. Dit zorgt er ook nog voor dat de grote ventilator het hele printje tegelijk kan koelen, terwijl een kleine ventilator alleen de filament koelt die direct uit de spuitmond komt.
Step 4: Hardware: Printing Surface


It is absolutely important to have a good printing surface. If you don't, your first layer will not stick and start slipping around or your part will warp. There are several good printing surfaces out there and I will discuss a few I am familiar with.
The first thing you can do against warping is purchasing a heated bed. Some 3D printers come with one, but with other printers you will have to purchase one separately. A heated bed warms the first few layers of your print to make them cool down slower. Since warping occurs because the layers are cooling too fast, a heated bed will keep your print from warping. I have only been printing with PLA and experienced 50 degrees Celsius to be working pretty well. Of course you will not want to print directly onto your heated bed, because when not properly levelled, the nozzle could seriously damage your heated bed. Also when the print is sticking to good to your heated bed, you might damage the heated bed when trying to remove the print. That is why you should place a piece of glass on top of your heated bed.
Then there is the actual printing surface. You could be printing directly on the bare glass I just mentioned. This surface is really smooth, so the first layer of your print will come out very nice, but plastic does not stick that good to it. To make sure the first layer will stick to the glass, it helps to clean it from any grease like fingerprints, but a better way to do this is to use some sort of tape or glue. When I was looking for a suitable printing surface kapton tape came out as the most promising option. After a little bit more research I found out kapton tape is ridiculously expensive and originally invented for use in air- and spacecrafts. This is why I continued looking for a more affordable option. That is when I heard painter's tape would be a good alternative. It is everything but expensive and available in rather broad strips, which is nice, because you will only need a couple of strips to cover all of the glass plate. Painter's tape is a little less smooth than kapton tape but is still capable of creating a very nice first layer, and most important, your first layer will absolutely stick to it! When your print bed is nicely levelled, you will not have to change the tape very often. Also this tape sticks very good to the glass. After just one or two prints on the same tape, the tape can still be easily removed if needed, but after a couple more prints the heated bed caused the tapes glue to warmed up and cool down a couple of times, which makes the tape stick really good onto the glass. When trying to remove the tape, you will probably not get it off in one piece. If you put the tape on a piece of glass, you can take the glass of the heated bed, try to peel off the tape and if this does not work, use water to get the rest of the tape and glue off. Do not use water to clean your heated bed, for cleaning electronics using water will damage the electronics. This is why you should absolutely not put tape directly on your heated bed. Apart from tape, you could also use a glue. Glue stick and watered down PVA glue prove to be very effective. Just put a thin layer of glue on the glass and print. This glue leaves the first layer as smooth as bare glass. Make sure you water down the PVA glue enough. I have tried using PVA glue, but I used to much glue. This caused my print to be stuck on my glass sheet. I did get it off eventually, but it did leave a hole in my glass sheet.
--------------------------------------------------
Het is absoluut noodzakelijk een goed print oppervlak te heben. Als u dat niet heeft, zal de eerste laag van uw printje niet goed plakken en zal het rond gaan glijden of het hele onderdeel zal krom trekken. Er zijn verschillende goede print oppervlakken en ik zal er een aantal waar ik bekend mee ben bespreken.
Het eerste wat u kunt doen om het krom trekken van uw printje te voorkomen is een verwarmd printbed aanschaffen. Sommige 3D printers komen standaard met een verwarmd printbed, maar bij andere 3D printers zult u er een los bij moeten kopen. Een verwarmd printbed verwarmt de eerste paar laagjes van het printje, wat ervoor zorgt dat ze minder snel afkoelen. Aangezien het krom trekken van een printje komt doordat de eerste laagjes te snel afkoelen, voorkomt een verwarmd print dat het printje krom trekt. Ik heb alleen nogmaar geprint met PLA en de ervaring leert dat 50 graden Celsius een geschikte temperatuur is. Direct op een verwarmd printbed printen is absoluut niet verstandig. Als het printbed namelijk niet goed geleveld is, kan de spuitmond het printbed ernstig beschadigen. Ook kan het voorkomen dat het printje te goed aan het printbed hecht. Als u dan probeert het printje los te maken kan u het printbed ook beschadigen. Dat is waarom het beter is om een glazen plaat op het verwarmde printbed te leggen en daarop te printen.
Dan is er het daadwerkelijke print oppervlak. U kunt direct op kaal glas printen, maar dat hecht niet heel goed. Glas is wel heel glad, dus de onderkant van uw printje zal ook heel mooi glad worden. Om het printje beter aan het glas te kunnen laten hechten kunt u het glas ontvetten. Dit werkt beter, maar het werkt nog beter om een soort tape of lijm te gebruiken. Toen ik op zoek was naar een goed print oppervlak vond ik uit dat kapton tape goed schijnt te werken. Na een beetje meer onderzoek bleek kapton tape belachelijk duur te zijn en origineel ontworpen voor vliegtuigen en gebruik in de ruimtevaart. Daarom ben ik door blijven zoeken naar een wat goedkopere optie. Toen begreep ik dat schilderstape een goed alternatief was. Ik heb het uitgeprobeert en gebruik het nu al jaren zonder klachten. Het is spotgoedkoop en verkrijgbaar in brede rollen, wat maakt dat u maar een paar stroken nodig heeft om uw hele print bed te bedekken. Schilderstape is wel minder glad dan kapton tape, maar is nog steeds in staat een hele mooie onderkant te maken aan uw printje, maar wat natuurlijk belangrijker is, de eerste laag zal zeker goed hechten. Als uw print bed goed geleveled is, zal u niet vaak de tape hoeven te vervangen. Ook plakt schilderstape erg goed aan glas. Na een stuk of twee printjes op dezelfde tape kan de tape relatief makkelijk van het glas verwijderd worden, mocht dit nodig zijn. Als u meer printjes op dezelfde tape maakt, bijvoorbeeld een stuk of 5 tot 10, zal dit al een stuk lastiger zijn. Dit komt doordat de lijm van de tape een aantal keer opgewarmd en afgekoeld is door het verwarmde print bed. Als u dan de tape van het glas probeert te verwijderen, zal dit er niet in één stuk vanaf komen. De restjes die u er niet af krijgt kunt u verwijderen door de glaspaat van de printer af te halen en de tape en lijmresten onder een warme kraan weg te poetsen. Omdat het uiterst onverstandig is om het verwarmde print bed met water schoon te maken, is het net zo onverstandig om de tape of lijm direct op het verwarmde print bed te plakken. Zorg dus dat u altijd een glazen plaat gebruikt. Behalve tape kunt u ook lijm gebruiken. Plakstift en met water verdunde houtlijm werken goed. Gebruik maar een dun laagje lijm. De onderkant van uw printje wordt dan net zo glad als wanneer u op kaal glas print. Zorg er wel voor dat u niet te veel lijm gebruikt en de houtlijm voldoende verdunt. Ik heb een keer met te dikke houtlijm op glas geprint. Mijn printje zat zo goed vast aan het glas dat toen ik het printje los had, er een heel stuk glas aan het printje vast zat en er dus een gat in mijn glazen plaat zat. Heel apart om te zien, maar geen aanrader om uit te proberen.
Step 5: Maintaining the Machine: the Nozzle


Like every complex mechanism, a 3D printer needs to be maintained. By maintaining it properly, you will prolong the lifespan of your 3D printer. In this chapter I will tell you about the two parts of a 3D printer which absolutely need to be in good condition. The first is the the nozzle. The nozzle a sort of heated funnel. When extruding plastic, filament is pushed into the nozzle. There the filament will be melted and pushed through a small hole at the end of the funnel. This small hole is mostly 0.50 to 0.20 mm in diameter. Filament generally comes in 2 sizes: 3 mm or 1.75 mm diameter. The inlet of the the nozzle has the same size as the filament size it is designed for. Almost every filament-nozzle diameter combination is available on the market, but not every combination works as well. When trying to push 3 mm filament through a hole with a 0.30 mm diameter, you will need quite some pressure. To make sure your nozzle does not ooze while travelling, all this pressure should be removed during such travel moves. Since molten plastic is not as fluid as water, you will not be able to remove all this pressure. If you want a 0.30 mm nozzle or smaller, make sure it uses 1.75 mm filament, otherwise your nozzle will ooze. When selecting a nozzle, keep in mind that a smaller nozzle is more precise, but slower.
It is possible that during printing your nozzle gets jammed. This could happen due to bad filament, sudden failure of the heating element or a slipping extruder. Also during normal printing activities sometimes small parts of filament stay behind in the nozzle. When filament is heated for too long, it will burn and turn brown or black. If these small pieces are small enough to fit through the nozzle, you will get small black spots in your print. If the pieces are not small enough, they could seriously jam your nozzle and stopping your extruder from extruding. To prevent this, keep an eye out for small black spots in your print. If you see them, you should clean your nozzle. There are several ways to do this. One of them is leaving the nozzle in the machine, heating it up around 30 degrees above your standard printing temperature and using a metal stick or a small Philips head screwdriver to push all the burned filament out of the nozzle. To clean the small hole at the tip of the nozzle you could use a small iron wire. The end of a resistor seems to work well because it is stiff, thin and long. This is a simple way to clean the nozzle, but it is not very precise. Another way to clean the nozzle is to take it out of the machine, go outside and burn the sh*t out of the filament residue using a blowtorch. This is a lot of fun, but again not very precise and this time not safe either. The best method I know to clean the nozzle is also the most time consuming method. First take the nozzle out of the machine. Then place it with the heater and thermistor still connected in a helping hand tool. Heat the nozzle to your standard printing temperature and use a small screwdriver to clean the inside of the nozzle. Get as much goo out as you can. Then use the legs of a spare resistor to push any residue left in the tip of the nozzle out. Make sure you also clean the outside of the nozzle. This is easily done by using a bit of cardboard. Bend it so it covers about half of the nozzle's tip and push all residue towards the tip of the nozzle. Use cardboard because it is easily bend, soft enough to not damage you nozzle and it will not burn as fast as paper. Make sure not to leave the cardboard and nozzle in contact for too long, because the cardboard might catch fire.
--------------------------------------------------
Zoals elk complex mechanisme heeft ook een 3D printer onderhoud nodig. Door uw 3D printer goed te onderhouden zult u de levensduur van de 3D printer verlengen. In dit hoofdstuk zal ik wat vertellen over de twee delen van uw 3D printer die het belangrijkst zijn om in goede staat te houden. De eerste is de spuitmond. De spuitmond is een soort verwarmde trechter. Wanneer uw 3D printer plastic extrudeert wordt er filament de spuitmond in geduwd. Daar smelt de filament en wordt het door het kleine gaatje op het puntje van de spuitmond geperst. Dit kleine gaatje is meestal 0.50 tot 0.20 mm in diameter. Filament komt in twee verschillende maten: 3mm of 1.75 mm diameter. De ingang van de spuitmond heeft dezelfde diameter als de filament waar hij voor ontworpen is. Iedere filament-spuitmond diameter combinatie is verkrijgbaar, maar niet iedere combinatie is een verstandige keuze. Als u bijvoorbeeld probeert 3 mm filament door een gaatje met een diameter van 0.30 mm of kleiner te persen, is daar aardig wat druk voor nodig. Om er zeker van de zijn dat uw spuitmond niet lekt tijdens bewegingen waarbij niet geprint wordt, zal dan al die druk weg moeten zijn. Aangezien gesmolten plastic niet zo vloeibaar is als water zal dit niet lukken. Om lekken te voorkomen is het dus verstandig om bij een spuitmond diameter van 0.30 mm of kleiner, 1.75 mm filament te gebruiken. Als u een spuitmond selecteert, houd er dan rekening mee dat een kleinere diameter preciezer is, maar ook langzamer.
Het is mogelijk dat tijdens het printen de spuitmond verstopt raakt. Dit kan gebeuren door het gebruik van slecht filament, plotseling falen van het verwarmingselement of het slippen van de aandrijving. Ook tijdens normale print-omstandigheden kan het voorkomen dat kleine stukjes filament achter blijven in de spuitmond. Als filament voor te lang verwarmd wordt zal het verbranden en wordt het bruin of zwart. Als deze stukjes klein genoeg zijn om door de spuitmond heen te passen, zult u kleine zwarte plekjes in uw printjes gaan zien. Als die stukjes niet klein genoeg zijn, kunnen ze de spuitmond blokkeren. Om dit te voorkomen moet u op de uitkijk staan voor kleine, zwarte plekjes in uw printjes. Zodra dat soort plekjes te zien zijn, zult u uw spuitmond moeten schoonmaken. Er zijn verschillende manieren om dit te doen. Een daarvan is door de spuitmond in de machine te laten zitten, op te warmen tot ongeveer 30 graden boven uw standaard printtemperatuur en dan met een kleine metalen staaf of kruiskop schroevendraaier alle verbrande filament door de spuitmond heen te duwen. Om het uiterste puntje schoon te maken kunt u een klein ijzerdraadje gebruiken, zoals het uiteinde van een elektrische weerstand. Dit is een makkelijke en snelle manier om de spuitmond schoon te maken, maar niet zo grondig. Een andere manier om de spuitmond schoon te maken is door hem uit de 3D printer te halen, naar buiten te gaan en alle filament resten uit de spuitmond te branden met een hand brander. Dit is een leuke en snelle manier, maar wederom niet zo zorgvuldig en dit keer ook niet heel veilig. De beste methode om de spuitmond schoon te maken die ik ken is ook de meest tijdrovende. Eerst neemt u de spuitmond uit de 3D printer, maar u houdt het verwarmingselement en temperatuursensor op hun plaats in de spuitmond. U plaatst het is een houder, zoals een soldeerhulp en u verwarmt het tot de normale printtemperatuur. Dan gebruikt u een kleine schroevendraaier om de binnenkant van de spuitmond leeg en schoon te maken. Haal er zo veel mogelijk residu uit. Dan gebruikt u weer het uiteinde van een weerstand om het kleine gaatje door te prikken en schoon te maken. Om de buitenkant van de spuitmond schoon te maken gebruikt u een stukje karton. Buig het een beetje zodat het rond de spuitmond valt en schuif alle filament richting het puntje van de spuitmond. Karton is hier uiterst geschikt voor omdat het buigbaar is en zacht genoeg om de spuitmond niet te beschadigen. Ook is het niet zo brandbaar als papier. Zorg er wel voor dat het karton niet te lang in contact is met de spuitmond, want het kan wel vlam vatten.
Step 6: Maintaining the Machine: Axis Maintenance

It is important to lubricate your 3D printers axes from time to time. If the axes are too dry, they will not run smooth which will effect the print quality and noise production in a negative way. To lubricate the axes just use any standard lubricant suitable for bearings like WD40. If your printer uses plastic bushings, make sure the lubricant does not dissolve the plastic.
Also if your axes seem to be getting dusty, you should clean them. Do this by whipping off all the dust and lubricant using a paper towel. Then spray some lubricant or oil on the axis and use this to clean the axis, again with a paper towel. After that, spray some lubricant on the axis and move it back and forth a couple of times. Begin with a low speed and end at high speed by adjusting the feedrate in the gcode. You could write a standard gcode file for this and put in on your SD card. The frequency with which you should clean or lubricate your 3D printers axes depends on how much you use your 3D printer and how dusty the printers environment is.
--------------------------------------------------
Het is belangrijk de assen van uw 3D printer regelmatig te smeren. Als de assen te droog worden, zullen ze niet meer soepel lopen en dit zal een negatief effect hebben op zowel de print kwaliteit als de geluidsproductie tijdens het printen. Om de assen te smeren kunt u gewoon standaard smeermiddel dat geschikt is voor lagers gebruiken, zoals WD40. Als uw printer plastic glijlagers gebruikt, moet u wel even controleren dat het smeermiddel de lagers niet aantast.
Zodra de assen er stoffig uit gaan zien, zult u ze schoon moeten maken. Dit kunt u doen door met een stukje keukenpapier alle stof en smeermiddel af te vegen. Dan doet u wat olie of smeermiddel op de assen en poetst wederom met behulp van een stukje keukenpapier de assen schoon. Hierna smeert u de assen door een beetje smeermiddel op de assen te doen en die as een paar keer heen en weer te laten bewegen. Begin met heel langzaam en ga steeds sneller. Doe dit door de feedrate in de gcode aan te passen. U kunt hier een standaard gcode voor schrijven en deze op uw SD kaart zetten. Hoe vaak u de assen moet schoonmaken of smeren is afhankelijk van hoe vaak u de printer gebruikt en hoe stoffig de ruimte is waar hij in staat.
Step 7: Software: G-code Generators


There are several gcode generators on the web. I cannot tell you which one is best, because this is mainly a matter of taste. I can however tell you about some gcode generators I have good experience with. But first it might be a good thing to explain what a gcode generator is.
A gcode generator is a computer program which converts an stl file into a gcode file. A gcode file is a file which contains commands for the 3D printer to follow. For example 'G1 X50 Z10 F100' could be a command in such a gcode. G1 means the 3D printer should move. X50 means 'move the X axis to position 50'. This is mostly 50 mm from it's home position. Z10 means 'move the Z axis to position 10'. F100 is the feedrate. The higher this number, the higher the moving speed. In this command the Y axis will not move. By combining different gcode commands, your 3D printer is able to move in certain shapes, which enables it to print the shape you designed.
There are basically two gcode generators which I like to use. The first is Slic3r. Slic3r is a program which is relatively easy to integrate in other programs. I use it's integrated form with Repetier Host. Repetier Host is a host program, which means it allows you to connect the 3D printer to your computer and control it by clicking the buttons in Repetier Host. To make a gcode using Repetier Host, simply load the stl file you want to print in Repetier Host. You will see the 3D model in the 3D space which represents the maximum printing volume of your printer. Then go to the slicer tab and press Slice with Slic3r.
The second gcode generator I like is Cura. Cura is made by Ultimaker, but it can be used with any 3D printer. It looks a lot like the combination of Repetier Host and Slic3r, but I think it works better. Cura has some nice features Repetier Host and Slic3r do not have, such as easy plugins and direct saving to an SD card, but Cura can not be used as a host program. One last note, I think Repetier Host shows the final gcode better than Cura does, but the best reason to pick a gcode generator is still personal taste.
--------------------------------------------------
Er zijn vele gcode vormers op het internet te vinden. Ik kan u niet vertellen welke de beste is, omdat dit voornamelijk neer komt op een kwestie van smaak. Ik kan u echter wel vertellen over een paar gcode vormers waar ik goede ervaringen mee heb. Allereerst is het handig even uit te leggen wat een gcode vormer eigenlijk is.
Een gcode vormer is een computer programma dat een stl bestand om zet in een gcode. Een gcode is een soort tekst bestand met commando's voor de 3D printer. Bijvoorbeeld 'G1 X50 Z10 F100' zou een commando kunnen zijn. G1 betekent 'beweeg'. De toevoeging X50 betekent dat hij de x-as moet verplaatsen naar positie 50. Meestal is dit 50 mm vanaf de oorsprong. Z10 betekent dat hij de z-as naar positie 10 moet bewegen. F10 is de feedrate. Des te hoger dit getal, des te hoger de snelheid waarmee de beweging wordt uitgevoerd. De y-as zal niet bewegen met dit commando. Door meerdere, verschillende commando's achter elkaar te zetten, kan een 3D printer de vormen tekenen die u ontworpen heeft.
Er zijn twee gcode vormers waar ik goede ervaringen mee heb. De eerste is Slic3r. Slic3r is een programma wat relatief makkelijk te integreren is in andere computerprogramma's. Ik gebruik het liefst Repetier Host met Slic3r geïntegreerd. Repetier Host is een host programma, wat betekent dat dit programma gebruikt kan worden om uw 3D printer met uw computer te verbinden en te besturen via een usb kabel. Om een gcode te maken met Repetier Host laad u het stl bestand wat u wilt printen in Repetier Host. U zult het 3D model in de 3D ruimte die het maximale printvolume van uw printer voorstelt zien. Dan navigeert u naar het 'Slicer' tabblad en klikt u op 'Slice met Slic3r'.
De tweede gcode generator die ik fijn vind werken is Cura. Cura is gemaakt door Ultimaker, maar is met iedere 3D printer te gebruiken. Qua uiterlijk lijkt het heel erg op Repetier Host en Slicer, maar ik vind dat Cura fijner werkt. Cura heeft een aantal mogelijkheiden die Repetier Host en Slic3r niet hebben, zoals de makkelijke plugins en het direct opslaan van een gcode naar een SD kaart. Een nadeel aan Cura is dat het niet gebruikt kan worden als host programma, maar als uw printer zelfstandig kan printen, is dit ook niet nodig. Nog een laatste opmerking, ik vind dat Repetier Host de gcode beter weergeeft dan Cura, maar uiteindelijk is de beste reden om een gcode vormer te kiezen simpelweg persoonlijke smaak.
Step 8: Software: Firmware Customization

In this second step of the chapter about software, I will explain a couple of things about the firmware on a 3D printer. The firmware of a 3D printer is the software running on the 3D printer. The most commonly used 3D printer firmware is Marlin. Marlin is free software and can be downloaded from GitHub. To be able to open, customize and upload this firmware you will have to download Arduino IDE onto your computer.
With most bought 3D printers it is possible to upload new firmware to the 3D printer, but I do not recommend it. Without getting to the electronics you cannot upload new firmware. To get to the electronics of the 3D printer, you will most likely need to open up the 3D printer, which will void the warranty. Also, if you accept throwing away your warranty and you succeed in uploading new firmware, know that there will be no way back. Uploading new firmware will permanently delete the previous firmware. There is no way to retrieve the firmware currently present on the electronics, which means you cannot make a backup. When uploading new firmware, make absolutely sure you know exactly what you are doing.
When building your own 3D printer, you will have to configure your own firmware from the version from GitHub. When configuring, just read the configuration tab of Marlin and follow the instructions there. Make sure you check every single setting and adjust it if needed.
There are some standard menus in the Marlin firmware, but sometimes you would want an extra menu, for example a menu to home each axis separately. I will now explain how to add such a menu. It is very easy to do this, but there are a couple of different places you need to add something. First of all, go to the ultralcd.ccp file. Around line 50 you will find this line: 'static void lcd_main_menu();' along with some other lines starting with 'static void'. Between those lines you need to add the line 'static void lcd_home_menu();'. Next you will need to locate the place where this extra menu should be. I placed mine in the prepare menu, just after the move axis menu. To do so, first locate the start of the prepare menu by searching for the line 'static void lcd_prepare_menu()' followed by a line saying '{'. These lines indicate the start of the prepare menu and you will find them around line 430. Directly beneath these lines there are a couple of lines with menu items ('MENU_ITEM'). Add a line in the place where you would like your extra menu to be saying 'MENU_ITEM(submenu, MSG_HOME_AXIS, lcd_home_menu);'. MSG_HOME_AXIS is a variable containing text, which is called a string. It contains the text which will be displayed on the lcd screen as the name of the menu. You will declare this string later on. First build the menu. To do so, scroll down a bit further until you find the start of the move axis menu, which is indicated by 'static void lcd_move_menu_axis()' followed by '{', around line 575. This menu is a really short menu, so if you found the beginning, you also found the end of the menu (indicated by 'END_MENU();' followed by '}'). Place your own menu after the end of the move axis menu. Do this by adding the following lines:
static void lcd_home_menu() //This is line indicates the start of the menu.
{
START_MENU(); //Start a menu.
MENU_ITEM(back, MSG_PREPARE, lcd_prepare_menu); //Add a menu item to go back to the prepare menu.
MENU_ITEM(gcode, MSG_HOME_X, PSTR("G28 X")); //Add a menu item to home the x axis.
MENU_ITEM(gcode, MSG_HOME_Y, PSTR("G28 Y")); //Add a menu item to home the y axis.
MENU_ITEM(gcode, MSG_HOME_Z, PSTR("G28 Z")); //Add a menu item to home the z axis.
END_MENU(); //End the menu.
}
In these lines the parts starting with MSG are strings containing text to display in the menu. You will have to declare these variables. To do this, go to the 'language.h' file. In this file all strings displayed on the lcd screen are declared and can be changed. To declare the four newly used strings, just locate the language you are using right now and add the following lines:
#define MSG_HOME_X "Home X"
#define MSG_HOME_Y "Home Y"
#define MSG_HOME_Z "Home Z"
#define MSG_HOME_AXIS "Home axes"
Change the part between the " to the text you prefer or translate it to the right language. Now upload the new firmware and the menu is added.
To change the language of the menus in your 3D printer, go to the language.h file and change the number after "#define LANGUAGE_CHOICE" around line 20 to the number corresponding to your language of choice. If your preferred language is not yet listed, you can add it by copying the lines from '#if LANGUAGE_CHOICE == 1' to the first '#endif', pasting it at the end of the file, just before '#endif // ifndef LANGUAGE_H' and translating all parts between the ". Don't forget to change the copied number '1' in the first copied line to a number with is not yet used by any other language in the language.h file. I have added Dutch to my language.h file. If anybody is interested, let my know and I will post it.
--------------------------------------------------
In deze tweede stap van het hoofdstuk over software zal ik een aantal dingen vertellen over de firmware van een 3D printer. De firmware van een 3D printer is de software die op de 3D printer draait. De meest gebruikte 3D printer firmware is Marlin. Marlin is vrije software en kan gedownload worden van GitHub. Om deze firmware te openen, aan te passen en te uploaden zult u Arduino IDE moeten downloaden op uw computer.
Bij de meeste gekochte 3D printers is het mogelijk nieuwe firmware te uploaden naar de 3D printer, maar ik raad dit ten zeerste af. Zonder bij de elektronica te komen kunt u geen nieuwe firmware uploaden. Om bij de elektronica van uw 3D printer te kunnen komen, zult u waarschijnlijk de 3D printer moeten open schroeven, waardoor u de garantie verliest. U moet wel weten dat als u het verlies van de garantie accepteert en het lukt u om nieuwe firmware te uploaden er geen weg terug is. Het uploaden van nieuwe firmware verwijdert de vorige firmware en er is ook geen manier om de huidige firmware van de 3D printer te downloaden, zodat u een backup zou kunnen maken. Als u dus nieuwe firmware wilt uploaden, zorg dat u heel zeker bent van wat u aan het doen bent.
Als u zelf een 3D printer wilt bouwen, zult u zelf de firmware moeten configureren aan uw printer van de versie van GitHub. Als u daar mee bezig bent, lees dan goed de instructies in het configuration bestand van Marlin en volg de instructies daar. Zorg ervoor dat u iedere mogelijke instelling controleert en goed instelt.
Er zijn een aantal standaard menu's in de Marlin firmware, maar het kan zijn dat u het fijn zou vinden een extra menu toe te voegen, bijvoorbeeld een menu wat u de optie geeft om alle assen apart naar de nul-positie te bewegen. Ik zal nu uitleggen hoe dit menu toe te voegen aan de firmware. Dit is best makkelijk om te doen, maar u zult wel op een aantal verschillende plekken een paar regeltjes toe moeten voegen. Allereerst moet u het ultralcd.ccp bestand openen. Rond regel 50 vind u het volgende commando: 'static void lcd_main_menu();' samen met een aantal andere commando's die starten met 'static void'. Voeg tussen die commando's het commando 'static void lcd_home_menu();' toe. Vervolgens zult u moeten bepalen waar in de bestaande menu's u uw nieuwe menu wilt plaatsen. Ik heb de mijne in het prepare menu gezet, direct onder het menu voor de beweging van de assen. Om dit te doen zoekt u het commando op wat de start van het prepare menu aangeeft, namelijk 'static void lcd_prepare_menu()' gevolgd door een regel met alleen '{'. U zult dit commando vinden rond regel 430. Direct hieronder vind u een aantal commando's die starten met 'MENU_ITEM'. Voeg het volgende commando toe op de plek waar u uw extra menu wilt hebben: 'MENU_ITEM(submenu, MSG_HOME_AXIS, lcd_home_menu);'. MSG_HOME_AXIS is een variabele die tekst bevat. Dit wordt ook wel een string genoemd. De waarde van deze string is de tekst die op het lcd scherm van uw 3D printer weergegeven zal worden als naam van dit menu. Ik zal een stukje verderop uitleggen hoe die variabele aan te maken en een waarde te geven. Nu eerst het menu zelf maken. Om dit te doen scrolt u nog wat verder naar beneden tot u het begin van het 'move axis' menu vindt. Dit is aangegeven met 'static void lcd_move_menu_axis()' gevolgd door een regel met '{', rond regel 575. Dit is een heel kort menu, dus u zult het einde van het menu (aangegeven met 'END_MENU();' gevolgd door '}') ook direct zien staan. Zet uw eigen menu direct na het einde van dit menu. Doe dit door de volgende regels toe te voegen:
static void lcd_home_menu() //Dit commando geeft het begin van het menu aan
{
START_MENU(); //Start een menu.
MENU_ITEM(back, MSG_PREPARE, lcd_prepare_menu); //Voeg een menu item toe om terug te gaan naar het prepare menu.
MENU_ITEM(gcode, MSG_HOME_X, PSTR("G28 X")); //Voeg een menu item toe om de x as naar 0 te bewegen.
MENU_ITEM(gcode, MSG_HOME_Y, PSTR("G28 Y")); //Voeg een menu item toe om de y as naar 0 te bewegen.
MENU_ITEM(gcode, MSG_HOME_Z, PSTR("G28 Z")); //Voeg een menu item toe om de z as naar 0 te bewegen.
END_MENU(); //Eindig een menu.
}
In deze regels zijn de stukjes die beginnen met MSG weer strings die tekst bevatten om in het menu weer te geven. U zult deze variabelen moeten aan maken. Om dit te doen gaat u naar het 'language.h' bestand. In dit bestand staan alle strings die op het lcd scherm weergegeven kunnen worden benoemd en kunnen ook hier aangepast worden. Om de vier nieuwe strings aan te maken, zoek de taal op die u gebruikt en voeg de volgende regels toe:
#define MSG_HOME_X "Home X"
#define MSG_HOME_Y "Home Y"
#define MSG_HOME_Z "Home Z"
#define MSG_HOME_AXIS "Home assen"
Verander de tekst tussen de aanhalingstekens (") naar de tekst die u graag in het menu wilt hebben staan of vertaal het naar de juiste taal. Nu upload u de nieuwe firmware en het menu is toegevoegd.
Om de taal van alle menu's van uw 3D printer aan te passen gaat u naar het language.h bestand en past u het nummer na '#define LANGUAGE_CHOICE" rond regel 20 aan naar het nummer wat overeen komt met de taal van uw keuze. Als uw favoriete taal nog niet in het lijstje staat, kunt u die zelf toevoegen door de regels van '#if LANGUAGE_CHOICE == 1' tot en met de eerste '#endif' te kopiëren en onderaan, net voor de laatste regel ('#endif // ifndef LANGUAGE_H'), te plakken. Vertaal vervolgens alle stukjes tussen aanhalingstekens. Vergeet niet het nummer 1 in de eerste, gekopieerde regel aan te passen naar een nummer wat nog niet gebruikt wordt door een andere taal in het language.h bestand. Ik heb aan mijn language.h bestand Nederlands toegevoegd. Als u geïnteresseerd bent in dit bestand, laat het weten en ik zal het uploaden.
Step 9: Outro

To conclude, there are a lot of different things to take note off when choosing a 3D printer, as well as when using a 3D printer. Make sure you take good care of your 3D printer, for it will prolong it's lifespan and keeps the print quality up. When choosing a 3D printer to build or buy keep in mind that there are a lot possibilities, but more features means a higher price. I hope I provided you with the information you need to make a good choice. If you have any questions left, just place a comment or send a personal message and I will see what I can do.
And don't forget to vote for me in the 3D printing contest of Instructables and 3DHubs!
--------------------------------------------------
Ter conclusie, er zijn veel aspecten om op te letten bij het kiezen van een 3D printer, even als bij het gebruik ervan. Onderhoud uw 3D printer goed, want dat verlengt zijn levensduur en houd de printkwaliteit hoog. Wanneer u een 3D printer gaat kiezen om te bouwen of kopen zijn er veel mogelijkheden, maar onthoud dat meer functies samen gaan met een hogere prijs. Ik hoop dat ik u van voldoende informatie heb voorzien om een goede keuze te kunnen maken. Mocht u nog met vragen zitten, laat dan gerust een reactie achter of stuur een persoonlijk bericht en ik zal kijken wat ik voor u kan betekenen.
En vergeet niet op mij te stemmen in de 3D printing wedstrijd van Instructables en 3DHubs!

Participated in the
3D Printing Contest


