

Introduction: How to Make a Customized Journal With a Composition Book


Why buy expensive generic journals at the bookstore?. Composition books are the cornerstone of inventors, scientists, and school kids, however they are ugly and boring. Now you can customize the cheap workhorse composition book into a beautiful personalized journal using abundant and diverse scrapbook paper you get at the craft store. Spend an hour crafting something you will be proud to carry around for months or years.
Techshop is an amazing source of inspiration for creativity and innovation. Just coming to our community workspace to work on crafts or any projects inspires the next amazing project idea. It is a fun and exciting atmosphere for makers and tinkerers.
Step 1: Materials List

Composition book
2 sheets of travel related scrapbook paper ( this is for a travel journal)
2 sheets solid color card stock ( paper can be used also but the card stock gives it extra strength)
Glue stick
Paper cutter (or scissors)
Embellishments ( ribbon, stickers, tickets, etc)
Ruler
Step 2: Step 1 Attach Cover


Measure the width of the composition book and add an extra inch or so, so that the extra can be wrapped around the composition book cover. Cut with a paper cutter. Spread the glue stick on the book cover, making sure to go the edge and just to the edge of the book binding. Cover fully and place the front paper on the book. Smooth with your hands.
Step 3: Step 2 Fold and Glue Inside Cover


Open the book and carefully fold the scrapbook paper along the edge of the composition book. Fold all 3 sides. Trim the corners by cutting out a square just inside fold marks. Fold the side piece at a slight angle so that when it is glued, it looks neat and doesn’t extend over the top and bottom. ( kind of like wrapping a package in gift wrap.) Glue all 3 tabs thoroughly and press down securely. Repeat entire procedure for the back cover.
Step 4: Step 3 Attach Ribbon If Desired


Cut a piece of ribbon 3/4” longer than length of book. Glue thoroughly on the back of the ribbon with the glue stick. Place the ribbon wherever desired on the outside of the book. For this book I placed on the binding but it can also be used anywhere on the front or back. Fold over the excess and press into place inside the cover. Repeat for back if desired.
Step 5: Step 4 Attach Inside Card Stock to Front and Back


Measure the inside cover and cut card stock to desired size. Make sure to leave a little room near the binding as it will not close fully if the stock is too close. Glue the card stock making sure to extend fully to the edges and attach to the inside of the book.
Step 6: Step 5 Weight Book and Allow to Dry Thoroughly

Place book under a phonebook or other slightly heavy book to dry so that it does not curl.
Step 7: Step 6 Glue Embellishments


Attach any stickers, tickets, or use a glitter pen to outline any objects to add interest to the outside. There is no limit to the possibilities. You might want to think about putting a map or a calendar on the inside.
Step 8: Step 7 Final Result
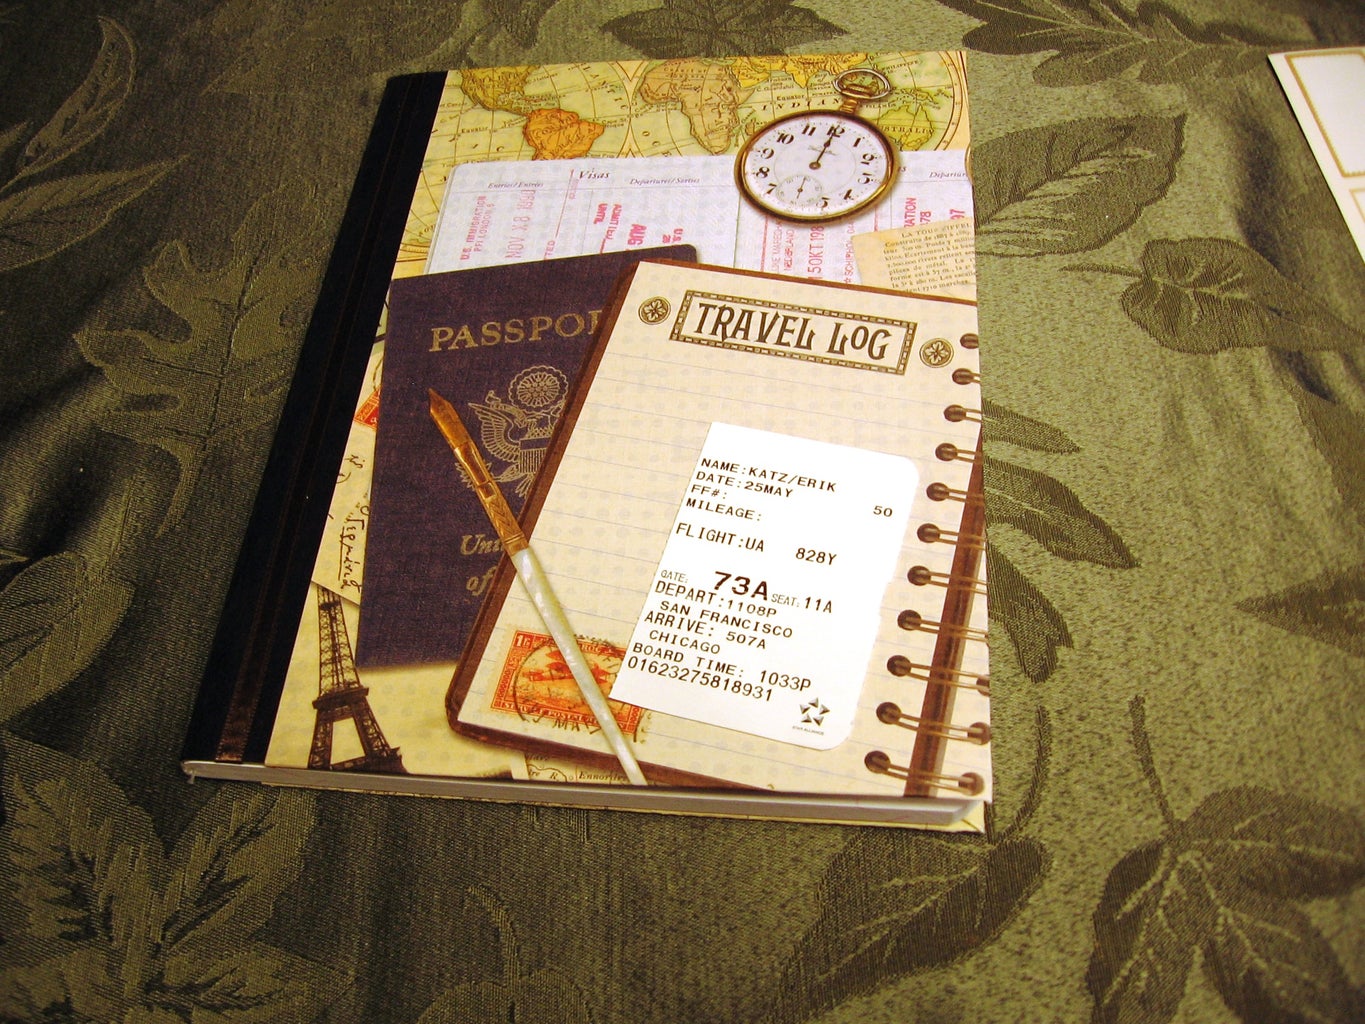

Here is the finished travel journal and another example of a diifferent writing journal.


