

Introduction: How to Paint a Bike


I first didn't have in mind to give instructions on how to decorate a bicycle so i don't have pictures of every step but i will explain with the pictures i have.
I do have to warn that this project takes a lot of time but the end result is worth it.
(i won a contest with this bicycle :p )
First step disassemble the bicycle so you just have the bare frame.(remember or write down where everything came from you will need it when you reassemble the bike).
Remove the paint of all the parts that you want to paint.
Step 1: Painting Your Parts


Next you clean the parts so there is no grease or dirt on the bare metal parts (dish washing soap will do) and dry the bike.
Be sure not to touch the cleaned bike with your bare hands because your hands have grease on it also.
1. Apply a light coloured primer (for light blue a light primer is best).
2. Apply your colour coat and remember to have an even coat and that there are no drips or white from the primer.
3. (optional) apply a clear coat so your colour coat is protected from scratches.
My personal opinion is that spray cans that are a little bit more expensive will give you a better result.
Also what you have to do is have patience between the layers (it's better to wait a bit longer then screw it up because you where over anxious ).
One more hint : read the instructions on the cans they are there for a reason and tape of parts that shouldn't be painted.
If all whent well your parts should look like the ones in the pictures
Step 2: Assembly of the Bike


After you finished painting your bike you can reassemble your bike.
Be careful the paint might feel dry but most of the time it still needs to harden.
Before you put any part back on your bike you remove all the grease and rust .
I general give every part a nice shine.
If you think that rust will come back after a while just clean it and paint it with a clear coat that will make the bike stand the test of time a bit longer.
Some parts are just too ugly or damaged to repair so you will have to buy some new parts ( i mostly still change small things on the parts i buy to make it fit the general style of the bicycle).
It also helps if you replace worn down parts like old bearrings and give everything that needs it some new grease.
Step 3: The Grips


I have chosen to make my grips myself from several layers of leather to have something special the advantage is that it impossible to take the grips off.
1. Measure the dimensions your pieces will nee to be ( you best measure every layer apart because every layer will become bigger.
2. Sew the peaces together (yes by hand) with a thick needle and hight quality wire ( don't pull too hard because leather can rip.
3. measure and sew the sides of the grips ( it gives it i finishing look)
I used a some material so the grips won't move, a lear of thick, soft leather for the centre and a smooth hard leather for the outside that will fit the colour of leather of the rest of the bike.
It is normal that it takes a long time to do these grips it took me 12 hours for the both of them!
The pictures gives u an idea of the result the kind of stitch pattern is of course to your own liking.
Step 4: General Decoration of the Bike


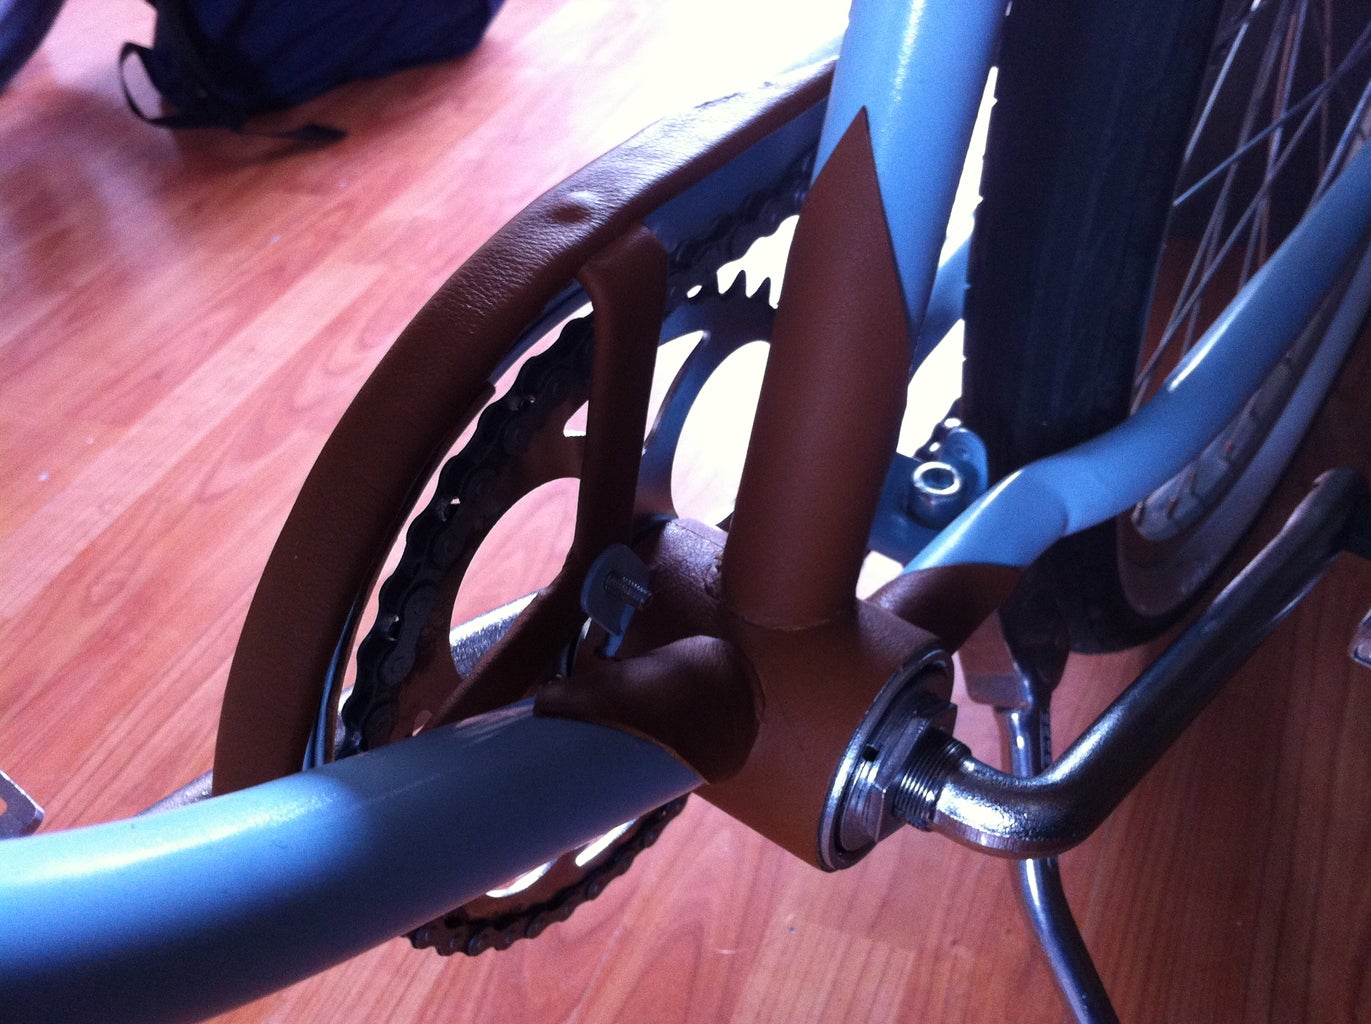


This step is mostly being creative but i will explain how i did it.
Stort with the surfaces that you want fully covered with leather.
The most important thing is to measure a lot and see that everything lines up properly .
Cut the pieces of leather at the places where the tubes connect so that the pieces connect nicely be sure to use a very sharp blade so that the edges are nice .
I gave the front tube a 3d logo of a shield by first gluing a cut out shape that a afterwards covered with other leather to have nice result and afterward i glued my logo on it that i cut out of a mirror piece of plastic i had lying about.
Take a time for all this.
I glued everything with pattex but be careful that you don't spill glue on the parts that you don't want to be covered with leather because paint and pattex are not the best of friends.
I also printed some text in mirror on some clear plastic so that the printed side was on the inside so the letters don't get damaged by scratches.
I also bought some new white whitewall tires because there is nothing better then some new white walls :) and a brooks leather saddle because it's a good match to the bike.
For this bike i also tried spoking (yes i succeeded) so the spokes are also sparkling.
When all that is done admire you classy bike you deserved it!
I don't recommend that you leave a bike like that unattended or that you use it when it rains but you are guarantied to get very good comments about it.
I also added a picture that was taken of me to enter a contest ;) .
The general idea of this project is to have fun and to give some bicycles a second chance.
You can chose how much you want to do yourself i just explained how i did it.
Finalist in the
Bicycle Contest

Participated in the
Fix & Improve It Contest


