

Introduction: Hymn of the Dead


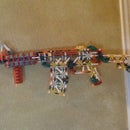

This is my all time favorite thing I've created. The bolt works and can be used very quickly
Step 1: Upper Receiver


The broken pieces in this step cannot be substituted
Picture 1 is what will be made
Pictures 6, 7, and 8 are all in pictures 9
Picture 9 will be added in picture 15
Step 2: Lower Receiver and Trigger


The broken pieces used in this step cannot be substituted
Picture 1 is what will be made
The white rod in pictures 5 is essential and should not be forgotten
The extra 2 parts in picture 6 are added in pictures 11 and 13
After picture 24 add the other side and the lower receiver is complete
Step 3: Barrel and Grip


Picture 1 is what will be made
Pictures 6, 7, and 8 must be in this order and fashion in order for the magazine to stay in properly
Step 4: Stock


Picture 1 is what will be made
The orange connectors in picture 3 are not necessary
In picture 4 the white rod is in between the two connectors
The white rod used in picture 9 from picture 8 is not necessary
Step 5: Handle


Picture 1 is what will be made
There are 14 grey two way connectors in picture 8
Pictures 15-17 are for comfort only and are not necessary
Step 6: Bolt Mechanism


Picture 1 is what will be made
There are 13 3 way connectors in pictures 8 and 8
The spacers added in pictures 12 and 13 should not be there
Step 7: Magazine


The magazine can be extended downward for a higher capacity magazine
Picture 1 is what will be made
The broken rods in pictures 3 and 4 are the only ones necessary, the rest are for support and are not needed
Step 8: Connecting Parts


Picture 1 is all the parts
Pictures 2-5 are connecting the upper receiver to the lower receiver
Pictures 6 and 7 are connecting the receiver to the barrel
Pictures 8 and 9 are connecting the handle to the receiver
Picture 10 is connecting the handle to the trigger guard
Pictures 11-15 are connecting the stock to the lower receiver and the handle
Pictures 16-20 are connecting the bolt mechanism to the upper receiver and the stock
Step 9: Rubber Bands


Picture 1 is a small rubber band on the trigger
Picture 2 is the rubber band used for the ramrod in pictures 3 and 4
Step 10: How to Use


Pictures 1-3 are showing how to put the magazine in. Once the magazine is angled in as shown in picture 2, just apply pressure upward and the magazine will slide in. To take the magazine out just pull it forward and down
To shoot, pull the bolt back as shown in picture 5, then pull the bolt back forward as shown in picture 6 then the gun is ready to fire
Step 11: Enjoy

I hope you enjoy my creation. If you have any questions or comments feel free to drop them in the comments section and I'll get to them as quickly as I can


