

Introduction: In-drawer Knife Organizer


A good set of knives is always needed in any kitchen; but it's hard to use them if your drawer knife block is too small to hold all of them. My mom has had this problem almost forever; the cutting utensils have never fit in to the weird plastic and wood holder that we have and end up strewn every which way. I decided that I needed to set things straight! literally.
Step 1:


Step 2: Cut It to Size


The piece of wood I had was actually cut from my failed attempt at making a fire canoe. Since it was too big to fit in the drawer I measured how big the drawer was and made a paper "map" of it. I used the map to mark the edges on the wood, I tried to mark it so that I had a bit of a natural edge. Then, I used my circular saw to cut the edges off.
Step 3: Plane


I wanted the piece to be as flat as I could get it with the tools I had so I decided to use my router. If you have access to a planer that would be easier than using a router. I mostly eyeballed my way around to start out. After a while of that I soon decided to set up a little jig by screwing the router to a small piece of wood I had and moving it around on top of two blocks.
Step 4: Drawing and Stapling


I traced the knives on my "map" of the drawer from largest to smallest, which I thought looked the best.
Step 5: Routing


For most of the knife spots I used a 1/2 inch bit and plunged it about a quarter of an inch. Then I routed the rough shape of the blade part and did the same for the handle part only twice the depth.
The bread knife is laid out differently so it was a little bit trickier.

Once all of the knife spots were rough cut I put the actual knives in for a test fit. If they didn't fit very well I marked the spot with a pencil and used the router again.

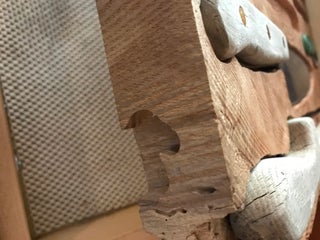
Step 6: Details


Since the router bits make round cuts I used a chisel to make them into points and to remove any imperfections. Also, I used some medium grit sandpaper to remove some of the burn marks caused by the router and to round some of the edges.
After test fitting it in the drawer I realized that the drawer handle bolts interfered with the piece of wood so I went back with the router and removed some material to make it fit.
Step 7: Clear Coat

After I removed the imperfections I clear coated the wood to bring out some of the color

Step 8: Put Knives in It!


If you liked this instructable consider following me or voting for this instructable in some of the contests I have entered it in

Third Prize in the
Home Improvement Contest 2017

Runner Up in the
Makerspace Contest 2017

Participated in the
Invention Challenge 2017


