

Introduction: Inspiration Board


I bookmark a lot of things I'd like to do and then try to make my own cheaper easier version of the project as I'm not very handy, this board is based on this photo I saved. The original board used wood pieces and wire to complete the project, my cheaper version uses cardboard and string.
I decided to make this to go along with "The Secret" what's the secret you ask, that's a good question. It's a book that tells 'The Secret' to success, which shows how for centuries people like Edison, Ford, King, Trump, Oprah, and Gates used the secret to become successful. Now 'the secret' really isn't a secret at all, more a theory that if put into action can help you get what you want from life, the theory goes as follows: Thinking about something 24/7 will lead to actions being taken and the outcome bringing you what you wanted, whether that's a raise, house, or a dream job.
My problem is my mind tends to wander and I'm always thinking about a million different things, I find is really difficult to think about just one thing all day long. That's where this board comes into play, because I'm able to see all the thing that inspire me or that I want in life and every day when I wake up, I'm reminded of those things. Now I know I'm not the only one who has this type of brain, so I thought I'd share this with you guys.
Step 1: Gather Your Supplies


For this instructable you will need:
A good size piece of cardboard
Some old wrapping paper
String or Wire
Ruler and pencil
Glue
Scissors or paper cutter
Yarn or twine
Possibly a craft knife
And some kind of clips (pictured is bulldog, paper, clothes, and hair clips)
Step 2: Cut Your Frame


Take your ruler and decided how wide you want your frame, measure it out and mark all along the board, I have made mine two inches wide all around. Then cut out the center and safe for some other project, as we all know good study cardboard is sometimes hard to come by.
*To get the corners nice and crisp I used my craft knife to start the cutting then followed with the scissors.
Step 3: Cover Frame With Paper


If you weren't taught to carefully unwrap presents/packages to save the paper for reuse, then you can always paint your frame like the original post says or you could even cover it with fabric.
Once you have picked you paper, you're going to lay it out and center the frame to get an idea of how much you will need to cover it, measure and then just cut four sheets of the same size. Start with any side and center your paper make a slit on the inside edge of frame to make the edge look clean when folding and gluing your paper, repeat the process until you have completely covered your frame.
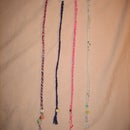
Step 4: Wrap String or Wire

Start wrapping string or wire across the fame tying it at the back. I ended up with five strands all together, do whatever you think looks best, maybe more maybe less.
As I found out the strands slip do to the weight of hanging things on them, so once you have the desired amount of string wrap on, begin spacing them how you like and then you'll need clear tape to the back to hold them in place.
It's at this point you'll want to tie some sort of yarn or twine to the top for a hanger.
Step 5: Final Touches


Now that you have a completed board, you can start adding some finishing touches, like a small sign or any pins, charms, and other keepsakes. With your clips in place start adding all the things you want from life, things you want to do, dreams you may have, or stuff that inspires you.
Now marvel at what you just created, and take satisfaction in knowing you're one step closer to making these things a reality. =]
*Upon reading another great book, I have since added a list of ten most important things to help me keep momentum.


