

Introduction: InstaMorph a Clipboard!


Hi folks!
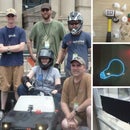
The Omaha Maker Group is back with another great Instructable, this time as part of the April Build Night with InstaMorph!
For this project, one of our members had a Storage Clipboard that he uses for taking notes in the field on construction projects. But the design of clipboard is such that it is very hard to open up the storage compartment with one hand, especially if wearing gloves or holding a pen or pencil. The solution? Add some InstaMorph finger grips!
Step 1: Supplies 'n Tools


Here's what you need for this project:
- Some InstaMorph (you won't need anywhere near a full pack, so there will be plenty left for more projects!)
- A few (like 6) tiny wire nails (I used 1/2" brass nails)
- The clipboard to be modified
- A pot to boil water, and a means to add some heat to that pot
For tools, you'll need:
- A pair of needle-nose pliers
- A torch for heating the nails
- Some cutters to trim the nails to length
- Tongs or larger pliers for retrieving the InstaMorph from the water
Step 2: Preparing the Clipboard


Some previous experiments with another type of product proved that simply attaching the finger grips to the outside of the lid failed, as the material sheared off over time. Therefore, we want to create some sort of structure to attach the InstaMorph to the clipboard. Hence the use of the nails, which sort of act like "rebar" inside the InstaMorph.
- Light your torch. A lighter or gas burner or other source of flame will work, too.
- Grip the nail with the needle-nose pliers and hold it into the flame to heat it.
- Press the hot nail through the lid of the clipboard, from the inside to the outside. The hot nail will melt the plastic and protrude through, and the plastic will grip the nail tightly once it cools again.
- Repeat for the other nails in the finger grip, about 3 or 4 per grip.
- The 1/2" nails will likely be too long for the grips, so use the cutters to trim the nails to a better length, around 1/4" or 3/8".
- Repeat this for any other finger grips you want. For my clipboard, I wanted a grip on either side of the latch.
Step 3: Prepare the InstaMorph


You can find great detailed instructions on using InstaMorph from their website, located here. While you're there, check out the safety warnings and some other ways to heat the product, too!
Here's my quick-and-dirty version:
- Pour some water in your pot. The exact amount is not important.
- Place your pot on a heat source, and start heating the water. A "medium" setting on the hot plate was good. The goal is to get the water to 150 degrees, not boiling.
- Add the InstaMorph pellets. As an alternative, you can also add leftover bits of InstaMorph from previous projects (like we did here).
- After about 2 minutes, the pellets and other material will turn clear and stick together.
Step 4: Make the Grip


Once the InstaMorph is clear and ready, use the tongs to pull a chunk out of the water. Squeeze out the water that might remain, then pick off a chunk to use.
Mold the InstaMorph over the nails and into a suitable shape for a finger grip, as shown in the picture. You will have a fair amount of working time before the InstaMorph cools and turns back to its original white color.
Repeat this process for any other finger grips you are adding.
Step 5: Finished!


And here's the finished product! As you can see, the molded InstaMorph grips provide the perfect point to grab the lid of the clipboard to open it.


