

Introduction: Interactive Cups


Have you thought about a cup that behaves differently depending on the liquid, temperature or the amount of liquid in that cup?
This is a group of interactive cups. The one on the left (Cup 1) can tells the difference in the liquid you put in it, and play a certain song for that liquid in react. The one on the right (Cup 2) can change the speed of the song playing depending on the amount of liquid you add in it. Also, the color of the pink cup changes when you pour hot water in it so it depends on the temperature.
Step 1:
Here is a video of the instructive cups moving.
Step 2:

Materials you need:
-a few disposable cups (transparent and opaque, different sizes)
-a small box as a base
-thermochromic paint and fabric paint
-a paintbrush
-glue
-scissors
-a coil of wire
-wire strippers
-Soldering supplies
-Arduino UNO board
-Wav Shield for Arduino (http://www.ladyada.net/make/waveshield/)
-a LED
-a light sensor
-a bendy sensor
-a speaker
Step 3:


Connect the audio shield with the arduino and connect the speaker to the audio shield. The followings are ways to connect each sensors, or LED to the arduino and the bread board. However, be careful not to solder everything first. You will need to unwire them later on when connecting to the cups.
A. Flex Sensor
To connect the flex(bend) sensor see the diagram.
The analog input should go to analog (0) for this one and we used a bread board to connect the resistors to Vcc because we will be using the Vcc power in many nodes.
You can test out if this sensor is working by using the code:
void setup()
{ Serial.begin(9600);
}
void loop()
{
int sensor, degrees;
sensor = analogRead(0);
degrees = map(sensor, 768, 853, 0, 90);
Serial.print("analog input: ");
Serial.print(sensor,DEC);
Serial.print(" degrees: ");
Serial.println(degrees,DEC);
delay(100);
}
http://www.sparkfun.com/tutorials/270
Step 4:

B. Photocell light sensor
The connection for the photocell is the same principle to the flex sensor. As we did in the flex sensor, connect a resistor (1k) in between the Vcc and one of the node of the sensor. Then, connect the other to the ground. ( It is better to solder a long wire to each legs because this photocell is going to be connected inside to the cup). Also, a the input analog (2) should be connected in the node where the resistor and the photocell is connected.
You can check the range of this sensor by using the same code above except change the analog(0) to anolog(2) and without printing the degree value.
Step 5:


C. Light Ambient Sensor
Connect the light sensor as shown in the diagram above. The GND node goes to ground, S goes to analog read (5) and Vcc connects to the power source.
Step 6:


D. LED
Connect the led to the battery. You will need a resistor in between the LED and the battery to prevent the LED breaking from too much current going through. Also, in between these connections, connect a button that can turn the light on and off. This will help saving the battery.
You can see the final connections in the pictures.
Step 7:

For cup 1, you need a bigger opaque cup and several smaller transparent cups (that you can put the smaller ones in the big one). Attach the LED and the photocell light sensor to the inside of the opaque cup, one on each side (as shown in the picture. Do this before you solder the light sensor and the LED to the circuits!). So when you put the transparent cups with different liquid in the opaque cup, the light sensor can sense the difference in the amount of photons that go through the liquid, depending on the difference of transmittance.
Step 8:


For cup 2, you need a light heat-conducting cup and a base (which was made from a slightly bigger cup) that the cup can stand in. Mix the Thermochromic paint with the fabric paint, apply evenly on the surface of both the cup and the base. After the paint dry out, make two parallel holes on the “wall” about 0.5 inches away from the bottom, each on one side of the base. Put the bendy sensor through the base via the two holes. Now you can put the cup in the base (on the bendy sensor). So the bendy sensor bends when you add water to the cup, and speed up the music. Also, the cup will change color following the change in temperature, due to the thermochromism paint.
Step 9:

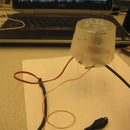
Attach two cups and the speaker on top of the base (the box), and hide all the electrical component in the box, except for the light ambient sensor.
The picture shows how it looks from the back.
Step 10: Codes
Download arduino 1.0.
Also, before using the code go to http://www.ladyada.net/make/waveshield/use.html.
You should format the SD card, convert audio files as suggested in this site.
Also, don’t forget to put the converted audio to the SD card.
Arduino Code that we used :
#include <FatReader.h>
#include <SdReader.h>
#include <avr/pgmspace.h>
#include "WaveUtil.h"
#include "WaveHC.h"
SdReader card; // This object holds the information for the card
FatVolume vol; // This holds the information for the partition on the card
FatReader root; // This holds the information for the filesystem on the card
FatReader f; // This holds the information for the file we're play
WaveHC wave; // This is the only wave (audio) object, since we will only play one at a time
#define DEBOUNCE 100 // button debouncer
// this handy function will return the number of bytes currently free in RAM, great for debugging!
int freeRam(void)
{
extern int __bss_end;
extern int *__brkval;
int free_memory;
if((int)__brkval == 0) {
free_memory = ((int)&free_memory) - ((int)&__bss_end);
}
else {
free_memory = ((int)&free_memory) - ((int)__brkval);
}
return free_memory;
}
void sdErrorCheck(void)
{
if (!card.errorCode()) return;
putstring("\n\rSD I/O error: ");
//Serial.print(card.errorCode(), HEX);
putstring(", ");
Serial.println(card.errorData(), HEX);
while(1);
}
void setup() {
// set up serial port
Serial.begin(9600);
Serial.println(freeRam()); // if this is under 150 bytes it may spell trouble!
// Set the output pins for the DAC control. This pins are defined in the library
// if (!card.init(true)) { //play with 4 MHz spi if 8MHz isn't working for you
if (!card.init()) { //play with 8 MHz spi (default faster!)
putstring_nl("Card init. failed!"); // Something went wrong, lets print out why
sdErrorCheck();
while(1); // then 'halt' - do nothing!
}
// enable optimize read - some cards may timeout. Disable if you're having problems
card.partialBlockRead(true);
// Now we will look for a FAT partition!
uint8_t part;
for (part = 0; part < 5; part++) { // we have up to 5 slots to look in
if (vol.init(card, part))
break; // we found one, lets bail
}
if (part == 5) { // if we ended up not finding one :(
putstring_nl("No valid FAT partition!");
sdErrorCheck(); // Something went wrong, lets print out why
while(1); // then 'halt' - do nothing!
}
// Lets tell the user about what we found
//putstring("Using partition ");
//Serial.print(part, DEC);
//putstring(", type is FAT");
//Serial.println(vol.fatType(),DEC); // FAT16 or FAT32?
// Try to open the root directory
if (!root.openRoot(vol)) {
putstring_nl("Can't open root dir!"); // Something went wrong,
while(1); // then 'halt' - do nothing!
}
// Whew! We got past the tough parts.
putstring_nl("Ready!");
}
void loop() {
//putstring("."); // uncomment this to see if the loop isnt running
int sensorValue;
sensorValue = analogRead(2); // read analog input pin 2
if(sensorValue<100){// this determines the song we play
playcomplete("water.WAV");
playcomplete("friday.WAV");
}
else if(sensorValue>=100 && sensorValue<250){
playcomplete("milkbaby.WAV");
playcomplete("baby.WAV");}
else {playcomplete("coke.WAV");
playcomplete("myjeans.WAV");
}
}
void playcomplete(char *name) {
// call our helper to find and play this name
playfile(name);
while (wave.isplaying) { //while it's playing!
int16_t potval = 450;
uint32_t newsamplerate;
int16_t lastpotval = 0;
#define HYSTERESIS 3
int sensorValue;
sensorValue = analogRead(5); //read input 5 which is the light ambient sensor
if(sensorValue<10){
break;} //if we get close to the light ambient sensor, it stops the song and change it to another music
// this is the code that changes the speed
potval = analogRead(0); //read the bend sensor and this code changes the speed depending on the sensor
if ( ((potval - lastpotval) > HYSTERESIS) || ((lastpotval - potval) > HYSTERESIS)) {
newsamplerate = wave.dwSamplesPerSec; // get the original sample rate
newsamplerate *= potval; // scale it by the analog value
newsamplerate /= 512; // we want to 'split' between 2x sped up and slowed down.
wave.setSampleRate(newsamplerate); // set it immediately!
Serial.println(newsamplerate, DEC); // for debugging
lastpotval = potval;
}
Serial.print(potval,DEC);
delay(100);
}
// now its done playing
}
void playfile(char *name) {
// see if the wave object is currently doing something
if (wave.isplaying) {// already playing something, so stop it!
wave.stop();
// stop it
}
// look in the root directory and open the file
if (!f.open(root, name)) {
putstring("Couldn't open file "); Serial.print(name); return;
}
// OK read the file and turn it into a wave object
if (!wave.create(f)) {
putstring_nl("Not a valid WAV"); return;
}
// ok time to play! start playback
wave.play();}


