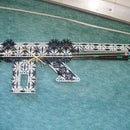
Introduction: K'nex M60E4 Instructions
hello guys and girls. after an excessively long wait, the instructions are finaly here. You will have your own M60E4 if you follow the steps carefully. I wish you the best of luck building this. However, skill is required to succesfully complete this gun. Many parts are necessary too.
Step 1: Parts List
Connectors:
- Dark Grey: 30
- Light Grey: 3
- Red: 33
- Green: 6
- Yellow: 196
- Orange: 107
- Blue 3D: 22
Rods:
- Green: Too many to count.
- White: 68
- Blue: 56
- Yellow: 2
- Red: 0
- Grey: 1
Extras:
- Tan clip: 3
- Blue clip: 3
- Grey spacers: 2
- Blue spacers: 4
- 'Y' cons: 29
- Blue hinge: 3
- Black hinge: 6
- Small bands: 7
- Big bands: 2
- Tape
- Plastic glue
- Duct tape
Modified pieces:
- Broken white rods: 4
- Broken Orange cons: 1
- broken red cons: 1
Step 2: Barrel
- Gather and make all these parts.
- Close up of the front sight.
- Put these 3 bars on the lower barrel section.
- Put one layer of bars on the upper barrel section.
- Add the front sight like this for now.
- Take the longest bar and put it on the upper barrel section.
- Add the last set of bars on the upper barrel section and add the other leg of the front sight.
- Add the outer layer.
Step 3: Hand Guard
- Gather and make this stuff.
- Add the first two part to the back panel. Add the other two parts.
- Add another layer of those.
- Add the last layer.
- Add the 6 white/black rods on it. (sorry you need to take an extra rod)
- Add those two bars on top.
Step 4: Main Body
- Make this plate. Pay attention to the place of the blue rods.
- Make this plate. It will be layer 2.
- Add layer 2 to the main plate.
- Add this rod and slide two grey spacers onto it.
- Make these plates. It will be the handle.
- Add the small piece to the main plate.
- Add the odd piece to it.
- Add the last plate to the handle.
- Add the handle to the body like so.
- Sorry I forgot to take a picture of the third layer. just pay good attention and look at other pictures.
- Make the trigger.
- Take it apart and slide it in like so.
- Add the other piece.
- Make the trigger guard. note that there's a bit of tape on the black rod.
- Slide it into the handle like so.
- Add the rod to the body and slide the trigger guard onto it.
- Make this stuff. it will be layer four.
- Add layer four like so.
- Make the belt cover.
- Another view.
- Attach like so.
- Close it and slide it over the orange con sticking out.
- Make the rear sight.
- Another view note that there's tape onto it to keep the dark grey con into place.
- Add like so.
- Make layer five.
- Add like so.
- Add all the remaining dark grey cons like so.
Step 5: Buttstock
- Gather and make.
- Add the pieces like so.
- Close up.
- Add the last layer.
Step 6: Box Magazine
- Make this strange piece. Just look at it closely. One rod is a white one. It's black on the picture.
- Make this piece.
- Gather these bits.
- Make this big part.
- Attach like so.
- Add the tan clip like so.
Step 7: Odd Parts
- Make these parts and get those rubberbands.
- Close up of the firing pin. You should glue the red connector to the grey rod beneath the tape. Uou can also see the modified red conector.
Step 8: Assembly
- Add the barrel to the grip.
- Add the grip to the main body.
- Add the body to the stock.
Step 9: Assembly of Odd Parts
- Add the fake charging handle and the charging handle mount.
- Slide in the modified ram rod.
Step 10: Banding
- Add a small band for the charging handle.
- Add two bands for the trigger block.
- Add a rubberband on the handle.
- Add a band for the trigger.
- Add a small band for the front sight like so.
- Add two bands for the belt cover.
Step 11: Attaching the Box Magazine
- Push in those 3 rods like so.
- Put the magazine on top of the 3 rods sticking out and then push the 3 others rods back in place.
- Put the belt through the belt cover.
- Put the mag pusher in and put a small band on top of it.
- Add a big rubber band like so and do the same at the other side.
Step 12: Finished
If you managed to get to this step, then you're done!
Have fun with your own life-size M60E4.
Hear is what you should consider. I am not responsable for any physical damage you may inflict. Never aim toward humans or animals because it can do serious damage.


