

Introduction: Kokedama - Japanese Moss Ball


Hey guys in this instructables I will be showing how to make a kokedama or japanese moss ball. It is a ball of soil covered with moss on which some plants are grown.The Kokedama is having a minimum life period of one year. After it is made, it can be watered by spraying water on the moss. The kokedama will exhibit its real beauty after one week from making it. the moss will begin to grow and it becomes more attractive and pleasing.
Materials:
Soil
Moss
Thread (preferably green colour)
A plant
Water sprayer
Step 1: Make a Soil Ball

A soil ball is to be made by pressing and hardening a handful of soil. It is recommended to use a glove while mixing the soil. the soil should be wet for better results.
Step 2: Collect Moss

Mosses can be found on floors and unused bricks they should be detached carefully. Try to get somewhat big pieces of moos to make the kokedama with uniform texture.
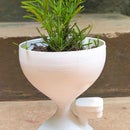
Step 3: Choose a Plant

A good and healthy plant of your choice can bee used. Red coloured plants will look so vibrant in the green colour of moss.
Step 4: Preparation of Soil Ball

Make a depression on the surface of the soil ball or make it into two pieces for placing the plant in it.
Step 5: Place the Plant in the Soil Ball

Step 6: Once Again Form the Soil Into a Perfect Ball Shape

Step 7: Place the Moss Pieces on the Ball and Press for Better Bonding


Step 8: Reinforce the Moss Pieces on the Surface of Soil Ball Using a Thread


Step 9: It's Done!

Now your traditional kokedama baby is ready and will start to catch your eyes just after a week. You can water it using a water sprayer

Second Prize in the
Planter Challenge


