

Introduction: L4D2 Logo Gaming Mouse


My 1st mod mouse is the one with a slit on the back (IO 1.1a)
the 2nd is the one with Fnatic logo (IO 1.1a)
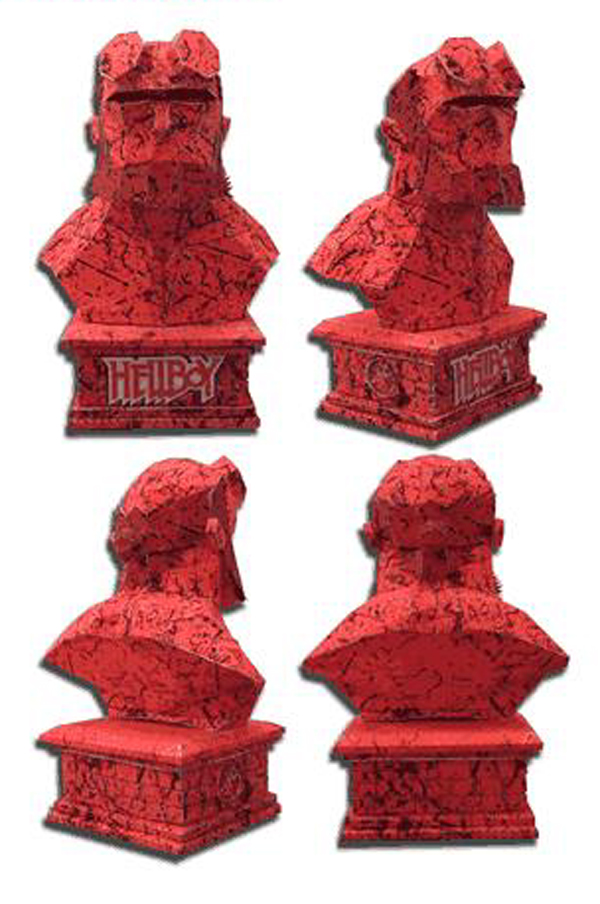
the 3rd is IE 3.0 with a cover of hellboy skin ( Hellboy bust papercraft )
the 4th is the one with L4D logo .
They look weird but i like them .
1. Spray paint , red , black , white , transparent .
2. Sand paper : 500 , 1000, 1500 .
3. Double sided tape .
4. Print paper.
Step 1: Make a Sleek Surface


Use 500-sandpaper fisrt then 1000 ( or 1500 ) to flatten the mouse's surface , take apart the mouse before doing this .
Step 2: Background Color Spraying


Choose a background color to spray . Mine is white , all white , i like that looked bright , and suitable for L4D .
About 4 5 layers. Then , you have to wait for it drying , Plz be patient, it will take at least 1 day under sunshine , when you won't smell solvent acrylic lacquer. After that , you should use (1000) sandpaper to flatten the surface again, make it real sleek. Do it with water .
Step 3: Mark the Big "4" With Blood Drops


There're some options .
You can make a big "4" and "2" like the game-shortcut icon (l4d2) at the middle of the mouse , lower position is for " left4dead2 " .
The big "4" is white and the small one is black , this is my favourite , looked like my first l4d mouse.
Second option , just one logo with big bloody number four and black number two .
Draw number four , plz consider the real size when you put all text together. Use double sided glue tape to glue it to the mouse, see images.
Draw blood drop like you see the game icon/logo . Dont worry , you can edit the spray logo using sandpaper after drying.
Spray with red paint to get the blood drop and white number four.
Make some small drops : use red paint and cross head screw driver to make some drops , see images.
Wait for drying .
Then use sandpaper again with water .
Step 4: LEFT - DEAD and Big "2"


See images. Do the same work in step 3. I made a mistake , "T" is too closed to "4" and i was so lazy to make an edit .
...
Make some scratches with a piece of paper and black paint.
... Use sandpaper again (with water). You can edit the logo every time you use sandpaper.
Step 5: Transparent Cover


Use sandpaper to make sure that the mouse surface is sleek , dont forget mouse 4 and mouse 5 buttons , then you can cover the shell with transparent paint to protect the logo and make the surface real bright . If by accident there 'll be some scratches , you can use sandpaper to flatten the surface and cover again with transparent paint .
Remember dry the shell under sunshine until there'll no more solvent smell before using.


