

Introduction: Laser Cut Puzzle and Cardboard Box


How to make a puzzle and storage box with a laser and a few basic woodworking tools. A super easy and fun project!
Step 1: Gluing the Photo

I had a couple of 11x14 photos printed at Costco for this project on matte photo paper. I also picked up some art board from my local Michaels craft store. Using spray adhesive, glue the photo down to the art board and trim away any excess.
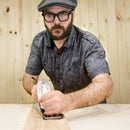
Step 2: Protect the Surface

Use masking or painters tape and cover the surface of the photo. This will protect it from burning as the laser makes the cuts.
Step 3: Vector Puzzle File

I found a free vector file of a puzzle online. Unfortunately each puzzle piece was a separate object which meant that there would be overlap and the laser cutting the same area twice as well as greatly increasing the cutting time. I used the vector file as a guide and redrew the art making a series of wavy horizontal and vertical lines with a bounding box.
Step 4: Laser Cutting Software

I then sent the file over to RetinaEngrave, my laser cutter software for my Full Spectrum laser. After doing a series of tests (with tape, without tape, photo side up, photo side down) I found that a speed of 25 and a power of 36 gave me the best results with minimal burning.
Step 5: Fire Away!

Next I let the laser do it's things and start cutting. The whole piece took around 7-8 minutes to cut. Make sure you have proper ventilation.
Step 6: Peel Off Tape

I then had the tedious task of removing the masking tape from 70 puzzle pieces.
Step 7: Cardboard Lid

Now onto making the box for the puzzle. I took the other 11x14 print and glued it on some poster board with spray adhesive.
Step 8: Cardboard Lid

I then folded up the edges, made a few knife cuts and glued up the corners with CA glue (super glue).
Step 9: Cutting Pieces for the Box

The base of the box was cut on the table saw using 1/8" plywood.
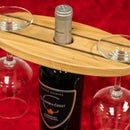
Step 10: Gluing Up the Box

I then glued all the pieces together with CA glue (super glue) and sanded it smooth.
Step 11: Finished


And that's it!! Here you can see the photo used for the project. It was a photo I took while visiting Alaska a few years back. Check out the video for the project on how this image came to be. Let me know if you make one yourself! I'd love to see what you come up with! Make Something!!


