

Introduction: Laser Etching Into Powder Coated Glass


In our last Instructable, we powder coated glass jars by lining them with aluminum foil before starting the powder coat process. In this Instructable, we'll learn how to laser etch into the powder and the glass, and see how different powder colors and speed and power combinations effect the outcomes.
What you'll need:
> Powder coated glass. Preferably a few different pieces, especially if you're planning to run speed/power tests
> Laser etching machine
> A level
I made this at TechShop SF!
Step 1: Align and Level Your Piece

We start with a jar that we powder coated in Deep Orange from Columbia, and a lid coated in Bright Red from Eastwood. The colors you choose will each take the lasering a bit differently and will effect the outcome of your project, Therefore, it's best to test each color for depth and penetration through the material, thickness quality of the etched lines, and contrast of the etchings on the colored background.
> Align the piece in the laser and matched the work to the surface.
> Level the piece. depending on your surface, you may need to build a shim or jig to level your work and keep it in place.
> Run a test etch on paper, cardboard, plastic, or other sacrificial surface to make sure that your lined up properly. (make sure your test doesn't bleed through to your work.)
Step 2: Create Your Test (use Color Mapping)

I used color mapping to create a simple test run for this material. (There's a color-mapping instructable here).
First, made a text box in an Adobe Illustrator file and color-coded it to represent a variety of speed and power combinations. I then went into the Epilog Laser's print driver, selected the Color Mapping option, then set the machine to raster the text into the jar based on the color table I created.
notes for this step:
1. Your file must be in RGB (not cmyk)
2. Your RBG color codes must match up perfectly, so use easy-to-remember codes like 255-0-0, 255-255-0. etc when setting up your illustrator file.
3. Get to color mapping through the print driver. PRINT>SETUP>PREFERENCES>COLOR MAPPING
4. Set your color mapping colors to match the colors in your AI file, then set the etching settings to match.
5. See this tutorial.
Step 3: Run Your Test

Once your piece is aligned and your test file is created, go ahead and run your job. If you have more than one set of color mapping tests, realign your piece and run your new file. Or, if you're testing the same test on different colors or thicknesses of powder, replace the old piece with a new piece and run it again. Once all of your test pieces are run, you can compare the results to find your best settings. Note that some settings create more or less smoky residue from different materials. The laser will leave marks and scorching in your powder at high power/low speed settings. You can remove most but not all laser scars from the powder, so charring is something you may want to avoid.
Step 4: Compare Your Results


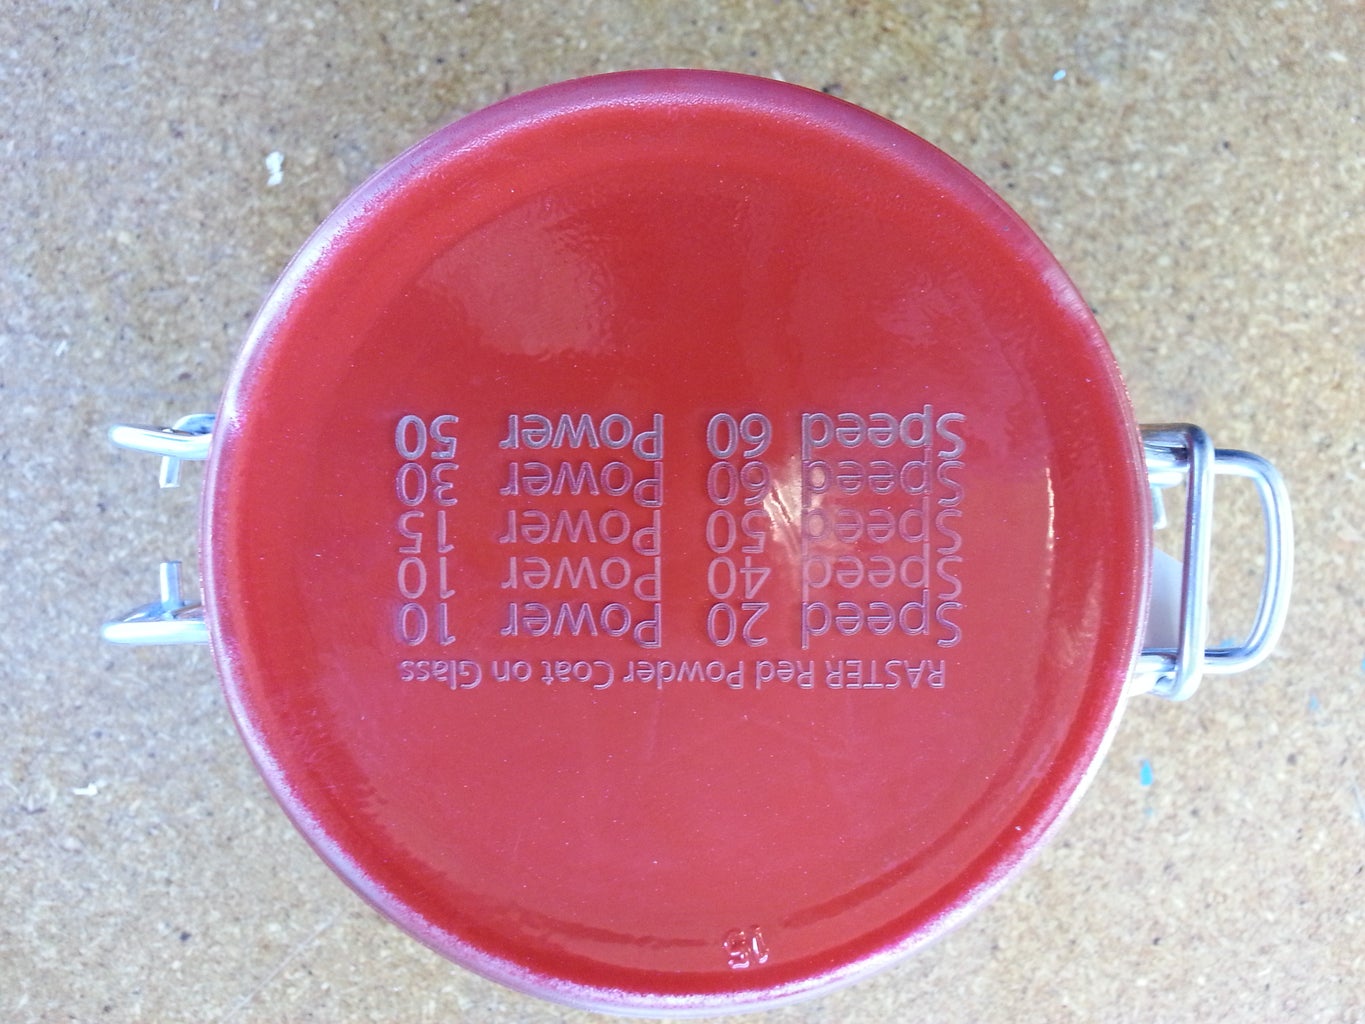


Once you've run all of your tests, compare the results. You'll notice that some lines are thicker than others, while some settings barely allow the laser to break the surface of the powder. You'll also notice that the same setting will produce different results depending on the color and make of the powder you're using. Some powders will keep some of their color when lightly etched, while other powders will mostly turn dark when etched. Choose the look you're going for and note the settings.
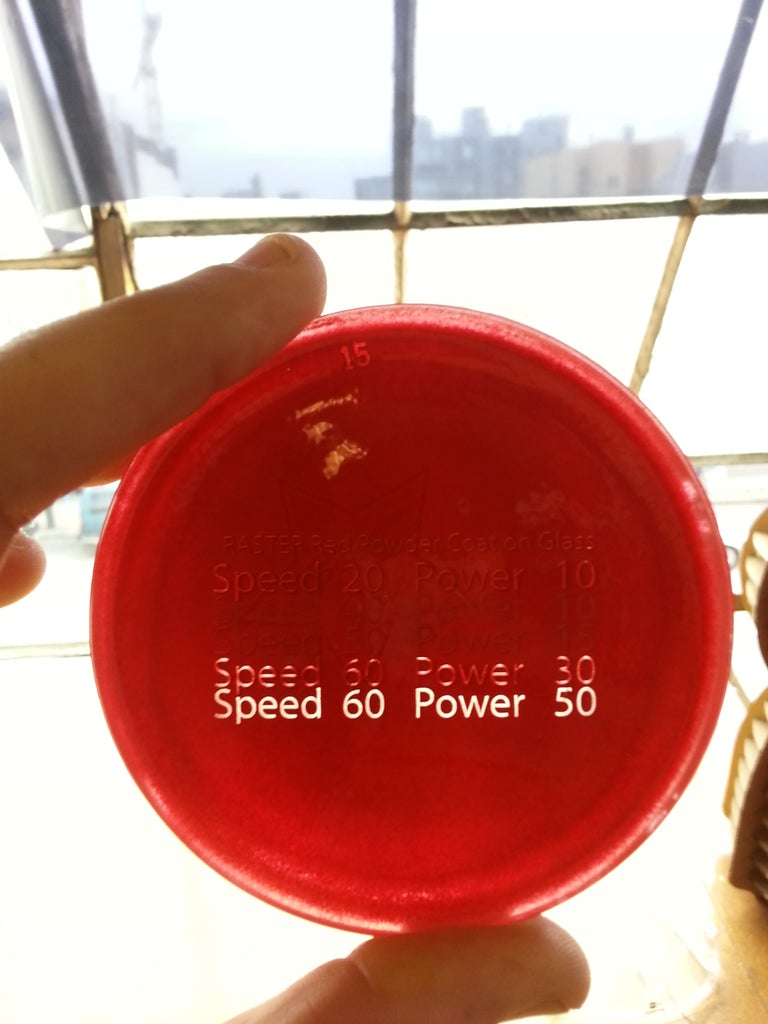
Step 5: Choose and Record the Best Outcomes for Your Project
Did you want fat lines that cut all the way through the powder, or thin lines that barely scratch the surface? Did you want transparency in your final piece? Do you want light to pass through your design? Once you've run your tests and compared the results, you're ready to choose the settings for your job. You may also decide to choose two ore more settings for different parts of your piece if you're trying to get depth or differentiation. Once you've chosen your best settings and etched your piece, make notes of the settings (including the type and color of powder coating) so that you can repeat your awesome results!
Step 6: Etch Your Powder!

Now that you've chosen and recorded your settings, etch your piece! The two-toned look in the photo below was created by lightly etching at high speed (around speed 80 and power 20) and doing 3 passes on the bottom half of the cut and 4 passes on the top half. Out of all the powders I tested, the Bright Blue powder seemed to keep it's color the best and hold up against the heat of the laser (where the orange powder mostly turned dark brown, for example).
You will want to review your piece and make any necessary tweaks to the power/speed settings. If you do make changes, record them so that you can repeat your results. Good work!


