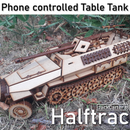
Introduction: Lasercut RC Comet Tank
Hello everyone ! This is the Instructable for my last ~1:18 Comet assembly. After some feedbacks from my previous models, i tried to make this one as clear as possible.
Thanks to my friend Jordan Roy for his advices and tips about the RC part, and the brothers Delahousse from PlasciLab for the mechanics. You can check their own awesome design here.
Its inside is designed, like my Hetzer except for the engine compartment that fits for the motors and microcontroller. The plus is the spring suspensions that serve to tension the tracks. I tried to make as many removable parts as possible, in case of bad design or broken parts, which allows me to not assemble it from the beginning again.
The plans and the code are available on its Thingiverse page, cut it in 3mm material, and you will need in addition of that :
- Ø 3mm screws :
* x14 15mm long,
* x10 25mm long,
* x10 30mm long. - x20 Ø4mm tubes (Ø3mm inside) as bearings inside the wheels, to avoid damages on the wood,
- Ø1mm metal wire (i took electronics wire) as track hinges,
- Ø3mm soft or threaded rod (~165mm long) for the cannon,
- x10 pen springs for the suspensions (typically 4,5mm diameter and 30mm long),
- x2 M4 headless screws,
- x2 5mm electric dominos for motor shaft extensions,
- a nice cup of coffee,
- and a bunch of toothpicks.
About electronics :
- A tiny breadboard,
- An NodeMCU (ESP8266),
- Some Male-Male and Female-Male jumper wires,
- two 28BYJ-48 motors with their control board.
The circuit requires a 5V supply for about 1.5A. I took what i got near me :
- A 5V USB power bank,
- And a random USB cable with a piece of Male-Male header.
Ready ? Let's begin !
Step 1: Throw an Eye at the Preview Models
I made some previews that you can check if you have some doubts about the assembly.
You can find a 3D assembled version here : https://a360.co/2WArRMB
And another exploded view here : https://a360.co/2WCiYSC
On this website, you can hide parts, add a sectionnal view, or isolate groups. I added all the screws to understand where everything goes.
Step 2: The Double Bottom (Hull)
I made the Comet as much "disassemblable" as possible. It is more convenient when a part breaks, so we don't have to make the whole tank again. We will begin with the hull, the main part that will handle all the other parts.
In a first time, it consists in a double bottom. The goal is to provide long holes for the suspensions axles that we will build later.
Take 4 nuts, fit it in each hole (3), put the 4 nut holders and the 10 spacers between the two floors (6).
Step 3: The Back (Hull)
The back contains the radiator (1 and 3) and the back faces. Some curves are stacked (8) so the motor can fit here. Also, assemble a ltille cross and glue it behind the hole to make the disc poke out a little (8).
Step 4: The Front (Hull)
After placing the front armor, the hull is finished. Other parts will be screwed or placed on it without being glued, except inside details.
Step 5: The Roof & Periscopes
This part is removable from the hull, on the one hand to see inside details, but on the other hand, to have as many removable parts as possible.
The periscope's lever is placed at the end. It is too thick to fit through the hole.
Anyway, The periscope is placed on the roof but not glued to it, and the roof itself is placed on the hull, still not glued onto it.
Step 6: The Side
This part will receive the lever arms of the suspensions and all the other wheels.. It is screwed to the double bottom with 15mm screws via the 4 nuts we've put previously in step 1.
Add 5 nuts on each hexagonal hole.
Make sure the fixing screw we will put through it will poke out perpendicular.
Step 7: The Road Wheels & Suspensions (Side)
The suspensions are a bit tricky. The wheel rotates on a Z shaped arm that pivots itself on the hull. I'm using pen spring as suspensions.
Because of the proximity of the spring top and the fact that you have to insert the arm by screwing it around the side nut (3), the spring top is fixed on the side after insert the arm (7).
Put a drop of wood glue on each spring end to avoid disengaging, and toothpick inside the spring to keep it straight during compression.
Step 8: The Front Wheel (Side)
Insert a 20mm screw inside before you seal the cap. The wheel will rotate around it, with the brass tube to prevent friction and damage on wood.
Step 9: The Top Wheels (Side)
The top wheels follow the same principle than the front wheel. Watch out during the assemble, the middle ring is very thin. I had to be thin enough to let the track teeth pass, but thick enough to not break. So, don't hesitate to put a great load of glue.
The screw which the wheel revolves around is maintained on the side part (Step 5) by being squeezed between two nuts.
Step 10: The Drive Wheel (Side)
Don't forget to cut away the motor's screw holes (Step 5). I choose this motor because of the shaft's offset. The IRL drive wheel being very close to the back face, i needed a motor that can provide a shaft as far back as possible.
Take your 5mm domino as an axis extension as the motor shaft is not long enough to go through the whole wheel.
Put the motor inside the tank, and screw the wheel+domino on the exterior. I put hot glue on the motor because i didn't know how to really hold it.
Step 11: The Tracks (Side)
It's a very long step, so make sure to have some hot coffee near you before. Each track must have an even number of links. Count around 78 or 80 links on each tracks.
Take a thin enough diameter wire, such as paperclips or electronic wire. Insert it between every link and glue two circles on each side, to impede the wire to slide outside.
It doesn't matter if the the links grip between each other, the track will be flexible over time.
Step 12: The Mudguard (Side)
After we have inserted all the wheels, we can put de mudguard on.
First, glue the top of the mudguard (the long part) perpendicular to the side (Step 5). Then, glue the front and the back (see the arrows).
The front curve can pivot to reveal the front wheel.
Step 13: The Chest (Side)
Insert two 6mm wire as hinges. This chest is useful to put some fragile spare parts.
Step 14: The Wheels Caps (Side)
The caps hide the screws in the center of each wheel. The road, top, front and drive wheels have their own cap.
Step 15: The Back Face
This face rests behind the turret. It will hide all the electronics.
Plus, the cannon holder is really useful to maintain the tank turret while you will store or move away the tank.
Step 16: The Turret Top
Most of the hull is done. Now, we can make the turret. The roof of the turret will rest onto the rest. You could remove it to see the inside.
The bent arms give the exact angle between the two faces. Make two of them poke out from the left hole, so the loader's hatch doors can rest on it when they are closed.
You can file the bottom of the hatches since i did not see they don't open properly.
Step 17: The Turret
Make sure the walls are perpendicular from the bottom. Be careful the top can be inserted between everywall piece. Glue the 4 tiny feet (4) 3mm below the roof. The top will rest on these.
Step 18: The Mantlet (Turret)
To make the cannon base, just align all these parts. I put glue outside, because i was afraid that glue between every stacked parts would add thickness, and not let it fit inside the hole in the front of the turret.
Step 19: The Breech (Turret)
The breech is the base of the cannon. After you've first inserted the stacked-parts-mantlet, then the square around it from inside on previous step, you will have to glue :
1. The main part,
2 and 3. the cranks,
4. The beginning of the cannon and the scope.
Step 20: The Cannon (Turret)
Now we will put the rest of the cannon.
Stack every slices around a rod. Don't forget to let the rod poking out of about 6mm from the slices (see on the left of the picture) .
Step 21: The Details (Hull)
The majority of the model is finished. We can now put the little details that make all the things. There are :
- On the shooter spot (left seat):
- The seat,
- The machine gun breech,
- The machine gun cannon on the outside,
- On the driver spot (right seat) :
- The seat,
- The gearbox and pedals,
- The speed counter,
- The hatch.
- Outside :
- The lamp,
- The front hooks,
- The diagonal hooks with the sides hatches hinges on the border of the front armor plate.
- Below the turret :
- Some crates,
- An ammo storage,
- A cabinet,
- Some boxes with cables poking out,,
- A border for the window between the shooter and the turret.
Step 22: Other Details (Turret)
The turret has some props too. The majority of the props included tend to hide some of the holes i had to make.
I made :
- A tank at back of the turret,
- Two radios,
- A kind of cubic tank on the right,
- The two seats,
- Other boxes with cables.
It is not much, but you are still free to make your own props ;-)
Step 23: The Electronics
Great ! now the aesthetics are finished. Now, we can begin the electronics assembly.
Power supply
First, i was looking for a 5V voltage supply that can provide enough current to supply my two steppers. I found out that my USB power bank could provide 2A, so i decided to use it as a power supply. However, power banks are maybe too big to fit inside the compartment. So, you can take a tiny one, or everything else that can provide 5V and at least 1A (i think it is enough).
Plugs
I used a breadboard to connect everything. I stripped a USB cable to connect my power bank to my board. Not every USB cable have same wire amount or color, please check with a multimeter wich wire provide the 5V and the ground. You can google it too.
The steppers, provided with 5V instead of 12V are way enough to have a sufficient torque. Plug the little jumper provided with the control board on the two ±12V. The -5V is connected to the ground of the power bank, as well as the Node's GND pin. The +5V and the Vin pin are connected to the 5V of the bank too.
Controls
The control board must be connected to four pins of the MCU. I chosed to connect the IN1 to IN4 right motor to the digital D1 to D4 pins. Same for the left stepper, with the D5 to D7 pins.
Step 24: Install Blynk
For the wireless control, I personnally choose a NodeMCU, because a had one near me, but you
can make it with any microcontroller you want.
The control of the model goes through my NodeMCU and the Blynk app (available on Android / iOS). This app provides a fully customizable HUD to control any Arduino or Arduino-like with your phone via WiFi.
So, after installing the app, the first thing to do is to create an account. Be sure you didn't forget your email address password, you will need to find some Blynk mails later.
- Create a new project, and assign an ESP8266 (The NodeMCU chip) as the microcontroller, and a WiFi mode.
- Once your see your HUD for the first time, create a Joystick. I decided to control it with this widget, with you can still control your own tank the way you want !
- We will send the joystick infos to the virtual pin V0 of the Node.
- After you've placed the joystick, click on it to open its settings. We will decide to send the X and Y position via the Merge option. Then, i chose to put a range from -15 to 15, 15 RPM being my own motor limits, before it starts to tickle and not working properly.
Step 25: Prepare the Arduino Code
This part describes some modifications you will have to do into the code before to flash it into the controller. The card has to be recognized by the project. We will need to insert in the code some unique informations about our project.
Install the libraries
- First, download the Stepper2 library here : https://github.com/udivankin/Stepper2
This library is a good option for cheap steppers like the one i used. It manages the motor's phases in a better way, and give a better torque to them. After you had downloaded the .zip file, install it from the Arduino software : Sketch>Include Library>Add .ZIP Library... and then select it.
- Then, if you never flashed a NodeMCU before, you need your computer to recognize it. The Arduino IDE provides a board manager, where correct drivers are installed.
Copy the following line :
https://arduino.esp8266.com/stable/package_esp8266com_index.json
Open the preferences and paste it in the Additional Board Managers URLs. Save the setting and go to the board manager in Tools>Board>Boards Manager. The ESP8266 board should be present, at the end of the list. I chose version 2.5.0 with my IDE in 1.8.9 . - You also need the Blynk library, which you can find in Sketch>Include Library>Manage libraries... and then search for Blynk in the search field.
Adapt the code
Go into the project settings, and send to your address the token, which is a big string, allowing your phone to recognize your NodeMCU when turned on.
Copy the token from your recently received mail and paste it into the auth array.
Also, you have to connect the Node to your WiFi, because Blynk does not allow direct Phone / Controller communication, as it must pass by Blynk servers first. You can specify your phone hotspot ID (it worked for me), so you can control further than your home's WiFi range.
You can now flash the code into the Node.
Step 26: Job Done !
Once powered on, the Node will imediatly connect to the WiFi you've mentionned in the code. Blynk will then sync with it. Now, you can enjoy your very own tank !
Please tell me if a step is not clear, or if you have some doubts.

Grand Prize in the
CNC Contest


