

Introduction: Lawn Tractor Tool Carrier


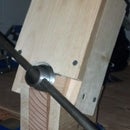
Here's a simple and cheap tool carrier for a lawn tractor. It cost about $5.50, and makes it easier to carry yard tools while mowing the lawn!
Step 1: Parts and Tools Required

Parts:
Waste paper basket - This one is from Home Depot, and is made of nice rubberized plastic that should hold up well outdoors. Cost $4.99
Bolts (2 or 3)
Nuts (2 or 3)
Washers (2 or 3)
I used 1/4"-20 x 1-1/2" bolts, but a larger size or more of them can be used if you want to carry more weight
Tools
Drill
Drill Bits
Socket wrench or crescent wrench
Measuring tape
Marker
Step 2: Where to Mount

Find a flat spot on the back of the lawn tractor body. You will be drilling through the body, so make sure you locate a spot that has no wires or mechanical parts behind it.
Measure and mark a location for 2 or 3 bolts that fits the width of your waste paper basket. Drill these holes to the size of your bolts, insert the bolts, and put nuts on temporarily.
Step 3: Align the Carrier

Find the height you want for your carrier, keeping ground clearance in mind. I set the bottom of mine right on the hitch plate. Once you are satisfied, press the waste basket against the bolts from the inside of the basket. The bolts will mar the soft plastic, making it easy to drill in the right spot.
Step 4: Make Some More Holes

Find the bolt marks on the waste basket, and drill these out. While you have the drill in hand, add some drain holes to the bottom to let water run out.
Step 5: Attach

Remove the nuts, mount the basket on the bolts, and put washers and nuts on the inside. Done!
Step 6: Use!
There you have it! This makes it easy to carry shears, a large drink, gloves, trash bags, and my favorite - the long reach pick up tool!


