

Introduction: Little Banksy Table


As a student, I love pallets! they're free, readily available and (depending on where you get them from) very sturdy.
My friend was moving into a new flat a wanted a coffee table with a bit of a personal touch.
one weekend whilst fairly bored I sketched up a design for him, unfortunately ruining some thermodynamics notes.
the other great thing about making furniture with pallets is that part of the aesthetic is an imperfect finish so I didn't have to worry too much about making precise cuts, great for a lazy Sunday.
I'm sorry in advance for the lack of photos, I wasn't immediately thinking of making it into an instructable at the time.
Step 1: CAD It


From past experience, drawing up a design in a CAD programme like sketchup is a great way to avoid headaches down the line.
For the benefit of you lot ill include my CAD drawing, the design is very simple though. He wanted the table to look like a pallet, but miniaturised and a bit more bespoke so this is what I came up with. To save myself some time it is made of two repeated designs stacked on top of each other.
My friend wanted a squat little table that wouldn't take up too much space in his flat while still performing the all to obvious role of holding up a cup of coffee or the occasional foot. With this in mind I figured a coffee table only needed to be about 25cm off the ground to count as a coffee table as opposed to a glorified foot stool bearing in mind that I was working with pallets so the dimensions were not precise.
Step 2: Cut the Parts


First I de constructed a couple of pallets I got from a building supplier. they seem to have better quality pallets because they keep their used pallets inside and the wood they are made from is of much higher quality (maybe to support extra load)
There are a few good instuctables like this one about how to properly dismantle a pallet and get the most out of them without ruining the planks.
After attacking a pallet with a hammer and crow bar, I had a selection of planks and blocks to work with all without spending a penny. luckily the same hardware store had some off cut sections of what looked like 2x4 that they let me have which was perfect for the stumpy little legs on the table.
Cutting list:
- - 8 x 500-100-15mm (table top slats)
- - 8 x 450-100-15mm (cross slats)
- - 4 x 60-100-70mm (legs)
Simple enough right?
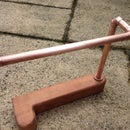
Unfortunately my table saw is a bit dodgy so I decided to go with a good old fashioned mitre box and wood saw in the end, despite the photo of it above.
Step 3: Construction


Now this is what I was talking about when I said that making a thorough CAD model will save time and effort down the line.
Originally I screwed the cross slat to the table top slats, but then remembered I still needed to attach the legs! just goes to show you shouldn't get complacent, even with simple projects.
new plan:
Screw the cross slats to the 'legs' THEN screw the table top on. having overcome this simple engineering conundrum I was only a few hours into the build and I had a table!
All that was left to do was sand it down ready for the paint job. I started with a course sand paper to give a distressed look to the wood and soften the sharp edges, then moving up to finer grades I smoothed the surfaces and refined the gouges and cuts in the wood making the surfaces smooth in all directions.
Step 4: Painting and Fin.

Step one was settling on the right banksy. we wanted something simplistic, not too politically motivated and most of all eye catching.
Having picked what I can only describe as 'girl with a balloon' I could make a stencil which was nice and easy because google images is full of .PNG and images ready for turning into a stencil.
After a few heavy coats of white primer and top coat it was time for the finishing touch. The hard part about this was to make sure that the paint wouldn't run or get under masked areas of the stencil due to the uneven surface of the table top and the gaps in between the slats. After masking the gaps, I laid the stencil down and did a number of light coats of black and red so that the paint wouldn't run...
Voila! one stumpy pallet coffee table and £20 for my troubles. I'd never worked with pallets before and I have to say I'm hooked! the simplicity and feel of furniture made from pallets is really appealing if you like shabby chic style and or are working on a budget (considering an IKEA table would have cost around £50 its a no brainer)
Thanks for reading this short but sweet instructable, now onto the next pallet inspired project!

Participated in the
Before and After Contest 2016


