

Introduction: Magnetic Base Helping Hands


Helping hands with Magnifying glass and clips that can be placed in any position. This system uses a magnetic base that works well with the BH-1 Mobile work station. Base and Glass holder are 3D printed parts. If you don't have a 3D printer, contact me and learn how to acquire a set of your own.
File HH_TriMount.stl is the Base, MG_HolderP1.stl is the Magnifying Glass ring and file MG_HolderP3.stl is the Ring holder. You may need to rotate the last file 180 before printing.


Step 1: Assemble Clips


Parts Needed for this step.
- 3 - Flexible Water Oil Coolant Pipe
- 3 - Alligator Clips, barrel type
- 3 - #6 x 1.25" Machine screws.
Note: If you want to use one of the Oil coolant pipes for the Magnifying glass, then you only need to repeat this step twice.
Remove the Orange Nozzle from the coolant pipe and thread a #6 x 1.25" screw fully into the end so the threads extend out the point of the Nozzle.
Slide the Alligator clip on to the Machine screw and "screw" the clip into place using the wire solder loop as a wedge.
If your clips don't have the Wire solder loop, then you can use 1.5" machine screws instead. These will extend past the set screw on the clip and you can use that to wedge against the machine screw..
Step 2: Assemble the Magnifying Glass


Parts needed:
- 3" Magnifying glass
- 1 - Coolant pipe
- 6 - #6 x 1/4" Machine screws
- 2 - #6 x 3/4" Machine screws
- 2 - #6 x 3/4" Thumb screws
- 1 - 9/64" Drill bit and drill (Not Shown)
- 2 - 3D printed Magnifying glass rings
- 2 - 3D printed Ring holder half's
With the 9/64" bit, Drill out the holes in one ring and one of the ring holder half's. Place the glass inside the ring that has not been drilled out. Place the other ring half on top and Line up the holes and place a #6 x 1/4 Machine screw throughout the 9/64" hole and screw into the second hole. Give the screw a bit of a push while turning the screw. The machine screw should thread itself into the plastic. Leave 2 holes open that are side by side.
Remove the coolant tip from one of the coolant pipes and place the ball joint into one half of the ring holder. Assemble in the same manor as the ring. Using the Thumb screws force the threads into the smaller hole of the plastic. Use the Thumb screws on the Ball side of the ring holder as shown.
Slide the Glass ring into the slot of the ring holder and use the last two 3/4" screws to secure the ring holder to the magnifying glass ring.
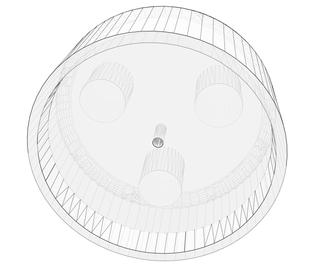
Step 3: Prepare the Base


Parts needed:
- 3D printed helping hands Base
- 2 x 1/4" cup magnet
- 1/4" NPT pipe thread tap
- #6 x 3/8" wood screw
Use the Pipe thread tap and thread each of the 3 holes on the top side of the base. Insert the magnet into the bottom side of the base and secure in place with the wood screw.
Step 4: Finale Assembly

Screw the 3 coolant pipes into the base. Place on a metal surface and enjoy your better helping hands.
Updates to come:
- 3D printed LED holder
- Non-magnetic Aluminum Base

Participated in the
Gadget Hacking and Accessories Contest


