

Introduction: Micro:bit Noise Level Detector


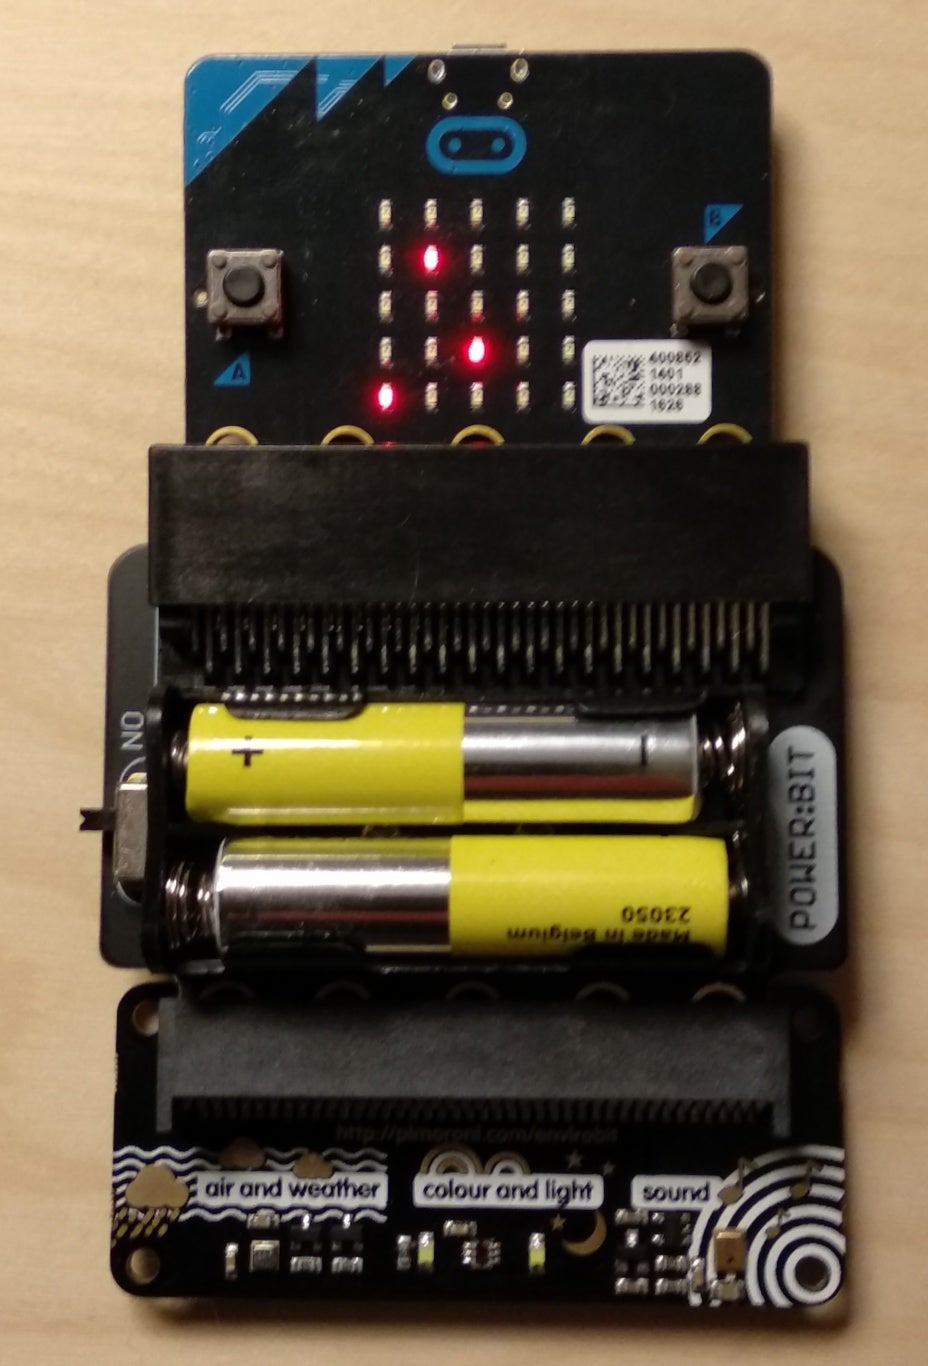
This is just a short example for a noise level detector based on the micro:bit and the Pimoroni enviro:bit.
The microphone on the enviro:bit detects the sound level, and from the resulting value a position on the 5x5 LED matrix is calculated and the corresponding LED is activated. The maximum values measured are stored and remain displayed on the LED matrix.
The values can also be displayed in numbers.
So it is basically a very simple noise level detection tool, e.g. for class room experiments.
The method described to display actual and the maximum values detected by a sensor on the micro:bits 5x5 LED matrix could also used for other parameters as temperature, humidity or pressure.
Step 1: Parts and Software Used
Hardware:
- A micro:bit
- A Pimoroni enviro:bit - comes with three sensors for sound, light and color, and pressure/temperature/humidity
(20 GBP at Pimoroni) - A Pimoroni power:bit - to power the device form batteries
(optional, or any other way to power the microbit, 6 GBP at Pimoroni)
Software:
- Microsoft MakeCode
- The Pimoroni enviro:bit MakeCode extension
To load the script to your micro:bit, just copy the provided hex-file to your micro:bit with an enviro:bit attached.
Step 2: The Code
The code has been written using Microsoft MakeCode in block mode, using the Enviro:Bit extension.
Bellow you find the corresponding JavaScript Code.
The function envirobit.getSoundLevel() reads the sound level from the sensor, returning a value from 0 to 443.
The constant signal_max defines a maximum value of the dynamic range to be displayed on the LED matrix, values above will treated as a being signal_max. This allows you to optimize the sensitivity of the device for your application.
The maximum value detected in a measurement circle are stored in the variant noise_max and remains displayed on the LED matrix.
Pressing button "A" resets noise_max and clears the screen, pressing button "B" displays the measured noise value as actual number.
To display the value, the values below signal_max are placed in 25 "bins" represented by one LED, starting from 0 (upper left) to 24 (lower right). Then the x/y position is calculated and the corresponding LED is switched on. Values above signal_max are placed in bin 24. If the value is below noise_max, the LEDs will be switched of again.
let noise_x = 0
let signal_max = 0
let noise_5 = 0
let noise_25 = 0
let noise_max = 0
basic.showString("Noise")
noise_max = 0
noise_25 = 0
noise_5 = 0
signal_max = 250
basic.forever(function () {
    while (input.buttonIsPressed(Button.B)) {
        basic.showNumber(envirobit.getSoundLevel())
        basic.showString("--")
    }
    if (input.buttonIsPressed(Button.A)) {
        noise_max = 0
        basic.clearScreen()
    }
    noise_25 = Math.floor(envirobit.getSoundLevel() / signal_max * 25)
    if (noise_25 > 24) {
        noise_25 = 24
    }
    noise_5 = Math.floor(noise_25 / 5)
    noise_x = noise_25 - noise_5 * 5
    led.plot(noise_x, noise_5)
    basic.pause(200)
    if (noise_25 < noise_max) {
        led.unplot(noise_x, noise_5)
    }
    if (noise_25 > noise_max) {
        noise_max = noise_25
    }
})
Attachments

Step 3: A Code for a Temperature (Humidity, Pressure) Sensor With Min/Max Indentifiers
Here you find a code for the enviro:bit temperature function.
Parameters signal_min and signal_max set the minimum and maximum temperatures (*C) displayed on the LED matrix. Here setting signal_main=5 and signal_max=30 results in 5 and 6*C being represented by the upper left LED (0,0) and 28/29*C by the lower right LED (4,4).
There is room for optimization: with the current code rising and falling temperatures are leaving a trace of LEDs either turned on or off. On the other hand side this allows to read the current temperature tendency (falling/rising), as the current value is indicated by the blinking LED.
Replacing getTemperature() by getHumidity() or getPressure() and adjusting the signal_min and signal_max values accordingly (e.g. 0/100 % respectively 950/1150 hPA) would allow to display these parameters on the LED matrix.
let Temp_x = 0
let Temp_5 = 0
let signal_delta = 0
let Temp_25 = 0
let Temp_Min = 0
let signal_min = 0
let Temp_Max = 0
let signal_max = 0
basic.showString("Temp")
signal_max = 30
signal_min = 5
signal_delta = signal_max - signal_min
Temp_Max = 0
Temp_Min = 24
basic.forever(function () {
    if (input.buttonIsPressed(Button.A)) {
        Temp_Max = 0
        Temp_Min = 24
        basic.clearScreen()
    }
    while (input.buttonIsPressed(Button.B)) {
        basic.showNumber(Math.round(envirobit.getTemperature()))
        basic.showString("C ")
    }
    Temp_25 = Math.floor((envirobit.getTemperature() - signal_min) / signal_delta * 25)
    if (Temp_25 > 24) {
        Temp_25 = 24
    }
    if (Temp_25 < 0) {
        Temp_25 = 0
    }
    Temp_5 = Math.floor(Temp_25 / 5)
    Temp_x = Temp_25 - Temp_5 * 5
    led.plot(Temp_x, Temp_5)
    basic.pause(100)
    if (Temp_25 < Temp_Max && Temp_25 > Temp_Min) {
        led.unplot(Temp_x, Temp_5)
    }
    if (Temp_25 > Temp_Max) {
        Temp_Max = Temp_25
    }
    if (Temp_25 < Temp_Min) {
        Temp_Min = Temp_25
    }
})
Attachments

Participated in the
Make it Glow Contest 2018


