

Introduction: Mid Century Modern Coffee Cabinet


This mid century modern influenced cabinet is made from baltic birch plywood and walnut plywood. The legs on the mid century cabinet are made from 1 1/2" thick solid walnut and angled for that classic vintage retro vibe. The drawer is custom fitted to hold k-cup coffee packages along with everything else to make a fine cup of coffee. The two hinged doors open up to reveal an adjustable pinned shelf. Iron on edge banding was applied to the baltic birch to hide the texture of the exposed edges and the outer cabinet was painted white with a standard paint roller. The drawer face and two cabinet doors are make from walnut plywood with solid walnut edge banding to hide the plywood edges. Most of the joinery was made from Festool Domino loose tenons which makes for easy alignment when assembling and provides durable long lasting strength. You can find more details and plans on this project at my woodworking website.
Step 1: Cutting Parts for the Case

Begin by cutting all the pieces for the case out of 3/4" baltic birch plywood on the table saw.
Step 2: Edge Banding

Next you’ll want to apply edge banding on any exposed plywood edges. This will give a nice clean edge to paint or finish. The edge banding I got has heat activated glue on one side and is easily attached using an iron.
Step 3: Glue Up


Now you can join and glue up the case. The middle divider is 5 1/4" from the top. I joined all my pieces using the Festool Domino but this can easily be done with pocket hole screws or dowel joinery.
Step 4: Paint the Case

If you plan on painting your case now is a good time to do so.
Step 5: Cutting Leg Supports

Cut out the four leg supports out of solid 2" thick wood on the tablesaw.
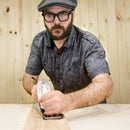
Step 6: Making the Legs

Using a printed template, attach it to the wood with spray adhesive and cut them out on the bandsaw.
Step 7: Reinforce the Legs

You’ll want to reinforce the leg joints with a domino, dowel or mortise & tenon.
Step 8: Glue-up

Gluing up the angled legs can be a little tricky. Cutting some wedges from scraps will make this process easier.
Step 9: Leg Assembly

Once the two leg assemblies are glued up and dry you can then add the short leg supports to complete the leg base. Again, you’ll want to reinforce the joints with a dowel, domino or mortise and tenon.
Step 10: Finishing the Legs

Before attaching the base to the cabinet it’s recommended to add finish first. I’m using a mixture of boiled linseed oil and polyurethane.
Step 11: Attaching the Leg Assembly

Once the finish dries you can then pre-drill and screw the base to the bottom of the cabinet.
Step 12: Cutting Doors and Drawer

Cut the doors and drawer face out of 3/4" walnut plywood.
Step 13: Edge Banding


To cover up the exposed plywood edges, cut some 1/8" walnut strips and glue them on all the doors and drawer edges.
Step 14: Pre Finishing

Finishing the doors and drawer is much easier now before they are installed.
Step 15: Making the Drawer

Next you’ll cut all the pieces for the drawer. Note that the total width of the drawer is 1" smaller than the cabinet opening. This will allow a 1/2" thick drawer slide on each end.
Step 16: Drawer Bottom Groove

After cutting the drawer sides you’ll then cut a groove to hold a 1/8" sheet of plywood for the drawer bottom.
Step 17: Drawer Glue Up

Now you can glue up the drawer with the bottom in place. There is no need to glue in the dividers. We’ll leave them removable.
Step 18: Back Panel

Next you’ll route a 1/8" groove on the rear for a place to tack in a back panel.
Step 19: Attaching Hardware

And finally you can attach all the hardware. You can find more details, photos and plans for this build on my website. Thanks!


