

Introduction: Misting Fan From Scavenged Parts


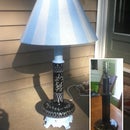


I had an idea for the "Keep It Cool" challenge for a simple misting fan from scavenged parts. I put this together in about 15 minutes and am really impressed with how well it works. This model is really just a "proof of concept". now I just gotta get a bigger fan..........
I'll update this with better pictures once I get a bigger fan. In it's current configuration the fan has an effective range of about 4 feet which is good for 1 child but not so good for multiple and they end up pushing and shoving for positioning. With a big fan and mounting it up high this should work great.
Unfortunately my home internet connection bombed yesterday so I wasn't able to submit this in time.
Parts needed:
fan
thin tubing
fish tank air pump
water bottle
misting nozzle (spray paint tip)
plumbing tape
silicone caulk
tools:
knife
drill
Step 1: Cut & Insert Tubing


first step is to cut two (2) lengths of tubing. one length will go from the water jug to the air pump. the other tube will run from the water jug to the fan. think about how you'll ultimately want the components to be arranged and cut your tubing accordingly. For me I knew that the air pump would sit right next to the jug so I cut that tube short and then gave some extra length for the fan tube.
now that you have your tubes, take the cap off of your water jug and drill two holes in it that are slightly smaller than the tubing. insert your tubing into each hole. the tube that will run to the air pump should only stick into the cap by an inch. the tube that will run to the fan should be able to reach the bottom of the jug .
apply silicone sealant around the tubing on both the inside and the outside of the cap. this isn't for leaking. this is for getting a good air seal.
Step 2: Prepare the Spray Nozzle


I took me a while to figure out a misting nozzle for this. at first I planned on using a sprinkler system nozzle but when I tried it out I couldn't get a good stream. so I started racking my brain...."what is it that is designed to spray with good atomization.....?" and then it hit me....SPRAY PAINT!!!!
Because I work with spray paint a lot and i had an empty spray can so I took the spray tip from it. The tip was in good shape and wasn't dirty (I clean out the tips when I use them by spray the can upside down to clear out paint). I took the tip and soaked it in paint thinner and then rinsed it off.
In order to make the tip fit into the tubing I simply wrapped it with plumbing tape until it was wide enough to create a good seal with the tubing and the water pressure wouldn't push it out. the tape was wider than the tip so I simply trimmed off the excess tape.
Step 3: Clip Nozzle to Fan & Mist Away!


Now that you've prepared the spray tip all you need to do is to clip the tubing to your fan and then turn on your air pump and mist away.
I meant to do this with a big fan but unfortunately our large fan had recently crapped out so all I had was a small fan.
I'm really happy with how this turned out (and my kids dig it). the one problem that I have is that when I turn off the air pump, the air pressure inside the water jug will keep the water pumping. to stop it, I pull the tube off of the air pump and that will relieve the residual air pressure.


