

Introduction: Mud Kitchen


Having recently made a folding potting table for my neice,during research I came across mud kitchens,(which Id never heard of) and decided to make one for her 4 year old daughter for xmas so she can play out under her grannys car port.I had some pallet wood,an old wardrobe ,a broken microwave and poundland-what more do you need ?
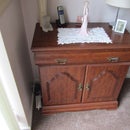
Supplies
pallet wood,old wardrobe,broken microwave,poundland
Step 1: Starting the Build


First step was to form the back from some longer pallet wood and add a small shelf,at this point I had forgotten how small she was as we haven't seen her for a few months due to covid so the whole thing was cut down later by 6 inches,the upper shelf was made deliberately small so she cant put anything big on it that might fall off and bonk her on the head/hands.then the front was made and the two connected by the slats,i made them sideways rather than full length as on the potting table as I knew I was going to cut a 'sink' out plus I could use the off cuts.
Step 2: Adding the Lower Shelf and Microwave


at this stage I realised I was going to run out of pallet wood so made the lower shelf out of a old pine wardrobe side and used the left over to fashion the microwave body-yes it would have been easier to use the complete microwave but Id already cut it up to fit in the recycling bin.The hob rings where cut using a large hole saw and painted black with the red rings made by spraying down a toilet paper tube(use what you have right) at which point the upper shelf was carved to match mummys potting table,still didn't realise it was going to be to tall ;0(
Step 3: Adding the Extras


I had seen some extras in poundland and the sink is actually a dog bowl(don't tell her) and the chalk board is in two slides rather than fixed so it can be easily replaced by..not me -I was also told off by the wife and daughter for making it to big(she's only 4 you know) and not shaping the knobs so had to adjust those and also added some wheels so grandad can fetch it out/put it away when required-these were done the same way as the hobs with a smaller hole saw-the rather fetching art work was also added ;0)
Step 4: Final Steps


As everyone knows little girls love to see their name so added a plaque of hardwood and carved her name(ok I misspelt it but she's only 4 she will never notice.... just kidding)- and then had the dilemma of what colour to paint it -I decided to have a go at charring the wood or shou sugi ban as its called apparently and putting some clear sealer over it,Im still not 100% convinced its the best thing but everyone who has seen it thinks its good, obviously everyone has their own opinion,I sanded down a few over zealous charred bits and it waits Santa in the garage-see what you think,oh and granny says its going to be a sand kitchen no mud allowed-spoilsport


