

Introduction: "Neck Relief" Ergonomic BookStand {3d Print} With Page Holding Mechanism


Do you want to read your favourite books for longer times without neck pain? Do you know someone in your family, may be a child or a grandparent, who feel excruciating pain after a short time of reading? You are not alone. This project is solely taken up and developed to scientifically help people who like to read, gather knowledge without any neck pain. This is the perfect thing to have, or to gift to a reader friend from any aspects of professions.
Issues that I want to resist through this:
"Cervical Spondylitis", "Tension Neck Syndrome", "Thoracic Outlet Syndrome", and "Tendinitis" represent a few of the numerous painful conditions that can affect individuals ranging from children to the elderly, often resulting from pain induced during reading. No treatment—whether medication, calcium supplements, or surgery—can effectively address these issues if the underlying cause is not corrected. You need to go deeper into the mechanism of neck support to pinpoint the cause of neck pain. ONLY then you can provide a solution. See "theory" section below where I tried to do that.
Supplies


You don't need much supplies for this project. You have to just print the file I have provided if you have a 3d printer. If you dont have one, look for a nearby 3D-print services and get it printed. You can also use the ".stl" file and curve the file out of Wood or plastic for your own business purposes too. Its royalty free from my side for a good cause.
Based upon our present design, the required resources/supplies are:
- 3D-Printer for printing the file.
- PLA filament or filament as per your wish.
- You may sign up for free to Autodesk Tinker Cad. (This is not mandatory but if you want to learn how to make this project or any other, give it a try. I found it to be surprisingly good for "tinker"ing with models very easily.)
For Night reading add-on module(optional, as shown)
- Led bulb for 9 volt
- 9 volt battery
- Battery Connector
- Wire
- wire cutter, glue, tape etc
- two M2 or M3 screws to fix light module
- push switch
- soldering rod, tin etc.

Step 1: Theory: Preliminary Research

[Internal skeleton image courtesy: https://www.zygotebody.com/]
Reason for pain: Mechanical lever action:
- The head, weighing around 4.5 kg, is acting as a lever of the 1st class over the neck bones and muscles at a 4:1 ratio or even more(See attached image).
- As per my humble estimation, reading with the head tilted downward 45 degree can exert approximately 4*4.5 kg= 18 kg! of continuous tension on the neck and shoulder muscles, specifically the Splenius and Trapezius muscles. Similar to how crowbars apply prying pressure into objects.
- To alleviate this, it is advisable to maintain a vertical head position. Then the weight goes directly to the neck bones. This ensures that there is only compression to the bone , which is safe. And no tension in the muscles during reading.
- However, habit may lead us to angle our heads downward to see more clearly. So only the reasoning is not enough, we have to make a device which holds the book upright and forces the head into a vertical safe position habitually.
To do this, I researched online about book stands, folding mechanisms and so on. There were few but some were not fold-able, some looked weak for heavy books we may study. So, I tried to make a 3d printable model of a functionally complete book holder with the following features:
- It keeps the book upright. This prevents the head from tilting down.
- Offers adjustable viewing angles.
- Fold-able, so that it takes much less space and easy to carry in bags. This mechanism is inspired by https://cults3d.com/en/3d-model/home/single-print-book-stand OR someone else with the same 3d print file which seemed common online. However, I simplified the hinges and the overall structure. Added thickness so it can bear thicker engineering books without issue.
- A simple but effective innovation by me: Rubber band tightened page holder that manages pages even in a moderate indoor breeze.
- A cute Socket-ball joint lamp for emergency light reading designed by me.
Step 2: Tutorial
This tutorial is not mandatory for the making process. You can just jump straight to the model download and make this. However, this is a documentation of the process. So read along if you want to know how it was made in TinkerCad and see how easily you can make your dream plans also. (I don't have any commercial affiliation with TinkerCad btw.)
Prime features in mind:
- We need to hold the book vertically.
- There needs to be adjustable angles.
- The print out must be contained in a common 3d printer bed of 220mmx220mmx200mm dimensions or as per your dimensions.
- The holder should be foldable for easier storage and transport.
- The holder should be sufficiently strong not to break for even 100mm thick books.
- An instrument should be there to hold pages in decent breeze.
- Also finally, the holder should not take too much print material.
Considering all of this, the geometry was made. It is printable in place. That means the hinges and loops are made in such ways that they interlock during the printing process.
Step 3: TinkerCad Setup

- In my experience, TinkerCad was a very quick to learn, efficient software. You need to go to https://www.tinkercad.com/ .
- Sign up or login for free session. No need to install as it runs of cloud.
- Click Create> 3D Design.
Step 4: Autodesk Tinkercad Workflow


Simple commands:
- View: Mouse wheel scroll to zoom in/out. Middle button for PAN. Right click to rotate view. Also select orthographic view for easier adjustments
- Object: There are basic shapes on the right side as shown in the image. You can drag them on the canvas.Then modify dimensions in the table or drag the geometry itself.
- Holes: Similar to the objects, use the hole option to draw cutouts. Or you can select any object and change it to hole.
- Grouping: Use grouping to combine objects or cut holes from objects.
- Use snap and alignment to make geometry symmetrical.
Thats it! Simple. this is 80% of Tinkercad. One could learn the rest of it intuitively on screen.
If you get stuck anywhere, you can visit https://www.tinkercad.com/learn for in depth tutorial on TinkerCad.
Step 5: Making the Frame


Use one cube for frame and three holes for cutouts
Step 6: Stand


Use two blocks to make a "U" type stand.
Step 7: Hinge


To make the hinge, you make a rod for the connection and a hole to rotate. Then place them in position.
Step 8: Combine

Combine the stand and give it a different colour as shown.
Step 9: Stand Lock


- Make the 2nd stand portion and hinges similarly.
- Estimate where the stand will touch when the book stand is vertical.
- Then cut out the part as shown.
Step 10: Notch


The tip of the notch should not be square for a good fit. it needs to be provided with a chamfer as shown.
Step 11: Rounding


When the stand rotates, it may protrude against the surface. That is why it needs to be rounded. To round we need a cube and a cylinder hole. the resulting object needs to be changed into a hole then cut it from the yellow part of the stand.
Step 12: Lock


Use a hole through the stands. This is so that we can put a screw through to lock the holder when it is folded.
Step 13: Final

- Add the page holder mechanism as shown.
- Add final touches and rounding as required.
- Two small holes are added on each vertical posts for future module addition.A LED bulb for night read or a magnifying glass for elderly readers could be some options of modules.
Step 14: STL

Select the files you need to make .stl and export them.
Step 15: Slicer

To make the .stl files recognised by a 3d printer we need to "slice" them in software.See image. The slicing general options are listed. You can use as you like if you have proper experience.:
- raft required (Provide raft for a worry free printing experience, I have not provided because I use adhesive on printer bed)
- Infill: 10%(Minimum) , triangular (=Total weight 90-100gm) or as you wish
- Support required: no
- Extruder: 205 degree C , Bed: 60 deg C
- Material: PLA
Ask me in comment if you require my detail settings or any help in 3d Printing
Step 16: Print

During printing, I like to keep it inside a enclosure I built for zero wind draft. See in Instructable website : 3d Printer enclosure . Also add hair-spray or 3d print glue on the bed before for better adhesion.
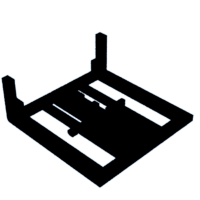
Step 17: Final Stand


Adjust the stand as required for your reading practice. This can be used for Books, Notepads, Tabs and so on.
Step 18: Page Holder

Tie a common rubber band over and around the holder as shown. This will make a spring mechanism to hold the pages in place. Easy and perfect isn't it?
Step 19: Night Light Module


This book holder is made in such a way that you can add modules to it. This is a "Night-reading mode" module that you can add. Now you can read those last pages in the dark without disturbing other people sleeping in the room. You can download the .stl attached. MUST add "Raft" for an issue-less printing .
See the making process in TinkerCAD in the attached images.
I didn't check the longevity of the light but you can use an adapter instead of battery for longer reading. However, I don't recommend reading in dim light for a long time for probable eye issues.)
Attachments

Step 20: Night Light Connection


- Connect the LED, switch and battery connection properly. Then solder as shown.
- Fix the night light module to the book holder with two screws.
Step 21: Final Thoughts

Many old people can no longer enjoy reading their favorite books for extended periods due to neck pain. It is my hope that this device will benefit them as well as a wide range of readers including children, artists, researchers so on.
I hope you like it ! If you want another module to attach, like marker holder/ or magnifying glass holder/ watch or anything you want, post in the comments. I would give it a try if time allows. One side of the module connection is free as of now.
Kindly do not forget to "favourite" this if you find it useful as it will inspire your friend to keep making things.

Second Prize in the
Books and Bookshelves Contest


