

Introduction: One-handed Vegetable Peeler


Our client Aaron needed a way to peel vegetables safely and efficiently while using one hand. He has a limb difference and does many things one-handed, including cooking. There are safety concerns with how he currently peels and it is time consuming. Our team took on the challenge to design and build a simple solution to allow Aaron to peel vegetables so he can enjoy cooking again.
Supplies
Food-grade 3D printing filament
2 Universal C-Clamps with 1/4 And 3/8 Thread Hole
1 Blade of a vegetable peeler, like this Farberware Professional Euro Peeler with Stainless Steel Blade in Black
Step 1: Initial Interview & Observations

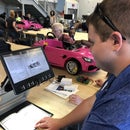
We met virtually with Aaron to introduce ourselves and get to know him. Aaron had video recorded himself peeling a potato so we could see how he adapts and accomplishes the task. He used a strip of bicycle inner tube as a grip and held with the peeler between his legs and used his hand to peel the potato.
To get an idea of his needs, we asked if he wanted a portable product, what kinds of vegetables he peels, and if he wanted something that was automated.
Aaron indicated he wanted a product that is as simple as possible, without any moving parts or automation, that can hold the peels and can go on his countertop.
Step 2: Brainstorming & Design Ideas


We listed out the constraints:
- needed to stand on the countertop
- rubber grips on the legs/bottom
- somewhere for the peels to go
- safety shield around the blade area to protect fingers
We found similar designs and products on the market, such as the one-handed vegetable peeler or the food grater and scraper. Neither were quite what Aaron wanted, but he liked the one-handed vegetable peer idea and suggested a few modifications.
The design we settled on was based on the one-handed vegetable peeler but adding a stabilizing stand on the back that would grip the countertop.
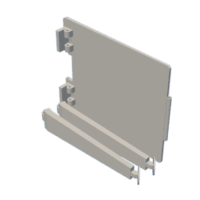
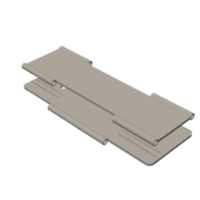
Step 3: 3D Printed Prototypes


For the first prototype, we attempted to 3D print the arms and main body as one and the clamping board and small piece that would be parallel with the tabletop were printed separately. After a couple of unexpected printer errors that would cause us to reprint twice, a prototype was made.
This prototype was rough but an amazing learning experience. Here are some of the discoveries we made:
- the surface was covered with the support layers for the print, making it a lot of work to clean up and smooth out
- the holes for attaching the pieces were extremely weak and brittle because of the orientation we printed them
- the final problem was that the cutout to fit the blade was too small and did not allow us to fit the peeler blade into the design.
From here, we got some advice from mentors and brainstormed methods for making a better design. The changes made for the final prototype were:
- editing the dimensions to better fit the blade
- added a chamfer to all the corners
- removed the print in leg joint and changed it to a similar joint to the clamp piece and middle piece by using a wooden dowel. This will make it easy to disassemble and store and clean each component as necessary
- increased the thickness of the dowel joints so that they will have more durability
We met with Aaron so he could try out our prototype and give us some feedback. He let us know what he liked on our prototype and gave us more ideas to make improvements. Overall, it was a great meeting that sparked our next efforts into our final prototype, which would only need a few minor adjustments.
Step 4: Presenting the Finished Project


We were excited to deliver the peeler to Aaron and have him give it a try. Being an engineer himself, he really liked our approach to the peeler tool and really appreciated our efforts in designing a prototype that would suit his liking and cater to his needs. He was very happy with the uniquely crafted vegetable peeler and said later that it made his meal preparation process a lot easier and safer.


