

Introduction: PastaMachineMotor - SRO2005


Hi !
This time there will be 3D printing, electronics and motor ! =)
My wife makes polymer clay jewellery (Fimo, Cernit...) and she uses a pasta machine to laminate the polymer clay. This machine works with a crank handle that allows the rollers to rotate, but for more simplicity she wanted a motor instead of the crank handle.
There are motors for these machines but they are often large, heavy and work with an electric plug (230V/110V motor). Moreover, they are rather expensive, about a hundred euros.
However, nothing very complicated to do yourself. So I started this project, especially since I recently invested in a 3D printer so it was an opportunity to use this new material for a concrete use !
Step 1: Tools and Electronics Components

Electronics components :
- An AC to USB 5V 2A adapter (as for smartphones)
- A female USB port (to connect the power supply)
- USB cable to connect USB adapter to the USB port
- 12V 40RPM motor with a high torque
- DC-DC boost module (to increase the voltage from +5V to +12V for the motor)
- An on/off switch
- 250mA fuse and a fuse holder
- Blue LED (or other color...)
- Resistor to limit the current throught the LED
- 2 Prototyping PCBs
- Few wires at least 24 AWG
Tools :
- soldering iron
- welding wire
- A 3D printer
Step 2: The Choice of Components
In this part I will explain in more detail the choice of some components:
The supply voltage:
First of all I chose to use a low voltage for this project to be able to use the final object with more security. I don't have enough knowledge to try to use it in 230V/110V, especially since the chassis of the pasta machine is made of metal...
So I chose a 5V voltage because nowadays it is very easy to find a 5V voltage source, a simple mobile phone charger is perfect.
The power supply:
I have chosen to take a mobile phone AC adapter, it can provide 2A, which is more than enough to power the entire system.
The motor:
I needed a motor with a high torque because the power to turn the rollers when the paste passes between them must be quite high. After searching on the internet my choice was a 12V motor, I didn't find a 5V motor with a high enough torque.
For the speed I chose 40RPM because it is the closest thing to the rotation gesture when my wife uses the crank of the pasta machine.
Connectivity:
I chose to use a USB-B port as there is on the printers because I think they are really strong, I could have used a micro-USB port for example but I was afraid that the cable would be hung and that it would break the port.
The LED:
I chose to use a blue LED because the ones I own have a good brightness, It is obviously necessary to associate a resistance to this LED in order to limit the current that flows through it. This resistance is calculated very simply: (Valim-Vf)/Iled=(5-3.8)/0.020=60 Ohm
The fuse:
After performing different motor load tests by passing Fimo paste between the machine rollers, I saw that the motor could consume up to 200mA of current. So I chose a 250mA fuse in case of a short circuit on the system.
The DC-DC boost module:
I had these DC-DC boost modules in stock because I had bought several of them for other projects. Depending on the characteristics, they can provide up to 2A, but they are recommended for 1A, which is enough to power the motor.
The wire section:
I chose 24AWG wires because I had them in stock and they are largely big enough to pass 200mA, based on these tables, it seems possible to pass 3.5A through cables of this section:
https://www.powerstream.com/Wire_Size.htm
https://en.wikipedia.org/wiki/American_wire_gauge#...
While doing this research I also found interesting informations about the voltage drop according to the length, section and current that crosses the cable, I put it here it is quite informative:
Step 3: The Cost
Compared to the purchase of a compatible motor for a pasta machine, this realization is really cheap! Indeed a compatible motor costs about a hundred euros I had to spend about 15€ but I recovered a lot of defective electronic card components (Recycling is well done... =D)
For a little more details:
- Motor 9€
- DC-DC Boost 0,55€
- 2 Prototyping PCBs for a few euro cents
- LED and resistor a few cents of euros
- Fuse 0€ (recycling)
- Fuse holder 0€ (recycling)
- Switch 0€ (recycling)
- USB port 0€ (recycling)
- A few electric wires 0€ (recycling)
- The cost in filaments for 3D printing of about 5€
If you decide to do this project yourself, it may cost you more, but trying to always recover electronic components from old device cards that no longer work, it's 100% positive!
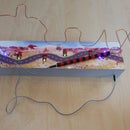
Step 4: 3D Printing


As I said in the introduction, I recently bought a 3D printer, it is a Prusa i3 MK3S. Absolutely great when you like to design projects !
I created 3 parts for this project:
- The box that will contain the motor and electronics, this box will be fixed on the side of the pasta machine
- A motor support that perfectly matches the shape of the motor and will be glued in the main housing
- An adapter between the motor axis and the axis that drives the rollers of the pasta machine.
I used Autodesk Fusion 360 software to design the parts and PrusaSlicer software to generate the gcode file that the printer uses to print the part.
The parts are available on Thingiverse by following this link:
https://www.thingiverse.com/thing:3810346
I printed the axis with a layer height of 0.2mm and a infill of 100% in order to make it as solid as possible and I printed the others parts with a layer height of 0.2mm and a infill of 30%. The material used is Prusament PLA Purple.
Step 5: Electronic Diagram

The electronic part is very simple. A 5V voltage arrives at the power connector, followed by a fuse to protect the system, then a switch to control start/stop, and a LED to see if the system is started properly.
When the switch is turned ON, the 5V voltage reaches the terminals of a module that converts the voltage to 12V and then supplies the motor.
I drew the assembly diagram on a slate because it is so simple that I did not make any for the realization of my project. So I apologize for the poor quality of the image, but I didn't want to redo a schematic on the computer for something so simple. Besides, I can't really find a software or website that allows me to draw electronic diagrams more simply than with large CAD software (like Cadence, Eagle, etc...). If you have software names that are simpler and therefore faster than these big software to make small schematics, tell me in the comments ;)
Step 6: Soldering and Assembly


I placed and soldered the components together as shown in the diagram. I had designed the case so that it would fit as well as possible to my different components (USB port, fuse holder, LED, atypical shape of the pasta machine). So it was quite easy to assemble, the longest thing in the end was to design the part in 3D with all the constraints to respect to place all the elements. But I didn't have to reprint the piece a second time, which is already an achievement for me =D
I fixed the 5V-12V module, USB port, fuse holder and LED with a little hot glue. I could have provided specific fasteners for these elements during the 3D design, but I preferred to keep "flexibility" in case of problems during assembly.
I think the hardest part was gluing the motor support to the bottom of the main hull so that the motor axis would fall right in front of the machine axis, I had to do it several times before getting a correct result but I finally got there, and considering the amount of glue I put in... it will never move again!
Then I fixed the complete case to the frame of the pasta machine. Thanks to the 3D printing, my part adapted perfectly to the side of the machine, so it fitted correctly without forcing but I still used 2 cable ties that I passed through slots on the pasta machine and in slots that I had planned on my case, it is clean and it holds really well.
I had the idea to do it like that because it's a system that is present in several places on my 3D printer and it's quite ingenious.
Step 7: Let's Go for the Test !
In this video I test the lamination of a piece of Fimo polymer clay at different thicknesses.
The machine allows 6 different settings: 2.2mm-2mm-1.6mm-1.2mm-0.8mm-0.4mm.
You can see on the video that the motor works well without forcing too much on all thicknesses except on the 0.4mm one where we see that the motor really forces but it is a setting that my wife never uses so in my case it is not at all important. And even if she used this setting, the motor only forces for a few seconds, so there is very little chance of damaging it.
Conclusion, it is a system that works really well! This is the first time I've used my 3D printer for a concrete project and I'm really happy about it!
See you soon for new projects!


