

Introduction: Pendant Lamps


Pendant lamps are maybe the most versatile of all indoor lamps. You don't even need a table to put them on. They can go ANYWHERE in a room because, conveniently, ceiling is everywhere! :)
Step 1: Pendant Lamp Anatomy
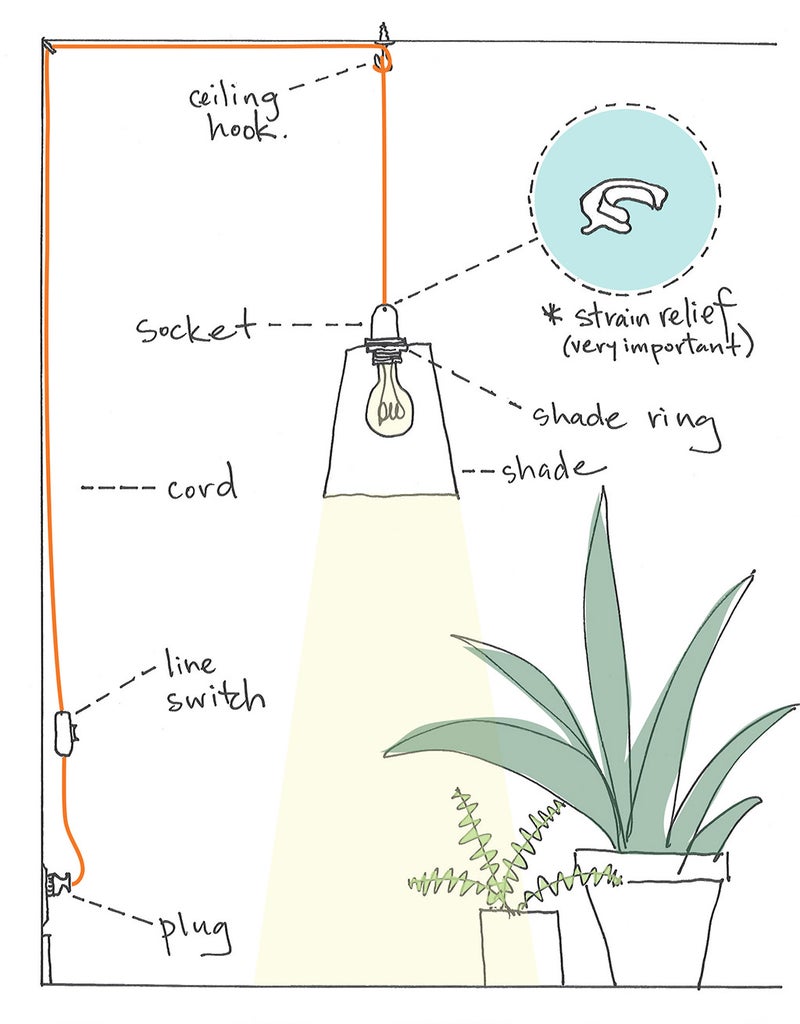
Every hanging pendant lamp has the above parts (or similar versions with the same function). The most important thing to remember to add to a pendant lamp cord set is a strain relief - whether it's the small metal one that goes INSIDE the socket like the one drawn above, or the exterior one.
A strain relief holds the weight of the shade and protects the cord/socket connections from being pulled out
Step 2: Hanging Pendant Project Ideas
The wonderful thing about pendant lamps is that there are so many potential shades hiding in all kinds of unexpected places! In the instructable link below, I show you 5 different ways to make hanging lamps that will use the skills you've learned so far:
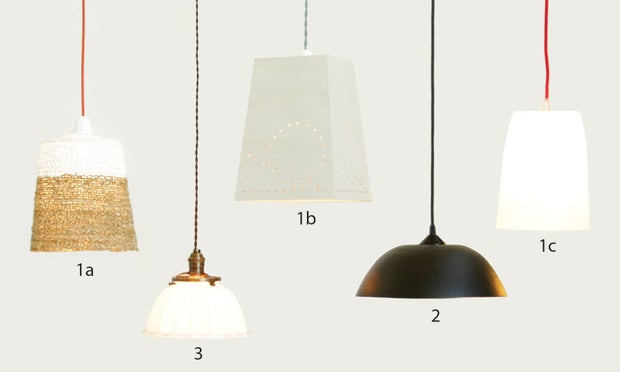
Choose from any of the above!
#1 a,b,& c
#2

#3
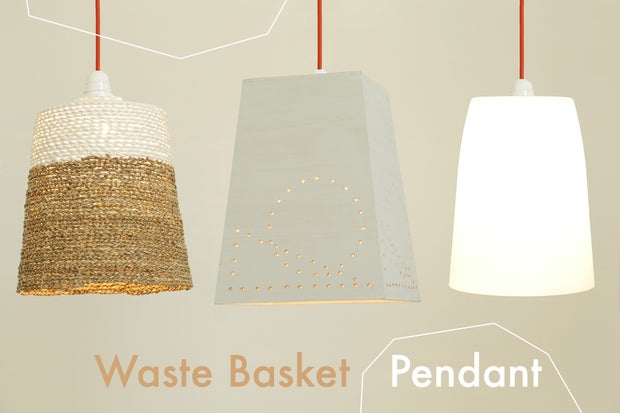
- Choice #1 a,b,& c: A simple case of re-imagined identity. Turn a waste paper basket into a shade!
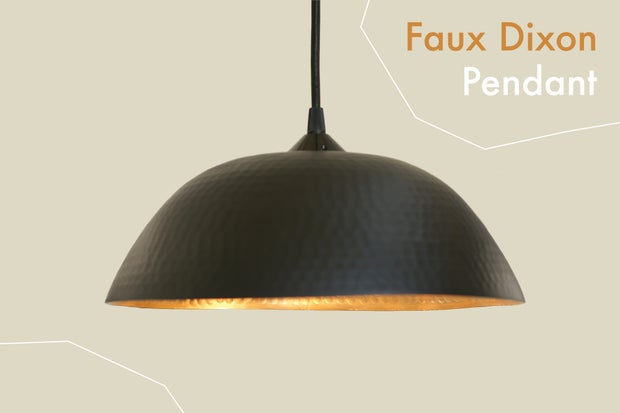
- Choice # 2: Riffing off Tom Dixon's 'Beat Lamps', this pendant will add a bit of industrial class to any space.
- Choice #3: Repurposing a vintage jello mold and adding vintage looking parts = a Victorian style charmer.
OR go your own way and come up with your own design!!
Step 3: How to Hang a Pendant

When installing your pendant light, how high you hang it depends on how you're going to use it. If it's going over a work surface or dining table, you'll want to choose a height that allows for total coverage of your work/dining area. This is usually anywhere from 28-38" above the surface, keeping in mind you'll want an unobstructed view across the table/counter.
If you have a large area you are trying to light, you may need two or three pendants to get an adequate amount of light. The general rule of thumb is one pendant for ever 20 - 32" surface area, depending on the how large the opening of the shade is combined with how bright your bulb is.
If it's going above a couch or leisure chair as a reading light, just make sure it's high enough that you don't hit your head when getting up and down.
I recommend using a standard ceiling hook and a 'U' staple nail (or another cable wrangling piece of hardware). If you have a wood ceiling, you can use a simple screw-in hook (pictured below right), but if you have a drywall/sheetrock ceiling, use a hook with a toggle bolt (below left). The 'U' staple is to secure the cord into the corner of the wall and ceiling and help direct the cord towards the wall outlet.

(Left) Toggle Bolt Hook For Drywall Ceilings, (Right) Screw-In Hook For Wood Ceilings
Step 4: How to Secure the Cord
Once you have picked a spot, installed a hook, and figured out how high you want the pendant to hang, take a small zip tie and secure it around a small loop in the cord.
The great thing about using a zip tie is that you can leave it a little bit loose for minor height adjustments and then tighten it all the way up once you have the pendant exactly where you want it!

Step 1 - One zip tie, preferably a small one in whatever color will be most unnoticeable.

Step 2 - Make a small loop in the cord at the height you want the pendant to hang, minus the pendent depth measurement.

Step 3 - Put the zip tie around the overlapping area of the cord.

Step 4 - Tighten it so that you are still able to adjust the cord.

Step 5 - Once you've confirmed the height, snip off the excess zip tie.

Step 6 - Hang your pendant!
Step 5: That's a Wrap!
In the next lesson you will learn about the anatomy of table lamps – and get a link to possible table lamp projects to try!


