

Introduction: Plastic Vise From 2 IKEA Cutting Boards


Recently I was restoring an old vise and I wanted to make some soft jaws to prevent marring on delicate work. Scrounging for some plastic to cover the jaws I came across an old cutting board that did the trick. In the process of attaching the plastic to the vise jaws, I thought it might be useful to try and make a plastic vise altogether using pieces cut from a couple of $2 IKEA cutting boards and laminated together with some hot glue.
The results of my project is the subject of this Instructable. So lets begin!
Step 1: Materials & Tools


Material:
- (2) IKEA LEGITM Cutting boards 13.5" x 9.5" x 1/4"
- (4) Sticks of High Temperature Glue sticks 10" x 1/2"diameter
- (1) 5/16" x 6" carriage bolt
- (1) 5/16" x 3" carriage bolt
- (2) 5/16" nuts
- Spray-on contact adhesive
- 60 grit sandpaper
- Scissors
Tools:
- Printer (to make copies of the supplied template)
- High Temperature Glue Gun
- Band Saw or Coping Saw
- Wood Rasp
- Drill
- 5/16" drill bit
- Utility knife and extra blades
- Small chisel
- propane torch
Attachments

Step 2: Template


- Begin by printing (2) copies the supplied PDF file which is the template of the various pieces which make up the vise. One copy will be used as a build reference and the other copy to be cut out as the template.
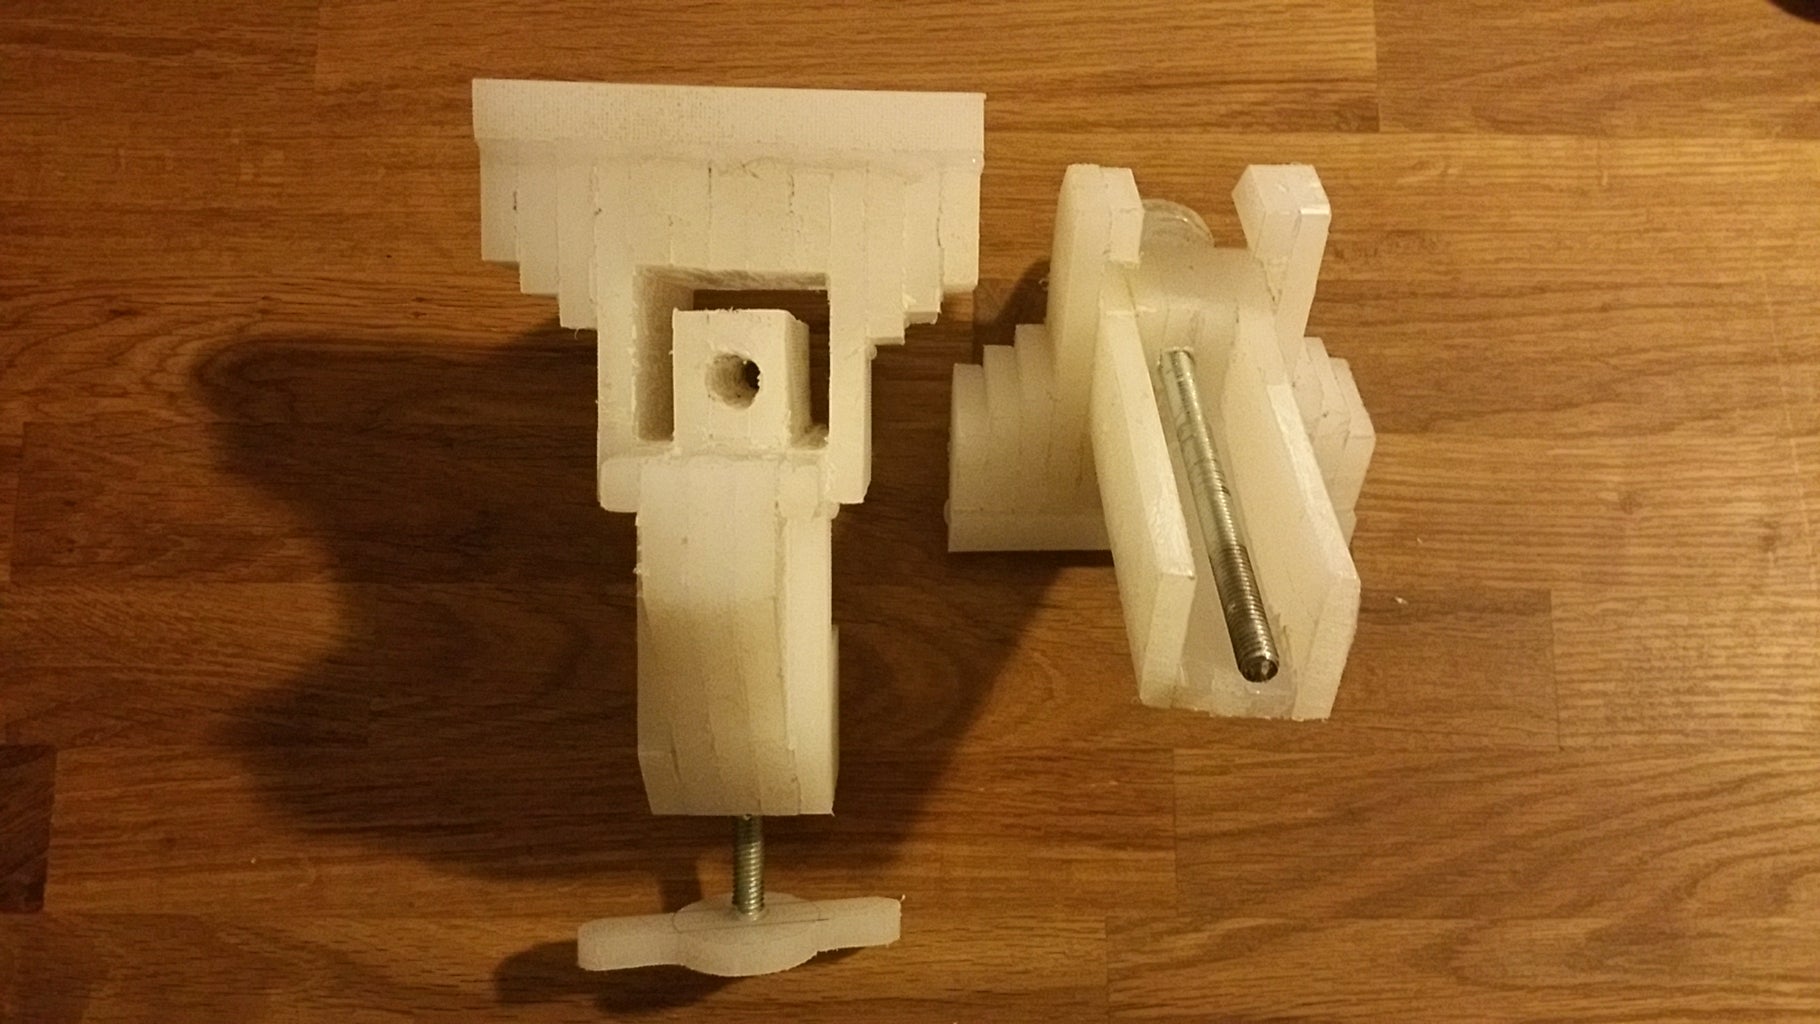
- The 1st and 2nd pages are images of the laminated vise fully assembled, minus the 2 screws used to hold the vise to a bench and to engage the clamping action.
- Proceed to cut out the pieces and lay them out in numbered order. There is a set of templates for the FIXED JAW (#1 thru #7) and for the MOVING JAW (#9 thru #15) along with a view showing how the layers are to be assembled. Yeah, I know what about #8? Ignore it, I was absent that day in school.
Step 3: Layout


- All the pieces have been sized to fit onto the 2 cutting boards. It is highly recommended to use the image of the layout on the two boards to orient the templates.
- To maximize the layout on the boards, some of the templates will need to be inverted. Specifically, one of each from templates #2, #3, #4, & #10.
- Spray contact adhesive on one face of each of the two cutting boards.
- On the back side of each template, apply a light coating of contact adhesive.
- Wait 5 minutes before applying the templates to the board in the order shown.
Step 4: Cutting the Pieces From the Board


This step is pretty straightforward. Using a saw, preferably a band saw or scroll saw cut out the various pieces from the board as close to the line as you can get. You can use a manual coping saw, but this step is extremely tedious even with a power tool.
A word of advise, have a vacuum handy as this creates allot of plastic saw dust.
Step 5: Gluing the Pieces

Ok. Now the fun begins.
I wish I had pictures of the glue up process, but I didn't have a free hand to snap some shots while I applied glue
WARNING: Hot Glue can be messy to work with and also painful if gotten on bare skin. Do so at your own risk.
- Plug in the glue gun and set it to high temp. Let it warm up until the glue flows freely.
- Remove all the paper backings from the cut plastic pieces. Have a 2nd printout handy or use a permanent marker to number the pieces after removing the paper.
- Its best to complete each layer on both sides of the center layer before proceeding to the next layer.
- Some layers have multiple pieces with the same number. Use the 2nd copy of the printout to get a feel of how the parts are oriented to one another and the spacing between pieces.
- Start with center layer (#1 for the FIXED JAW and layer #9 for the MOVING JAW).
- Dry fit the subsequent layer to ensure proper alignment.
- Apply hot glue to one face of the contacting surface. Quickly press it to the mating surface of the next part, align and apply pressure for several seconds. The bond between the two parts occurs very fast and is extremely strong. There is very little room for error. If you see the joint is not to your satisfaction, immediately separate the parts and let the glue cool. A utility knife can be used to scrape the parts clean and be reused.
- Continue to build up the layers until the parts are complete.
Step 6: Fitting
The parts won't fit initially due to the tight line-to-line fit of the two parts.
- Using a utility knife, remove excess glue from the edges which makeup the sliding contact between the FIXED & MOVING JAWS
- With a flat surface available secure a piece of 60 grit sandpaper to it. Proceed to sand the faces to remove any misalignment of the layers due to the glue up. Feel free to shape the jaws to your liking.
- I found a chisel and rasp to be effective in shaping the U-shaped channel of the FIXED JAW.
- Work the two parts with sandpaper, chisel and rasp until the two parts slide freely together.
Step 7: Threaded Hardware (Jaw Screw)


- Using a 5/16" drill bit, enlarge the square hole that runs the length of the FIXED JAW and the MOVING JAW
- The 5/6" nut will be locked into the FIXED JAW by heating up with a torch and pressing it to the backside of the FIXED JAW.
- Thread the nut onto the 6" bolt halfway down.
- While holding the bolt in a vise or with pliers, heat up the nut with a torch. Try to keep the heat localized to the nut.
- With the nut sufficiently heated, slide the bolt into the 5/16" hole of the FIXED JAW. The nut will begin melting the plastic. Push it down about 2" into the body of the FIXED JAW. Make sure the bolt is straight in the body as the nut cools.
- Unscrew the bolt.
Step 8: Threaded Hardware (Bench Screw)


- Using a 5/16" drill bit, enlarge the square hole in the FIXED JAW on the feature which will allow it to be clamped to a table or bench.
- Slide the 3" carriage bolt into the hole.
- Thread the nut onto the bolt.
- Using the torch, carefully heat up the nut with localized heat.
- When sufficiently heated, pull the end of the bolt so as to drive the heated nut into the body of the FIXED JAW. The nut will start to melt the plastic. Continue to pull on the nut until it is flush with the C-channel face which will allow it to clamp to a bench.
Step 9: Finishing Touches


With some of the leftover scraps, I made a couple of knobs which was not included in the templates. Attaching them to the ends of the carriage bolts was done in the same manner using the torch.
Step 10: Final Thoughts
I have to admit, I rushed to get this project done to enter it by the deadline for the Make it Plastics Contest. Some things I would have done differently:
- The Jaw screw is not secured to the MOVING JAW. In the closing action, the screw pulls the two halves together applying a great deal of force surprisingly. In the opening action, the screw will back out, but the jaws have to be opened manually. Not a big deal, but a little inconvenient and easily remedied in the future.
- More pictures and maybe a video! I know, sorry about that. Again, it was hard to take pics of the gluing operation alone. Next time I'll set the camera on a tripod.
- Given more time, I would have liked to try drawing the template on TinkerCAD.

Participated in the
Plastics Contest


