

Introduction: Poor Man's Landscape PAR Can


My halogen lamp-based low voltage landscape lighting is aging. Factoring that in with the fact that some of my bulbs are 50w and can cost $5 to replace I started thinking of an alternative.
Flood lamps based on compact fluorescent lamps (aka CFL) are commonly available both in traditional and colored versions. A CFL flood lamp rated with the same output as a 100w traditional flood lamp uses only about 23w, plus they are rated to last much longer than the roughly 2000 hour lifetime of your traditional incandescent lamp. Sounded like it was worth trying to me.
My first effort was to simply put the CFL into a stake-based socket. Worked well for holding the lamp, but there is a lot of light "spill" to the sides which creates a large amount of glare. Also, I was using a colored CFL and there is a gap where the reflector portion ends and the colored lens begins, giving an unattractive ring of white light.
Wandering through the garden shop of my local mega home warehouse store, I spied a plastic flower pot that looked deep enough to house the CFL - and the Poor Man's Landscape PAR Can was born.
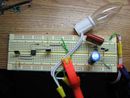
Step 1: Gather Materials

Warning: DO NOT USE THIS TECHNIQUE WITH INCANDESCENT LAMPS. THEY ARE MUCH HOTTER THAN CFLs AND WILL MELT THE PLASTIC.
That said...
Step 1 - Gather Materials
- CFL flood lamp, color optional
- stake base flood lamp holder, one with a removable rubber grommet is ideal
- plastic flower pot
- black spray paint (optional)
Step 2: Drill Flower Pot

I used a 1 3/4" hole saw to make the hole for the base of the CFL in the flower pot. Any combination of knives, saws, files, etc. can be used to accomplish the same.
Don't make this too big, but it has to be big enough for the base of the CFL to extend far enough to be able to screw into the flood lamp holder.
Step 3: Assemble


Assembly is a snap...
1) If you got a flood lamp holder with a rubber grommet, remove it.
2) Put the grommet on the base of the CFL
3) Put the CFL/grommet assembly through the drilled flower pot
4) Screw the CFL/grommet/flower pot assembly into the lamp holder
Note: the grommet helps provide tension to hold the flower pot snugly in place.
Step 4: Optional - Paint Flower Pot

The flower pot is not overly thick, and some light shows through the sides. This may or may not be an issue for you.
Spraying the inside and outside of the flower pot prior to final assembly with black paint will help cut this down. This is more a matter of taste than a requirement.
I hope you've enjoyed this step by step guide to making a Poor Man's Landscape PAR Can!
Step 5: After Thoughts
This project was inspired by another Instructable:
https://www.instructables.com/id/Outdoor-PAR-Flood-Light-Cans/
"Credit where credit is due."
Also, the 100w equivalent light output is a lot of light and might not suit your purpose. The low heat output of the CFL would likely allow use of some cheap neutral density filter or diffuser materials. I'm thinking disks cut from milk jugs or similar... maybe with a haze of black paint if needed. For my purposes, "as-is" works fine.
Enjoy!


