

Introduction: Raspberry Pi With 4 Relay Module ( for Home Automation )


Firstly we will connect the raspberry and the 4 array module and test it locally. The next step is to make a web app that will control our module . We will make it with apache server , php , javascript , jquery , bootstrap , bootstrap- switch buttons and some python . Everything is explained with a comments when you open the file , you also can see the documentation in github. The files are uploaded here and can be also find in github .
Step 1: What You Need

We need :
- Raspberry Pi
- 4 Array Relay Module
- 6 Wires
- Wifi Dongle
- Filezilla (optional)
- SHH (optional)
Step 2: Wiring

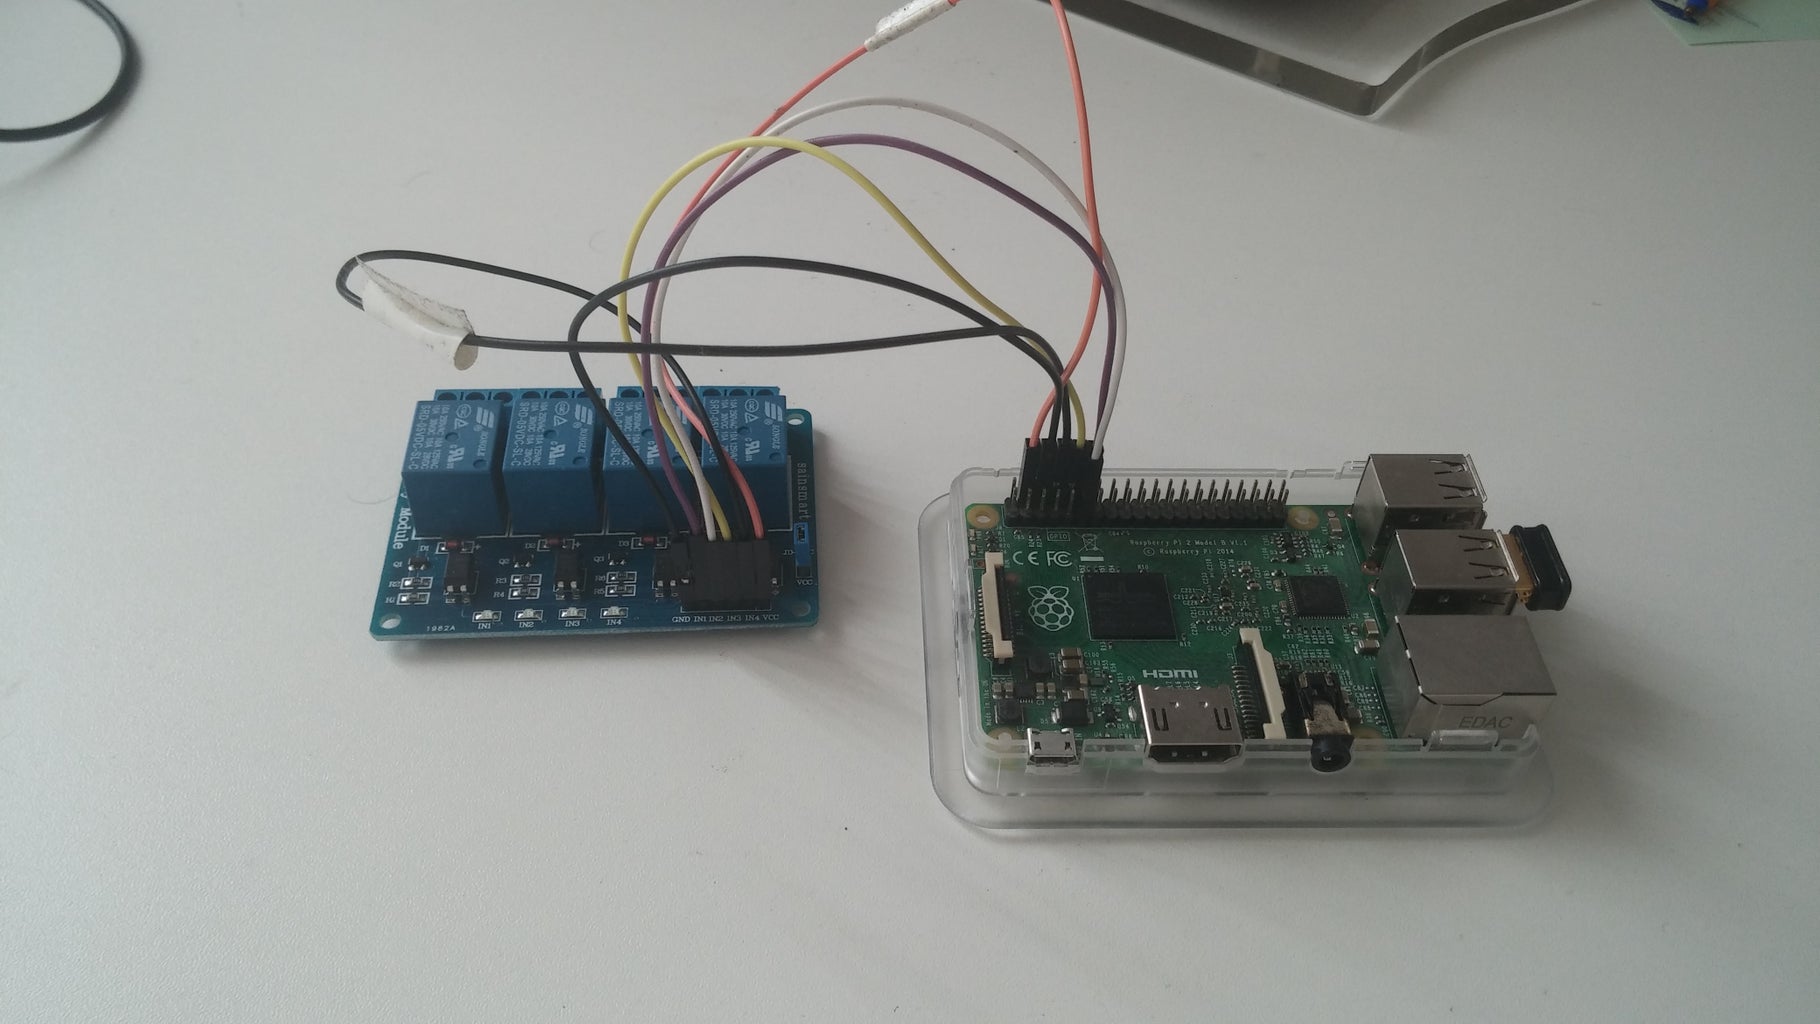

We need to connect our Raspberry and the module .We will get the 5V from the Raspberry (not very recommended but its easy ) .So lets begin :
PI GPIO | Relay module
Pin 4 ---------VCC
Pin 6 ---------GND
Pin 8 ----------IN4
Pin 10 ---------IN3
Pin 11 ---------IN2
Pin 12 ---------IN1
Step 3: Testing


Now we need to start the raspberry and to connect to the power supply and connect to it over FTP with Filezilla or start it on monitor . Next download and put the test_relay.py file in the main dir (home/pi).Then start the python script by typing :
sudo python test_relay.py
If leds start flashing from IN1 to IN4 and shutdown from IN4 to IN1 then everything is okey and the wiring is like currect .We can move to the next step .
Explanation
The relay boards are powered by 5v and the relays are triggered by taking the input pin to ground. Since the Raspberry Pi's GPIO pins output 3.3v I used a set of transistors to take the relay pins to ground.
So when you are setting the GPIO output value:
1) 0 the relay starts ;
2) 1 the relay stops .
Attachments

Step 4: Installing Apache and Php
We will need them for the server part .Helpfull link.
To install apache2 we need to run :
sudo apt-get install apache2 -y
To test the web server we can you on the raspberry browser:
http://localhost/
It's also an option to use the Pi local ip address (Get the ip: hostname -I ):
http://192.168.1.10
Next install PHP module for APACHE :
sudo apt-get install php libapache2-mod-php
Clone the repo:
git clone https://github.com/kasadawa/PiRelay.git
Place the files into the apache root dir (ex: /var/www/html ):
sudo cp -r ~/PiRelay/var /
Type your Pi IP address :
http://YourPaspberryIp/index.html
Step 5: Uploading the Needed Files for Your Web App

You need to download the .rar file , extract it and copy the files with Filezilla to the main dir of Raspberry home/pi and to the var/www. For pasting the files into var/www you need to set a permision .
at var/www<br>bootstrap.css<br>bootstrap-switch.css<br>bootstrap-switch.js<br>changeState.php<br>firstCheck.php<br>index.html<br>jquery.js
at home/pi
firstCheck.py
relay_off.py
relay_on.py
When you are done coping the files , just go to your browser , type RaspberryIP/index.html (ex: 192.168.1.23/index.html) and the webpage will be opened .And also you can test it and remotely control the relays from any device that is connected to your local network(router) .
Attachments
Step 6: How It Works


I will explain it shortly. If you want to get to more details you can see the project in github.
When we click on the button , the ajax request has been called and the php file from it is called . From the php we execute a python script file with some params . The python script return us json converted array , which we pass to the php and the php passes it to html file .We can go only in the one way but if we want to reload the page we need in what position the relays are . The other point is if we dont do it that way there is no feedback and we cant see what is happening .
Please share and write a comment bellow if it was usefull .
If you like my tutorial please donate.
To the next time .


