

Introduction: Recycled Material Designer Lamp


I won't hide it, "I love lamp!". When I see a cool lamp, I like to think about how I can make it with what I can find around my house. Then it generally turns out that I don't have everything I need and all of my Instructable endeavours cost me an arm a leg because I don't have all the tools or materials I need...
The idea started in my head, and as you can see in my drawing for the design, my artistic abilities are barely existant. So I just start building and see how close I can get to building what I envision.
For this project I used:
Material:
Scrap wood that was used to fix a fence in my parents' backyard;
1*3/8-6 inch threaded bolt
2*3/8-3 inch bolt
1*3/8-4 inch bolt
3/8 washers
Nuts with matching thread
6*2 inch robertson screws
Scrap wire and switch
Thrift store bought floating ceiling lamp fixture ($4)
Bluetooth controlled lightbulb bought on amazon ($30 on amazon.ca)
Tools:
Laminate rotary tools
Screw driver
Wrench
Files
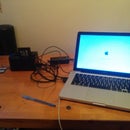
Step 1: Setting Up Shop


Seeing that this project has a few different steps and that I have never done something like this before, I had to make some of my stands and organize my workbench differently.
You will see in the next step that I had to modify my router plate to be able to use it the way I wanted it.
Step 2: A Bit of Aesthetic Testing


In order to get as close to the curve and look I was looking for, my original thoughts not being included, I had to try out a few setups with different rotation angles and stopping areas.
That is why instead of using the brass knobs, I opted to use the longer screw to mark off where the curve would end.
The router tool plate that I bought didn't fit my router so I had to drill holes in the plastic in order to screw in the router using its threaded nuts.
Step 3: Curves, and Luck


A woodworking tool shop near my house had a sale one day, and I bought a rotary tool drill press in order to pilot straight holes where I needed them at the end of the boards.
I then used a 3/8 drill bit and a drill to make a hole that would fit the bolts, and the brass knobs that came as pilot bits for the router plate.
I put the brass knobs through the 3/8 holes in the boards and turned the board using the router to cut as much as possible on one side of the boards. I then flipped the boards over and cut the second side to even things out seeing as the boards were thicker than the router bit's length.
There was bit of luck and wishing things would work out when this was being accomplished.
Lesson learned: Get a drill press!
It allows you to drill straight holes (obviously).
The holes I drilled in after piloting the holes with the rotary tool weren't straight. Therefore, when I put the knobs in to router the ends of the boards they would be crooked, and when I would form the ends they weren't even when I flipped the boards over.
To even things out I filled down the uneven edges and did my best to make everything "look" straight.
Step 4: Base and Feet Boards


For the base I used the same angles and curves for the feet boards.
I then measured out the thickness of the boards that would make the knees of the lamp's legs and torso so it could fit the 5 boards I would need to get everything to work together.
Once the measurements were marked on the underside of the base board I drill 1/4 inch holes so I could screw the feet in from the underside.
Step 5: Lamp Head


I once again used the same angles and curves to make the head board that would hold the bulb and head of the lamp.
Using the same screws as for the feet, I took the head apart, drilled holes into the aluminum and screwed in the head board.
Step 6: Assembling


The end of the lamp involved slotting bolts into washers and bolts only to find out that those crooked holes would have to widened to fits the bolts in straight.
The original idea was to use wing nuts to clamp the boards together, but they didn't have 3/8 wing nuts at the Home Depot, or I din't find any. I used 3/8 nuts instead, and now if the lamp needs to be adjusted I need a 3/8 wrench to loosen, tighten, and maintain the desired angle for the lamp.
Step 7: The Final Product
In the end I had to make a new head board that was longer so there would be more flexibility in the lamp angling at the head.
As I write this I am hoping that you are understanding how I assembled the lamp through the pictures.
Your comments with regards to bettering the instructions would be much appreciated!


