

Introduction: Robotics for School: Create Four Easy Robots Using Simple Materials


This story starts on October of 2022, when I volunteered to be mentor of Bahadir, an amazing Grade 5 kid, who required personalized STEAM lessons once per week. Inspired by the Superhero Cyborgs project by Autodesk and KidMob, my intention was to train him in the basics of robotics and bionics, so in the future he can create his own solutions. Every week we developed a new project; and I chose the best four of them to create a tutorial in basic robotics, so educators around the world can easily recreate these toys.
Every project had the following constraints:
- User-centered: materials, tools and processes had to consider student's anatomical features, so he can build safely, but without sacrificing independent work and taking creative risks.
- Resources availability: materials had to be affordable and easy to obtain locally.
- Environmentally friendly: most of the materials must be biodegradable, reusable, or at least, repurposed (upcycled).
- Time restrictions: we only had 40 minutes to complete each project.
- KISS (Keep It Short and Simple): projects had to be easy to build and repair. In case of a broken part or dead batteries, they must be easy to replace, to extend the life time of the product.
- Wow factor: awesome and fun projects increase student's confidence and interest for engineering and technology.
These activities are intended to be completed by the student. However, every time you see a phrase in cursive like this:
"TEACHER STEP: Use a small flat screwdriver to open a hole on one side of the rubber washer."
That's an activity that must be, for safety reasons, executed by an adult (educator, parent or guardian.)
(NOTE: Parents and kid approved the publication of photos and videos where he appears.)
Supplies


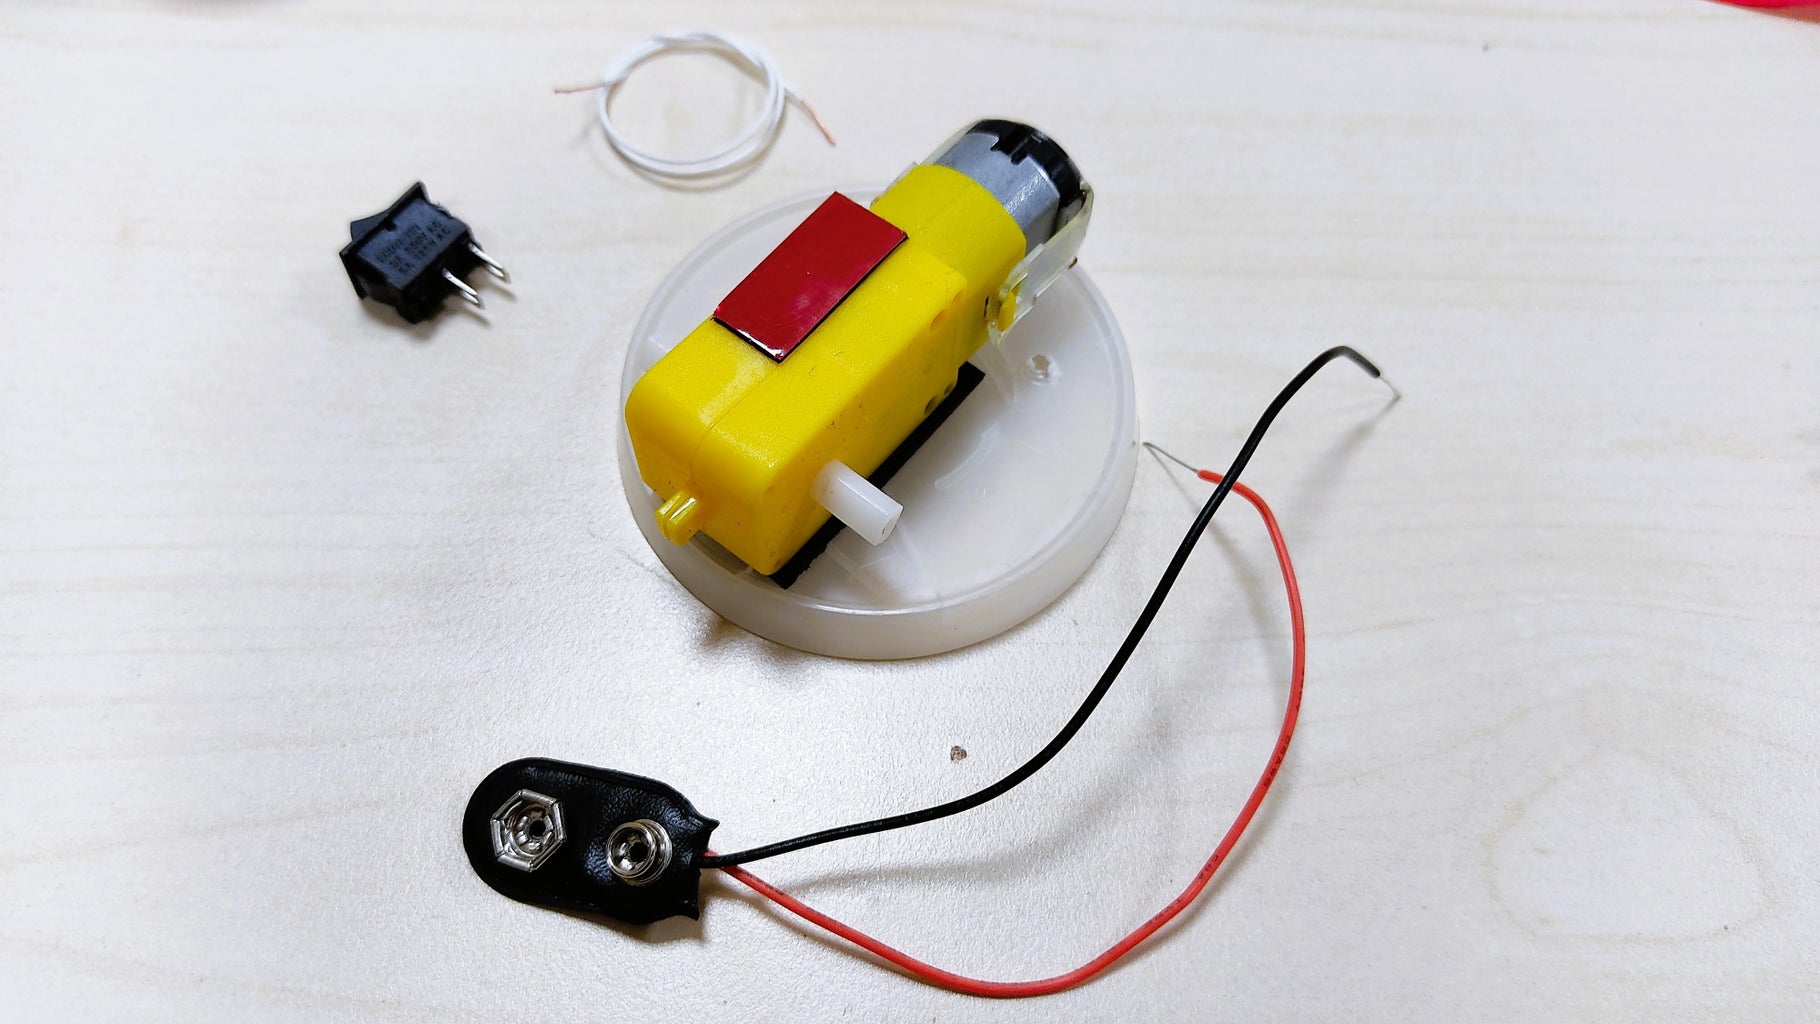
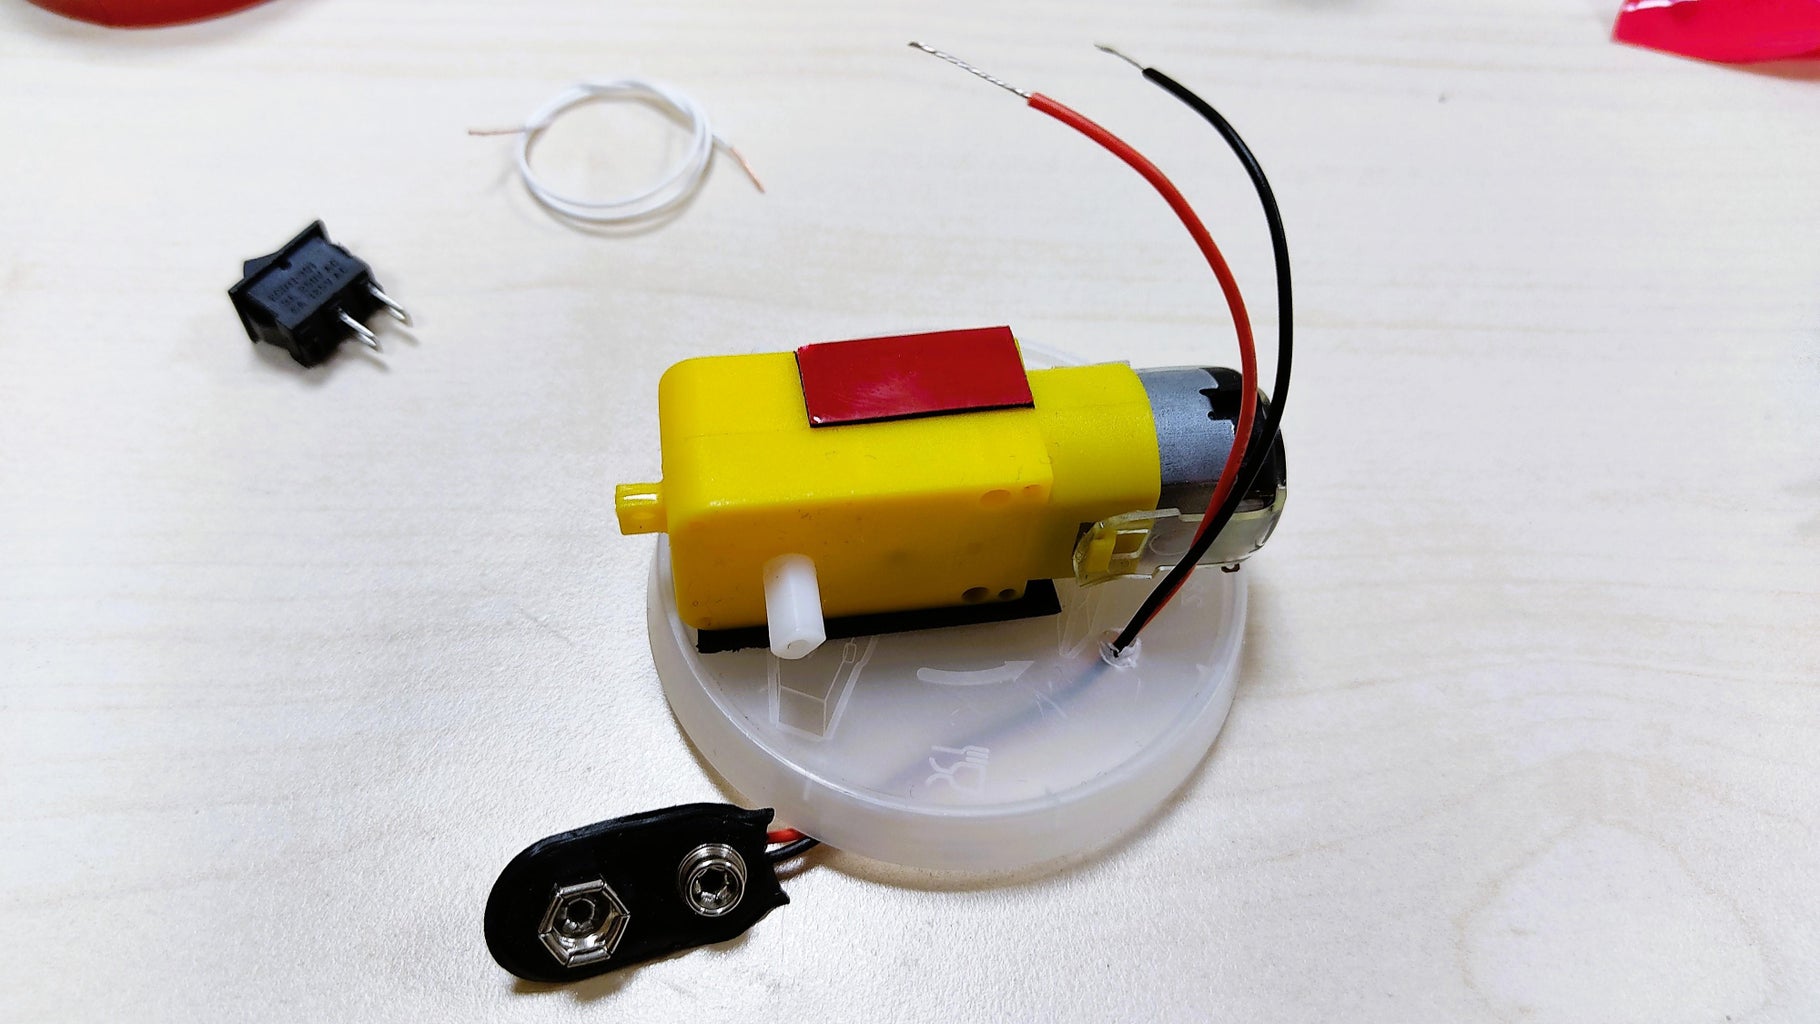
I will enumerate the required materials and tools when I start describing each project. However, if you want to have a basic robotics workshop at school, there are five basic electric components you need to have; and you can use reuse them constantly:
- Hobby motors (like this one): very affordable, easy to get from broken toys; great for vibrobots, brushbots, boats, and simple applications that require a lot of speed but little torque.
- Gearbox, or Gear Motor Dual Shaft (like this one): great for robots that require torque, like walking machines, all-terrain rovers, jumping robots, grabbers, basic animatronics and launchers. If you have been following my projects, probably you already know that this is my favorite component for creating toys.
- 2 X 1.5V AA Battery Holder, with switch (like this one): it's great for smaller kids, or when you have a very limited lesson time to build your robot. You just need to connect it to the wires to the pins of the motor, and you have your electric circuit ready.
- 9V Battery Clip Connector (like this one): for connecting 9V battery to your project. I recommend to get the hard plastic ones instead of the leather ones, so you can reuse them more times; and also are useful as a makeshift switch.
- SPST On/Off Mini Toggle Switch (like this one, similar or smaller): very practical to use with the 9V battery clip.
For most of the projects, I'm using disposable utensils (forks and spoons). Try to use compostable, because they are not only ecofriendly, but also very sturdy; demonstrating more resistance to drilling and bending than the traditional plastic ones. These ones look like a good option; however it's up to you to test their resistance before the projects.
For drilling holes, you can use a small flat screwdriver, or some pointy scissors. Even you can try a Hand Drill for jewelry. My weapon of choice is my old Leatherman Juice S2 Multitool. Its small screwdriver is amazing for drilling holes, and I use it often when I need to perforate plastic caps for STEAM projects.
Step 1: Bot 1 - Vi-bro


Vibrobots (like brush-bots, bristle-bots and sketch-bots) are the traditional first step in robotics. Affordable to build, simple to create, fun to watch in action. It's the perfect project to test the capabilities of a pupil!
You can create vibrobots even using parts from broken toys. However, if you want to create vibrobots for several students, you will need part of your budget to buy some plastic parts, like brushes (for brush-bots), toothbrushes (bristle-bots) or markers (sketchbot). So I decided to use materials that are abundant at school: paper cups and spoons.
But this vibro-bot has a twist: my students discovered that it's great to give massages! They like to put it over their heads and activate it. For the record: this is not a therapeutical device, I always limit the exposition time to a couple of seconds, and it's not recommendable to do it to people with any kind of neurological condition. However, kids are always happy with the "brain scrambler", and they prefer to play with it that way than watching it dance. So, why not?
Step 2: (Bot 1) Materials

- 2 paper cups (for coffee or water)
- 4 disposable spoons
- 1 rubber washer (you can get it in any hardware store)
- 1 1.5V AA Battery Holder, with switch
- 1 motor
- 2 AA batteries
- 1 Mounting tape (double sided tape, thick)
- Googly eyes
- Color markers (for decoration)
- Hot glue gun
- Scissors
Step 3: (Bot 1) Preparing the Motor


TEACHER STEP: Use a small flat screwdriver to open a hole on one side of the rubber washer.
Insert the axle of the motor through the hole you opened in the rubber washer.
Add a square of mounting tape on the side of the motor opposite to the one with the electrical pins.
Step 4: (Bot 1) Body


Take the two paper cups and the four spoons. Place the handle of the spoons inside one of the cups, checking that there is an equal distance between them. Then, insert the second cup, so the spoons are retained there by pressure.
Once you are happy with the exact position of the spoons, add a little bit of hot glue in the points where the spoons are in contact with the two cups, to keep them in place
Step 5: (Bot 1) Attaching the Motor


Remove the protective peel from the mounting tape, and stick the motor on top of the cup, being careful that the rubber washer is not in contact with the body of the robot.
Step 6: (Bot 1) Battery Holder


Take the battery holder. Add a rectangle of mounting tape over the side near the switch (be careful of not covering it).
Insert the batteries, being careful that the polarity is correct. Then close the battery holder, remove the protective peel from the mounting tape, and then stick it inside the body of the robot, checking that the switch is visible and accessible.
Step 7: (Bot 1) Connecting the Cables

Take the cables from the battery holder, and connect each one to each pin of the motor
Step 8: (Bot 1) Improvements and Final Questions

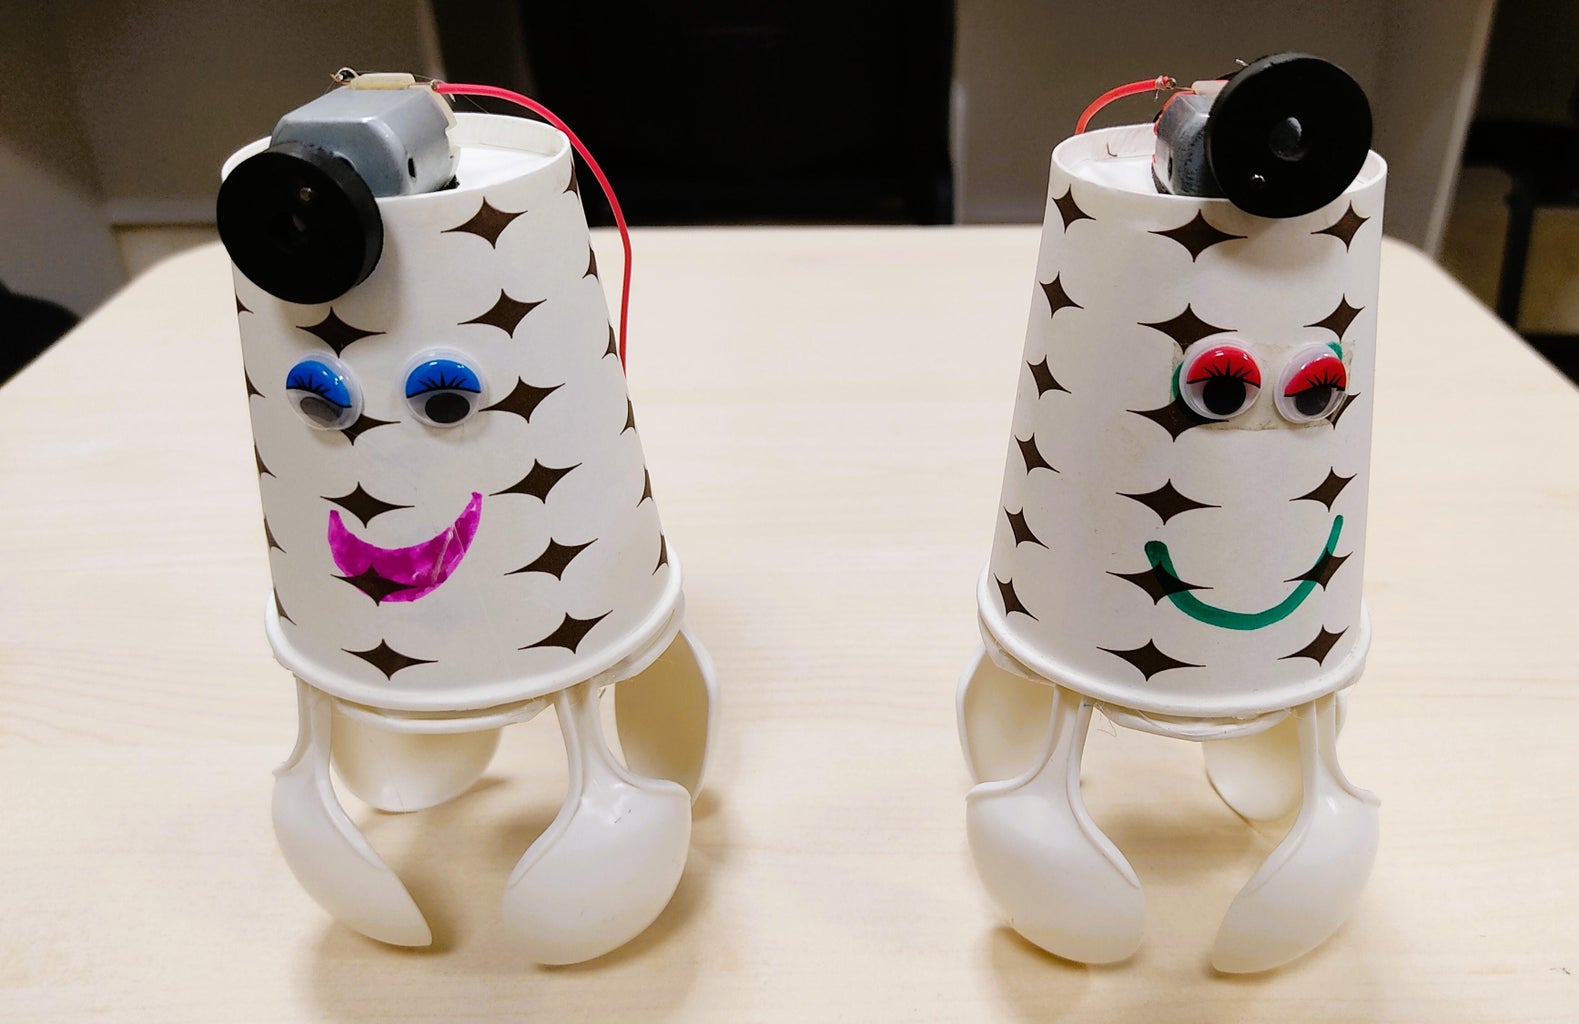
Add googly eyes, paint a mouth, decorate your Vi-Bro as you prefer!
It's a good time for a discussion about technology. Ask this question:
What other everyday technological devices use vibrations generated by a motor spinning an unbalance weight?
Answers:
- Joysticks and game controllers have inner motors to create vibrations that simulate being impacted by an enemy or explosion during the game.
- Cellphones have a tiny motor inside that creates the vibration when your phone is in silent mode.
Step 9: Bot 2 - Spoon Dogg
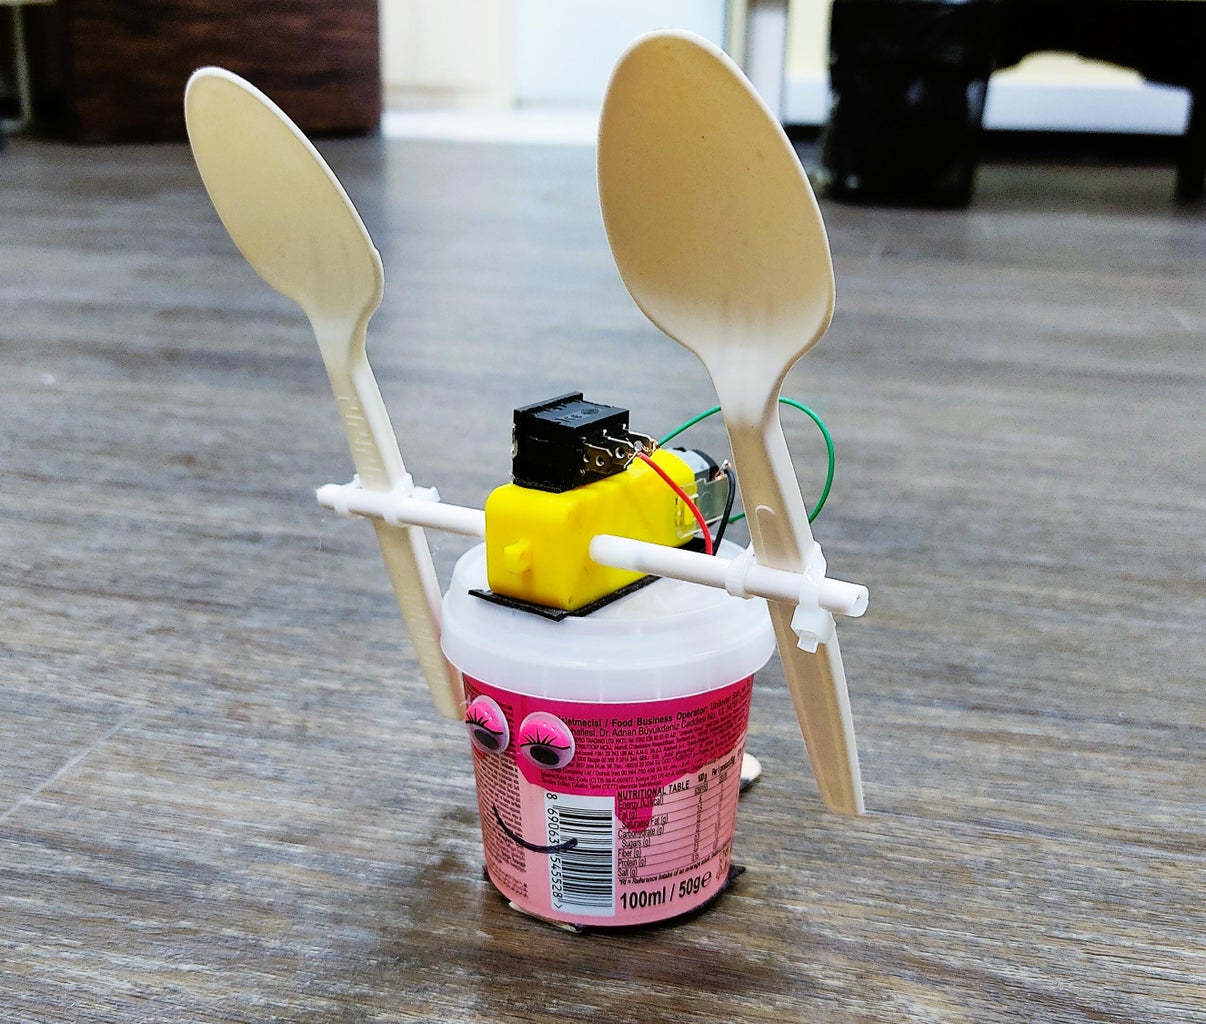


The name "Spoon Dogg" was inspired by the robo-dogs from Boston Dynamics, being their most remarkable feature that they can stand on their own every time they fall or they are kicked down. Also, this small bot uses spoons as way of locomotion. So... Spoon Dogg!
This robot was inspired some Simple Bots by Randy Sarafan. The idea was to create a bot that could move in a fun way but using only one motor; react to its environment without needing any sensor, and be easy to build without using power tools.
The result? A little cute robot made from an ice cream cup. Enjoy!
Step 10: (Bot 2) Materials

- 1 small ice cream plastic cup with lid, or similar (you can also try with a small tin can)
- 2 disposable spoons
- 1 Gearbox (Gear Motor Dual Shaft)
- 9V Battery Clip Connector
- SPST On/Off Mini Toggle Switch
- 1 9V battery
- 1 extra wire
- Hard plastic straw (like the one for party balloons). Note: the axle of the gearbox must fit tightly inside the straw.
- 1 round bamboo stick (like the ones for shish kebab, or for chopsticks). Note: the bamboo stick must fit a little loose inside the straw.
- Optional: 2 hard plastic tubes (like the ones from pens) that can be attached to the gearbox's axle. If you can get this component, you don't need the bamboo stick and the plastic straw.
- 2 zip-ties
- 1 Mounting tape (double sided tape, thick)
- 1 Craft stick
- Googly eyes
- Color markers (for decoration)
- Hot glue gun
- Scissors
- Small screwdriver (for drilling one hole)
- Pliers
Step 11: (Bot 2) Body and "Foot"


Take the ice cream cup and stick a piece of mounting tape on the bottom.
Then, remove the peel, and stick a craft stick in the middle.
Step 12: (Bot 2) Lid and Gearmotor


Drill a small hole in the ice cream cup's lid, big enough for the two cables of the battery clip to pass through.
Then, using mounting tape, stick the gearmotor to the upper part of the lid, with the motor pins near the hole you drilled.
Step 13: (Bot 2) Electrical Circuit


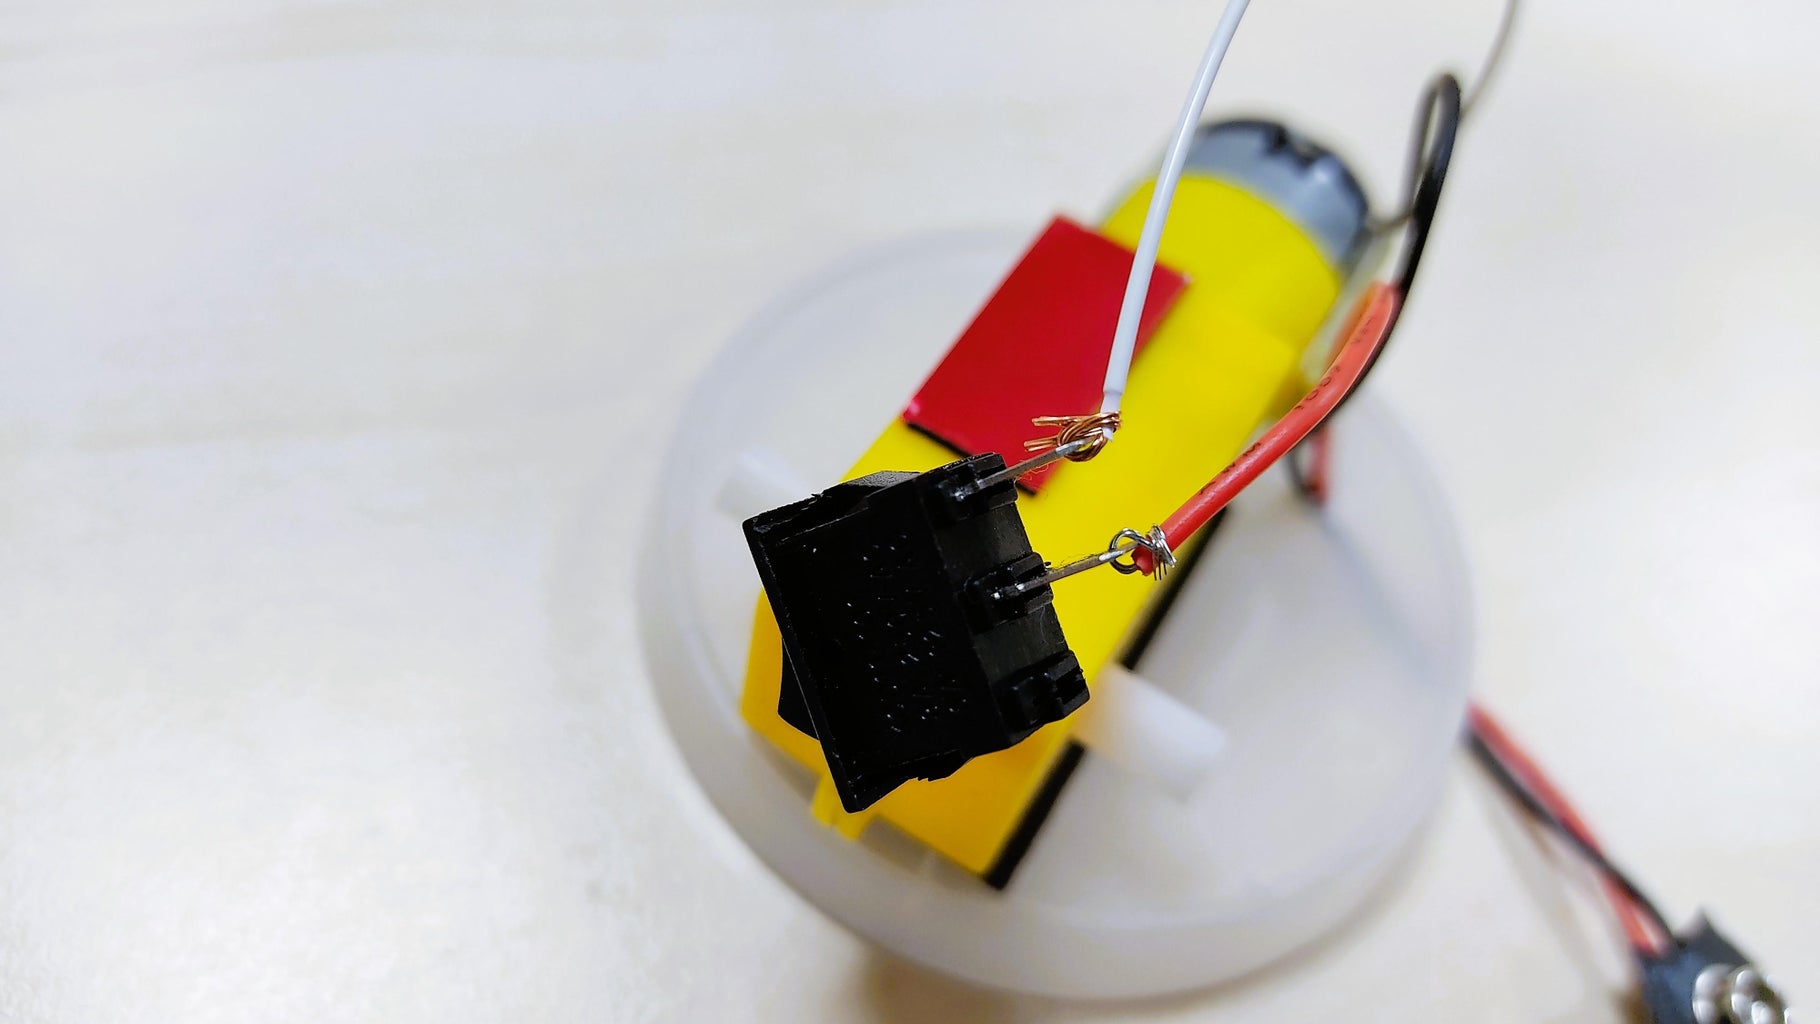


Stick a little piece of mounting tape on top of the gearbox. This will be great to stick the switch to the robot.
Bring the battery clip, and insert the wires through the hole in the lid, from the bottom to the top.
Connect the black wire to one of the pins of the motor. Connect the red wire to the center pin of the switch. Then, connect a third wire (white) from the available pin of the switch, to the available pin of the motor.
Then, stick the switch to the mounting tape on top of the gearbox.
Step 14: (Bot 2) Battery and Closing the Body


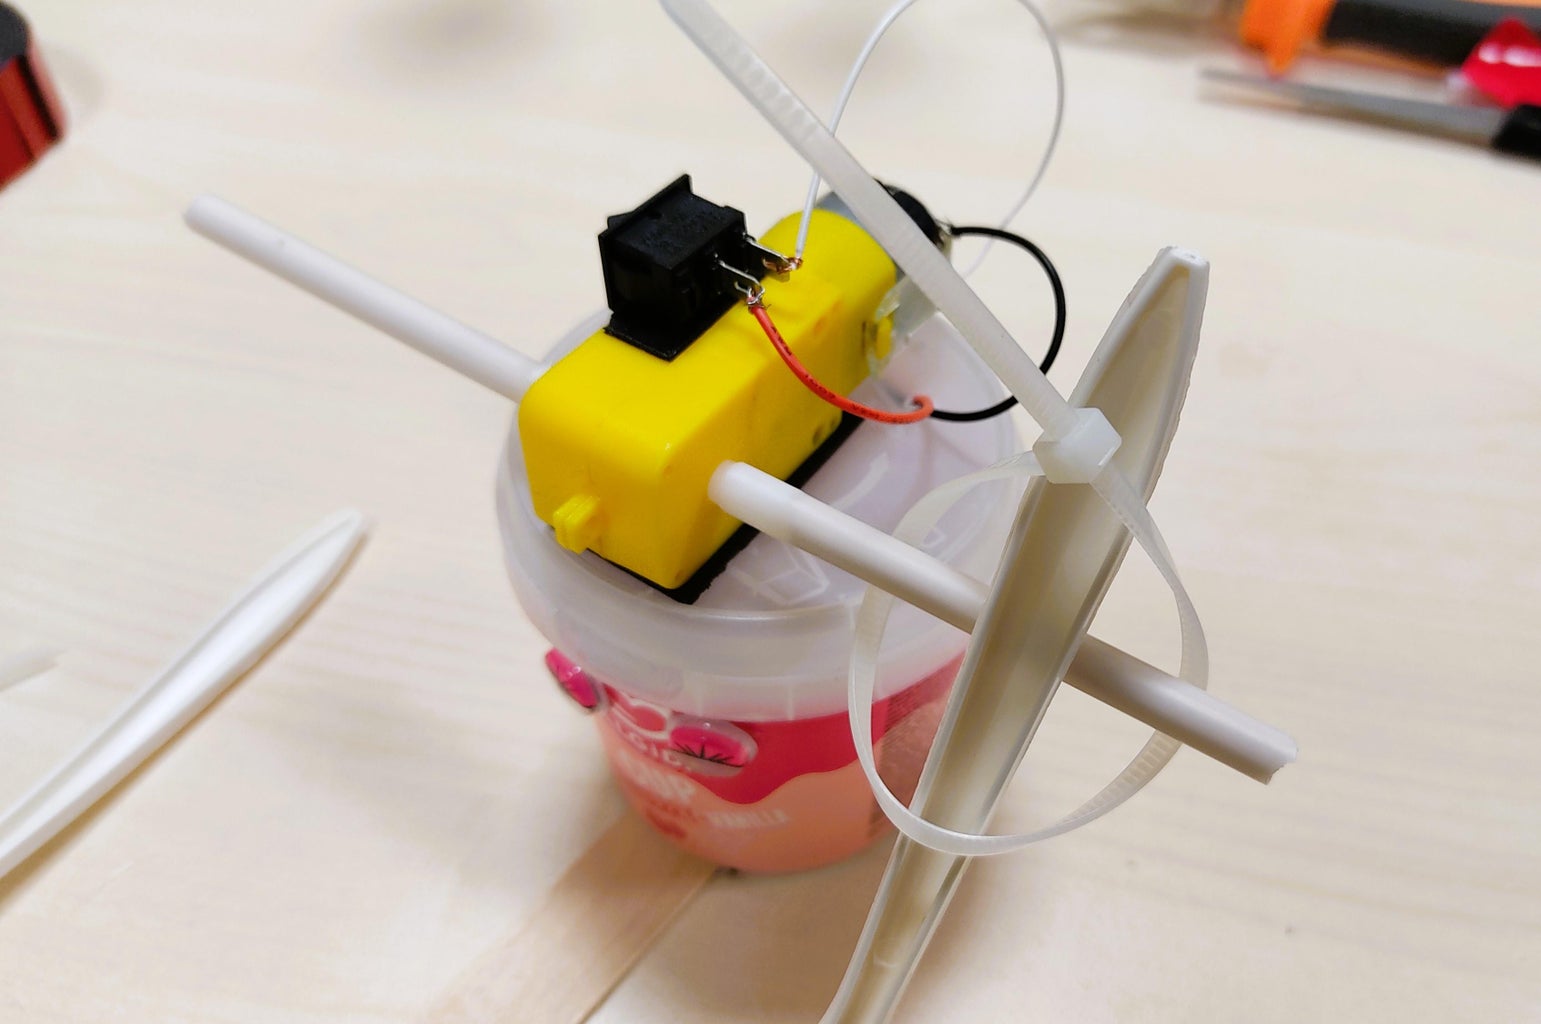
Connect the 9V battery to the battery clip. Then, put the lid on the ice cream cup.
Step 15: (Bot 2) "Shoulder" Axles


Bring the plastic straws and the bamboo sticks. Cut the straws into two 6 cm segments, and the sticks into 5 cm segments. Attach the straw segments to each end of the gearbox's axle. Insert the sticks segments into each straw. For a better attachment, your can glue the segments to the axles using hot glue inside the straw, as long as it doesn't jam the gearbox mechanism.
Step 16: (Bot 2) Attaching the Spoons


Attach a spoon to each straw segment, using a zip-tie. The most practical way to do it is creating a loop with the zip-tie. You can pass the spoon from below, then pass over the straw segment, then go down through the loop.
Tighten the zip-tie as much as possible, avoiding to break any of the components. Now you can appreciate that the main function of the bamboo stick is to protect the straw from getting broken after so much stress.
Step 17: (Bot 2) Improvements and Final Questions


You will need to experiment with the position of the spoons, until you achieve the perfect movement. This will depend of the dimensions of the ice cream cup, and how long are the spoons when they touch the ground.
You can also experiment with cutting the front segment of the craft stick, to check if it improves balance.
Add googly eyes, and paint some details.
Challenge your students with this question:
How can we improve the movement and stability of our robot?
Answer: Spoons that are too short will generate a discreet (and boring) locomotion. Spoons that are too long will cause the bot to move in a very crazy way. The perfect point is when the robot can move forward, and when it hits an obstacle, falls and recovers again. We need to keep doing trial and error, until we find the perfect configuration.
Step 18: Bot 3 - Cyborg Claw


When you explore internet in search of good STEAM projects about prosthetics, usually you find or very basic ones, where you need all your fingers pulling strings to move a cardboard hand; or very complex ones, where you need to apply concepts of CAD, 3D printing and Arduino.
I wanted to create a very simple cyborg claw, where concepts of mechatronics could be explored, without requiring advance knowledge or expensive materials, and with a grip enough to grab and lift some basic objects. The result: a fun prototype activated with just pressing a switch; with the potential of being improved by students using their imagination.
Step 19: (Bot 3) Materials

- 2 flat plastic pieces from a heavy duty magnetic catch for cabinet (like this one, or this one)
- 2 screen frame corners (this one has premade holes, so it will save you preparation time. However, try to pick a sturdy one that doesn't get broken easily)
- 1 rubber hair curler (like this one)
- 1 long flat bamboo stick (for shish kebab)
- 1 Gearbox (Gear Motor Dual Shaft)
- 9V Battery Clip Connector
- 1 9V battery
- 1 lever micro switch (like this one)
- Extra wires
- 1 long bolt
- 1 short bolt
- 7 nuts
- 1 Mounting tape (double sided tape, thick)
- 1 rubber band
- Hot glue gun
- Optional: Super Glue (cyanoacrylate)
- Scissors
- Small screwdriver (for drilling holes)
- Pliers
- 10 zip-ties (9 small, 1 big)
Step 20: (Bot 3) the Gearbox


TEACHER STEP: Before lesson, carefully remove the metal plate from the flat plastic pieces. You can use pliers or a drill to destroy the rivet. Also, check if the axles of the gearbox fit in the plastic pieces holes. If not, use some tool, like a screwdriver or scissors, to enlarge the hole.
Take the flat plastic pieces. Attach one plastic piece on each axle of the gearbox.
Step 21: (Bot 3) Lock for the Rubber Band


Bring the short bolt. Screw a nut until the middle. Then insert the bolt, and screw another nut to keep the bolt in place.
Step 22: (Bot 3) Fingers


TEACHER STEP: if your frame corners don't have a hole in one of the ends, open it using some pointy scissors, a small flat screwdriver, or any other available tool at hand.
Take the long bolt, the remaining nuts and the two frame corners. Insert the bolt through the hole of the corner frame. Then insert the bolt through the hole in the center of one of the flat plastic pieces, screw two nuts to keep the frame corners tight and the flat plastic pieces parallel to each other, and then insert the bolt into the opposite flat plastic piece. Then add the second frame corner, and screw the last nut.
Use zip-ties to firmly attach the frame corners to their respective flat plastic pieces.
Step 23: (Bot 3) Thumb


Take the hair curler and remove the wire using the pliers (don't throw it, we will need it for our next project).
Cut a rubber segment of 5 cm approximately. Insert the tip of the flat bamboo stick through its hole.
If it's hard to insert, use some sand paper to slightly sharpen the end of the stick. TEACHER STEP: you can also use the cutting part of the pliers, but be careful with splinters projection, or with possible bruises.
Step 24: (Bot 3) Attaching the Thumb


Stick a segment of mounting tape to the top part of the gearbox. Peel it, and stick the bamboo stick in a way that is opposite to the "fingers" attached to the gearbox.
Use small zip-ties to complete the attachment of the gearbox to the stick.
Step 25: (Bot 3) Attaching the Rubber Band


Bring the rubber band and another zip-tie. Tie the rubber band to the small bolt in the claw, using a Lark's head (cow hitch) knot. Attach the opposite arc of the rubber band to the stick, using the zip-tie; leaving a distance of approximately 4 cm between motor and zip-tie (distance may vary, depending of the rubber band size and flexibility.)
Cut the remanent of the zip-tie.
Step 26: (Bot 3) Electrical Circuit


Bring the 9V battery, the battery clip, and the switch.
Connect the red cable of the clip to one of the pins of the motor, and the black cable to the center pin of the switch (marked with the number 3 in several models).
Connect an extra cable from the first pin of the switch (number 1, under the button of the switch), to the available pin of the motor.
Connect the battery, and test that the claw closes when the switch is pressed, and returns to its original position when the switch is released. If it doesn't work this way, invert the polarity, swapping the position of the cables connected to the motor. Also, check that the rubber band is not too tense, or too loose.
After checking that everything works, stick a piece of mounting tape to the battery, place it in an available part of the stick, and reinforce the adhesion with the big zip-tie.
Step 27: (Bot 3) Switch and Handle


Add a little piece of mounting tape to one of the sides of the switch, and stick it to the stick. Improve the attachment using a small zip-tie.
Add a 10 cm segment of the rubber roller, to the available end of the stick. Test that you can grab the cyborg claw using your hand, and that you can press the switch without problems.
Step 28: (Bot 3) Improvements and Questions


Challenge your students with the following questions, so they can improve their Cyborg Claw at home:
How can we improve the grip of our robot claw?
Answer: you can add some rubber (fingertips from rubber gloves, rubber bands, silicon, Sugru) to the tips of plastic fingers.
How can we improve the ergonomics and functionality of our robot claw?
Answer: you can replace the foamy handle for an attachment that can be fixed to your hand or arm, using belts, cardboard, or even a repurposed watch. The switch could also be located in one of your fingers, so it can be easily pressed to activate the claw.
Step 29: Bot 4 - Fork Knight


For this project, we will explore the concepts of Reuse and Upcycling. Using plastic trash that may be found at home, we created a rolling bot that moves its arms.
Step 30: (Bot 4) Materials

- 1 small plastic or metal container, like a coffee can or a candy box (a box made from sturdy cardboard can be used)
- 2 disposable forks
- 1 Gearbox (Gear Motor Dual Shaft)
- 1 1.5V AA Battery Holder, with switch
- 2 AA batteries
- Hard plastic straw (like the one for party balloons). Note: the axle of the gearbox must fit tightly inside the straw.
- 1 round bamboo stick (like the ones for shish kebab, or for chopsticks). Note: the bamboo stick must fit a little loose inside the straw.
- 2 round containers for dental floss (or any other cylindrical piece that can be attached to the straw)
- 2 hair gel lids, where the dental floss containers can fit inside.
- 2 screws for aluminum (with a round large head)
- 2 plastic or wood pieces that you can use as shoulders: I reused some white tension catches for cupboard. You can use anything with enough surface on one side, to be glued to the robot's body, and a hole on the opposite side, to insert the screw and attach the arm.
- 2 small metal washers
- 4 metallic fasteners for paper
- 2 maleable wires (from the hair rollers we used in the Cyborg Claw)
- 1 Mounting tape (double sided tape, thick)
- 1 Craft stick
- Googly eyes
- Hot glue gun
- Scissors
- Small screwdriver (for drilling one hole)
- Needle nose pliers
Step 31: (Bot 4) Drilling Holes


TEACHER STEP: Before the lesson, open two holes on each fork: one in the middle, and one at the end of the handle. Drill a hole on each hair gel lid, ad the middle of the radius distance. Finally, open a hole in the center of the door catch (or the plastic/wood piece of your election.)
Step 32: (Bot 4) Gearmotor and Axle


Bring the plastic straws and the bamboo sticks. Cut the straws and sticks into two segments. The segments length must be the enough to cover half of the bottom of the container (body) plus an extra centimeter to attach the dental floss container (wheel).
Attach the straw segments to each end of the gearbox's axle. Insert the sticks segments into each straw. For a better attachment, your can glue the segments to the axles using hot glue inside the straw, as long as it doesn't jam the gearbox mechanism.
Step 33: (Bot 4) Wheels


Bring the dental floss containers, and attach them on each side of the gearbox. You can add a bit of hot glue between the straw and the dental floss container.
Step 34: (Bot 4) Attaching the Gearmotor to the Body


Take the gearbox. Stick it to the bottom of the body using mounting tape. Then, stick another segment of mounting tape over the gearbox.
Step 35: (Bot 4) Power


Take the battery holder. Add a rectangle of mounting tape over the side opposite to the switch's side.
Insert the batteries, being careful that the polarity is correct. Then close the battery holder, remove the protective peel from the mounting tape, and then stick it on the back of the body of the robot.
Take the cables from the battery box, and connect each one to each pin of the motor
Step 36: (Bot 4) Tail


We will need a third wheel to keep our robot balanced. A fast and cheap option is to simply stick a craft stick under the robot, using the available The longest part of the craft stick must be located on the back of the robot, so it doesn't fall back.
Step 37: (Bot 4) Arms


Attach the forks to the plastic door catches, using the aluminum screws. The forks must rotate freely; if not, enlarge the hole, and check that the screws are not to tight.
Step 38: (Bot 4) Attaching the Arms to the Body


Glue the "shoulders" to each side of the body.
Step 39: (Bot 4) Wires


Take the wires. Cut them in two segments, approximately as long as the distance between the border of the dental floss wheels and the middle hole of the fork (arm). plus 1 cm.
Using the needle nose pliers, create a small loop in the ends of each one wire.
Step 40: (Bot 4) Cranks


Take the hair gel lid. Attach the wire to the hole, using a fastener and a small metal washer. Check that it's not to tight, and that the wire can spin freely. This will work as a crank.
Step 41: (Bot 4) Attaching the Cranks to the Wheels


Glue the hair gel lid (crank) to the dental floss containers, getting a bigger wheel.
Step 42: (Bot 4) Attaching the Wires to the Arms


Using fasteners, attach the available loop at the end of the wire, to the hole in the center of the fork. Check that it rotates without problems. The best way to test that is activating the robot.
Step 43: (Bot 4) Improvements and Questions


Challenge your students with the following questions, so they can improve their Fork Knight at home:
How can we improve the traction of the wheels?
Answer: you can add some rubber (rubber bands, silicon, Sugru) to the circumference of the wheel, being careful of not jamming the crank mechanism.
How can we use the available space inside the robot's body?
Answer: you can add more weight to improve the traction. Also, considering that we didn't touch the inner part of the container, we could use it for keeping pencils, color markers, Lego bricks or even your favorite candies! Use your imagination.
I hope you enjoyed these four projects, as much as we making them. Have fun!

Grand Prize in the
Crafts For Kids Challenge


