

Introduction: SIMPLE PALLET SHELVES


I am living in my first flat and since I immigrated to another country I didn't have much house stuff or contacts to get things cheap. So I am using this as an opportunity to start my adult life on the eco friendly side! I am trying to get most of my things second hand or building them myself using recycled materials. I found loads of pallets behind my flat the other day couldn't say no to a load of free wood!
This is a cheap and easy way to use reclaimed wood to make nice shelves no need for shelf holders (who knew does things where so expensive!)
You will need:
- Pallets or wood slats
- Screws (5/shelf)
- Anchors (2/shelf)
- Drill
Step 1: PREPPING THE WOOD


First things first. If you are going to be using pallets, be safe about it. Some pallets can be chemically treated and should not be used for projects or burning. Learn how to decode pallets stamps here!
When you know the pallets you are using are safe it's time to dismantle them. This can be quite an excruciating exercise. Here I used an Iron saw & a hammer.
Slide the saw between the wood and cut the nails. If the wood is too close together to slide the saw in, take a hammer and knock the wood from the back to create a little space for the blade of the saw.
When you have your wood slats, pick out the ones you want to use, sand them and wash them.
Step 2: MEASUREMENTS AND MARKINGS


Ok for the sake of simplicity I will name the slats 1 & 2 (check image).
First mark the width of slat 2 on the back of slate 1 at the hight you want. I decided to do it about 2 cm from the bottom.
Take the marked slat 1 and measure 4 cm in from each side. Drill holes through the board in the middle of the markings at that hight.
Take slat 2 and measure 4 cm in from each side and drill deep holes at that hight. Like on the first image the holes should level out.
Step 3: SCREWING THE SLATES


Take the 2 slats, line up the holes and screw them together. The screws should be at least 1/3 the length of the wight of the shelf.
3 screws will do the job but if you are planning on putting a lot of weight on it, consider adding 1 or two screws extra.
Step 4: PUTTING IT UP THE SHELVES


Drill 2 holes on slat 1 to be able to put 2 screws in the wall. Drill 2 holes in the wall that will line up with the holes in the slat and put anchors in the holes.
Use a level to make sure your shelves are straight.
Allow about 15cm between the shelves to have room for average books.
Step 5: FILL UP THE SHELVES


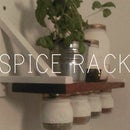
Pallets give a nice Industrial look.
To stay in the style I used beer bottles as bookends and aluminum pots for the plants.
A beer bottle bookend alternative is to fill up a beer bottle with concrete let it dry over night, then break the glass with a hammer. Voila Industrial style bookend (see 3 pictures)
What is really brilliant about this project is that you can stack up as many as you want. From floor to ceiling if thats what you fancy.
Hope you enjoy these super easy pallet shelves!

Participated in the
Reuse Contest

Participated in the
Pallet Contest

Participated in the
Bedroom Contest


