

Introduction: Sheet Metal Roller
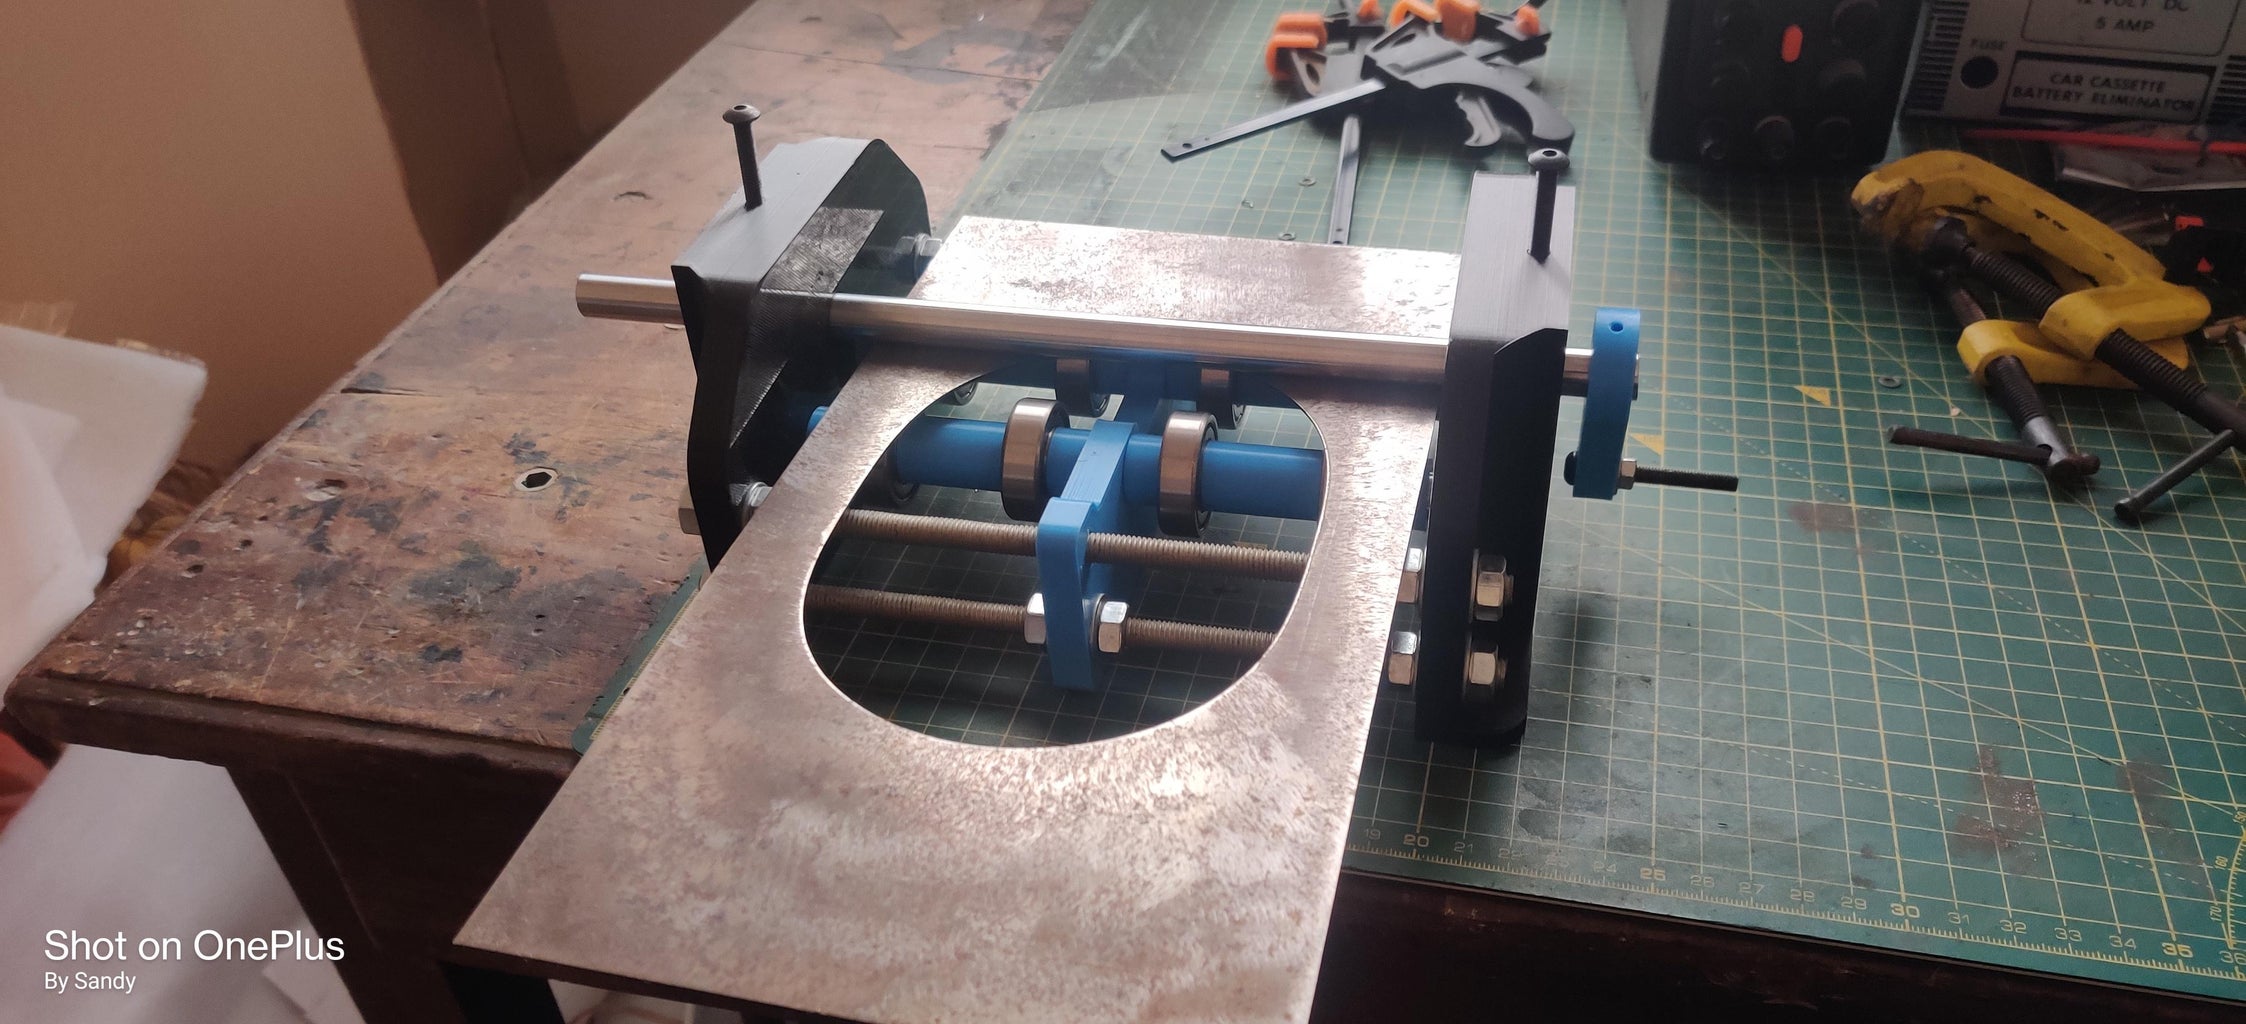


I am working on a project for which I need to make a metal pipe by rolling 1mm thick sheet metal. I have researched online and not found easy way to make a tool. I spent some time and came up with 3d printing solution to make a sheet metal roller. I believe this is the 1st 3d printed sheet metal roller available in the internet. I have tested with 1mm thick sheet metal and it is working fine. Metal can be rolled based on the pressure applied by the two M5 bolts.
Youtube: https://youtu.be/3dJySXXvipE
Attachments

Supplies


- Bearings (6201ZZ) - 10pcs
- 12mm metal rods(18cm each) - 2pcs
- 12mm rod (27cm) - 1pc
- 8mm threaded rods (20cm each) - 4pcs
- M5 Bolts (35mm each) - 2pcs
- M5 Bolt (40mm) - 1pc
- M5 Nuts - 3pcs
- M5 Washer - 1pc
- M8 Washers - 20pcs
- M8 Nuts - 20pcs
- 3d print filament
Step 1: 3d Printed Parts


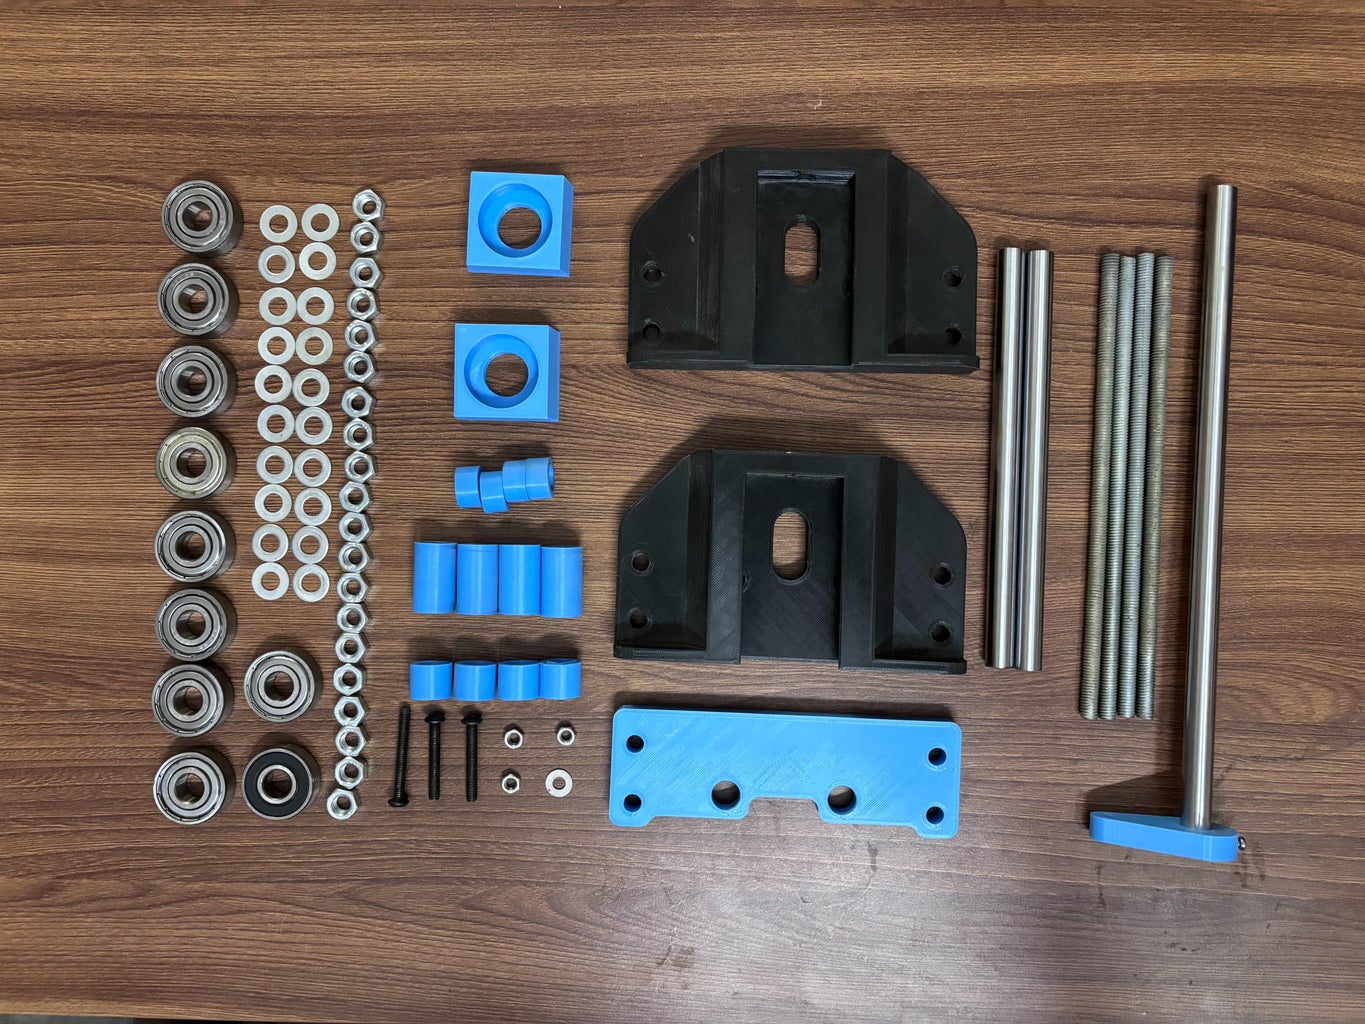
Download and print the files from printables
- Left Plate - 1pc
- Right Plate - 1pc
- Middle Plate - 1pc
- Spacer small - 4pcs
- Spacer medium - 4pcs
- Spacer large - 4pcs
- Handle - 1pc
- Shaft1 - 1pc
- Shaft2 - 1pc
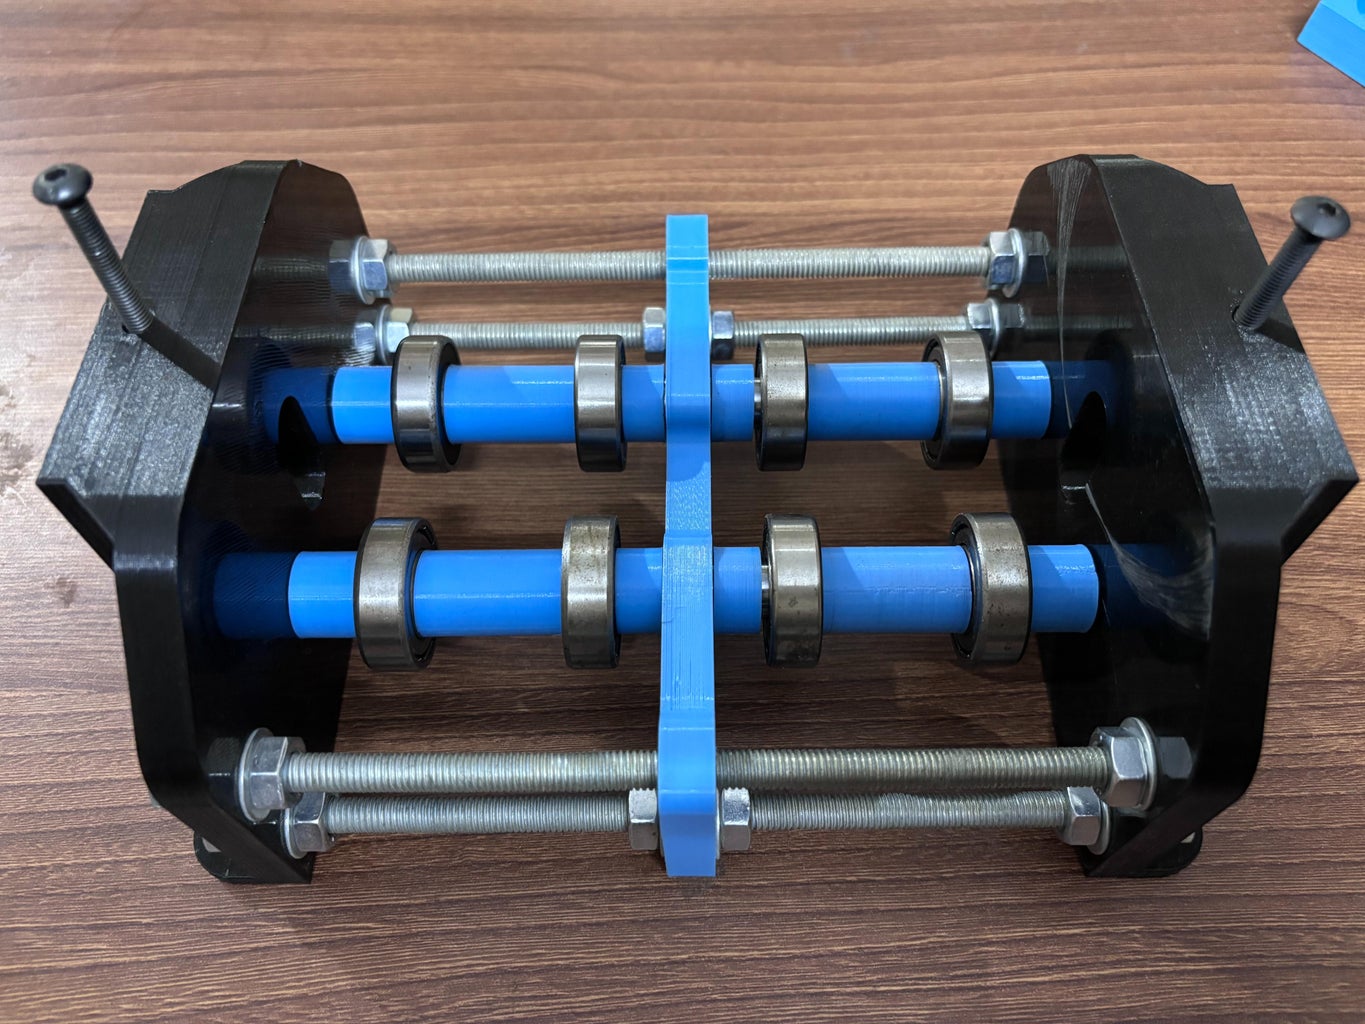
Step 2: Assemble Body


- Insert 8mm threaded rods to left plate and screw them as shown in the images.
- Insert spacers and bearing in the order: medium spacer -> bearing -> large spacer -> bearing -> small spacer.
- Insert M8 Bolts -> M8 Washers -> middle plate.
- Insert M8 washer -> M8 Bolts.
- Insert Another set of spacers and bearing in the order: small spacer -> bearing -> large spacer -> bearing -> medium spacer.
- Insert M8 bolts -> M8 washers.
- Insert right plate and bolts and then screw.
Step 3: Tensioner


Insert M5 bolt in to 3d print and add M5 bolts from top. These bolts are used to increase the tension on sheet metal to roll.
Step 4: Assemble Shaft


- Glue some waste metal washers as shown in image using epoxy glue. This part helps to prevent 3d part from damage while rolling the sheetmetal due to pressure.
- Insert bearing in to the print and add the part to right plate.
- Repeat the process one more time to make for another side.
Step 5: Handle and Lever


- Cut a groove on one side of the 12mm metal rod.
- Insert the rod inside handle and screw it.
- Add additional M5 nut, bolt, washer to handle.
- Insert 12mm metal rod from left plate to right plate as shown in pictures.
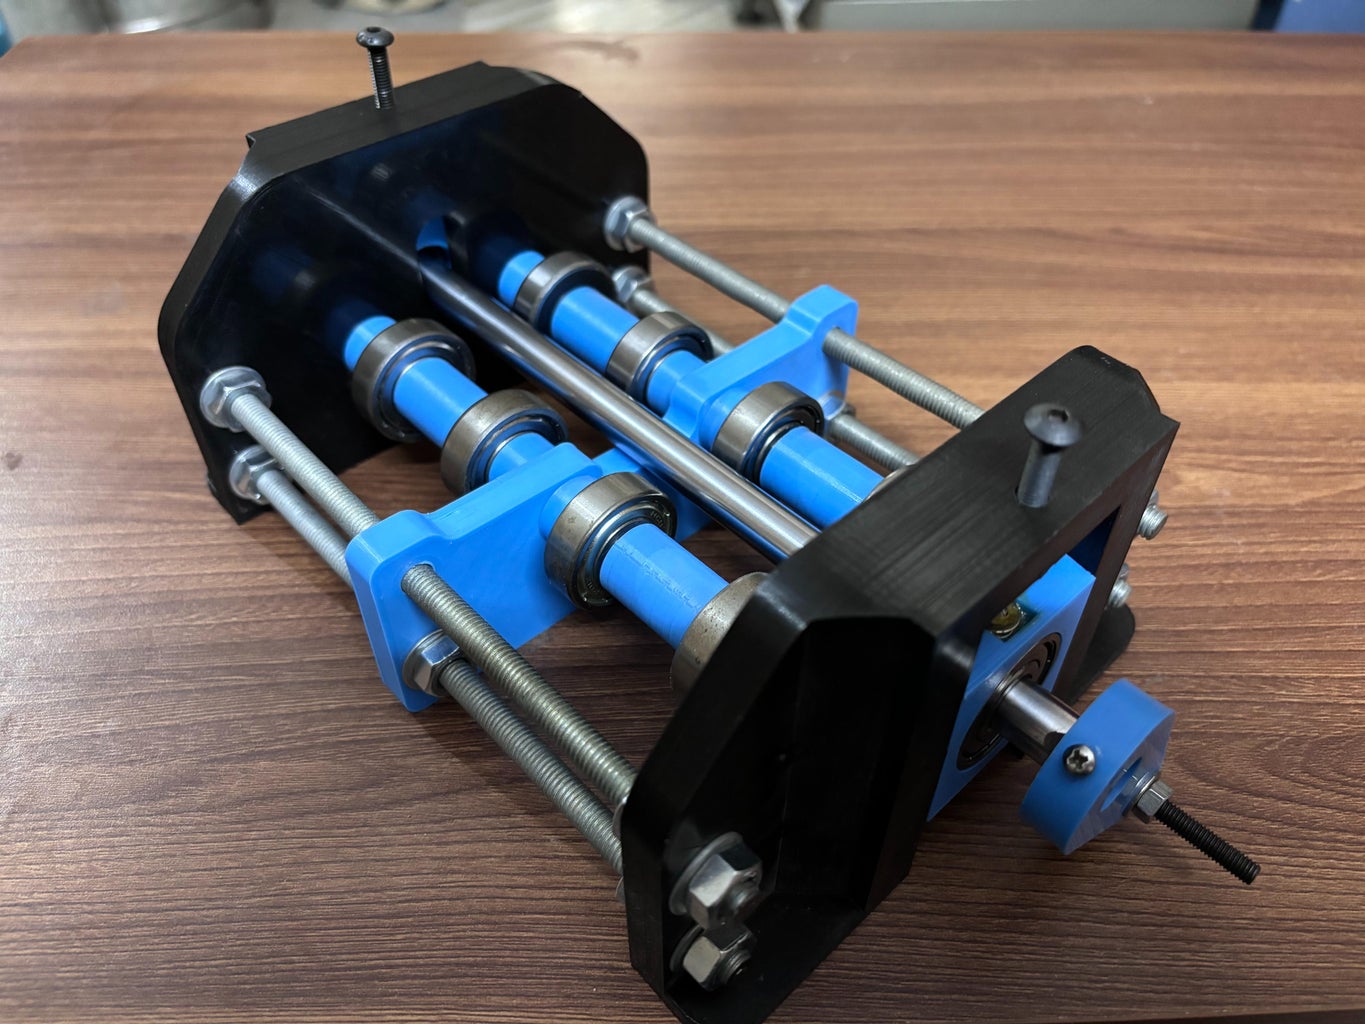
Step 6: Final Product


Final product is ready. Please watch my youtube video to see in action.

This is an entry in the
Build-A-Tool Contest


