

Introduction: Shinty Sticks and Laminating Jig


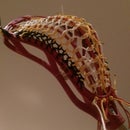


Shinty is a very old Scottish Highland stick & ball game. In Scottish Gaelic its called Camanachd, and the sticks are called camans. Its the ancestor game to field hockey, hurling, ice hockey, golf, and cricket, as well as more obscure sports like ritinis, bandy, and shinny.
There are only a few shinty clubs in the US, and I'm fortunate to have one near me - Northern California Camanachd Club. But sadly, there is nowhere in the US to buy a caman, so all the club's sticks were bought in Scotland and brought over, often just 1 or 2 at a time. In Scotland there are only a handful of caman makers up in the Highlands (plus one in London) and they're pretty busy keeping up with domestic demand.
I decided to make my own sticks, because I have decent carpentry experience and have also bent wood for traditional style Native American lacrosse sticks. This instructable will show how to make the bending jig, then cut and laminate the wood for sticks, plus a few tips (and some failures) I figured out on the way.
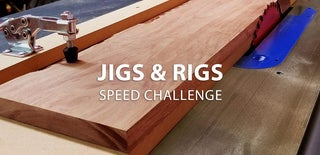
This Instructable is an entry in the Jigs & Rigs Speed Challenge.
Image credits: Outlander on Starz TV. Action shots from http://www.norcalshinty.com/
Supplies
Supplies are kind of self-explanatory from the photos, but basically:
For the jig: MDF, titebond glue, 1/4" nuts, bolts, and washers, a little bit of 1/16" sheet sheel, spray adhesive, etc. For the sticks: ash, titebond, danish oil. Tools: table saw, band saw, angle grinder with wood carving wheel, belt sander, hand planes, and all the clamps in the world.
Step 1: Making the Jig


I laid out the curve first on a piece of MDF. I didn't think to borrow one of the other player's sticks to take home, so I sort of eyeballed it. Its an inexact science except for a few measurements (more on that later) and it came out great.
After cutting out the first curved section, I traced it to make 2 more because I wanted the jig to be 2.25" high and the MDF was .75" thick. I then glued all 3 pieces together and used a belt sander to even them up and square the jig.
Then I glued and bolted the thick form to a flat piece of 1.5" (2 x 3/4") plywood as backing for the jig. Its heavy, but that's good in a jig so it can handle the clamping pressures without twisting or bending.
Step 2: Clamping & Bending Slider on the Jig


For bending in the curve, I wanted more even pressure than just a series of clamps would provide. So I made a triple-thick sliding piece of MDF for the inside curve. The inside curve piece is a smaller radius than the main form, so as the wood laminations stack and slide and squeeze against each other, they'll stay tightly glued. I estimated a 2.5" thick stack of laminations and made the inner radius that of a circle 5" smaller than the outer radius overall.
I cut a slot in the jig's backing and put in some through bolts with washers between the slider and the plywood so it could move easily.
I cut and glued and screwed some mild steel to the main clamping surfaces so the MDF form lasts longer. I then painted them, and waxed the entire jig so glue will release.
Its important to re-wax all the surfaces of the jig before every use. Paste wax works fine.
Step 3: Cutting, Laminating, and Bending Wood in the Jig


I used ash, because if its good enough for baseball bats and traditional lacrosse sticks, it should be fine for camans. I found a couple straight-grained pieces of 8/4 ("eight quarter" means 2 inches thick) ash at a local specialty lumberyard. After testing a few trial pieces at various thicknesses for bending, gluing, and springback, I settled on cutting them to 1/8" thick. 1/4" was too hard to bend and had some cracking, and 1/16" took too much glue. I alternate which way I stack the pieces for laminating so the grain doesn't split from one slice to another.
I didn't take photos of the glue-up because I was working fast and had glue all over my hands. But the process was: cover a work surface with plastic sheet, lay a fat bead of Titebond on all the surfaces of wood, spread it with a plastic spreading knife, and as I stacked them, add another bead & spread it on all the dry surfaces which were face down on the plastic.
Then drop it into the jig and start tightening clamps. The curve is tight enough that I had to start the bend with pipe clamps until I got it close enough that my largest c-clamps could fit on. Pull those in tight and then work your way up the length of the jig.
Step 4: Measuring and Shaping the Caman


I left the lamination in the jig for 24 hours. When it came out, there was almost no springback. Then I squared up the end so I could lay out the angled faces of the stick. The measurement rules for camans are that the hitting end must be small enough to pass cleanly through a ring 2.5" in diameter. The length is generally said to be perfect if the caman comes up to your bellybutton.
I did some rough shaping of the handle and hitting faces on the bandsaw. Then went to an angle grinder with a wood shaping wheel, hand planes, and finally files and sanding blocks. Take your time and go slow and this part is not as hard as you'd think.
Step 5: Finishing the Camans


I used a couple of coats of Danish oil because it hardens nicely. I'm sure linseed oil or even some polyurethanes would work fine too.
Many players tape the hitting end to increase durability, and the handle end to improve grip. The sticks also work just fine without any tape, its all personal preference.
Step 6: Other Info and Lessons Learned


I've finished 2 camans now. The first one came out a little thin, so that's to be used as a forward's stick. The angle sends the ball like a golf club, so forward's sticks need to keep the ball path low so they don't shoot right over the goal.
The second one came out with a lower angle, which sends the ball higher and also farther. This is my preferred caman, since I play defense and goalie and need to clear the ball upfield to the offense as quickly as possible.
The thin one shakes your hands a little on contact, so I put thick tape and a lacrosse stick rubber butt-end on it to make it more comfortable to use.
Its also impossible to buy shinty balls in the US. Fortunately, size 4 silotars ("slitter", an Irish hurling ball) are available on Amazon. They're a little larger, but the same weight as a shinty ball.
I tried one lamination alternating ash and some Philippine Mahogany I had sitting around. It didn't work - I think the oils from the mahogany didn't take to the Titebond the same as the ash did. I also tried one using polyurethane glue (like Gorilla Glue) but it didn't hold together. Both of those experiments ended up in the bin - not uncommon when glue-laminating wood in a jig.
Thanks for reading and please vote for this Instructable for the Jigs and Rigs Challenge if you like it!
Participated in the
Jigs & Rigs Speed Challenge


