

Introduction: Simple 12 Note Piano


Music has been and still is one of the best ways to gather people together. If you would like to learn how to play music to get those people to gather that can be a very difficult process. This may be the solution you are looking for. Today you're going to create a simple 1-octave piano. This a nice simple project to get you introduced into circuitry and coding at the same time. This will also help fulfill your musical urges and help you learn the notes.
For this project you will need:
- 12 pushbuttons
- 12 10K ohm resistors
- a piezoelectric buzzer
- Chipkit Max32
- Wires
- Mpide
Once you've got your materials lets get started!
Step 1: Creating the Circuit


Once you have your breadboard you'll want to plug all of you push buttons in in a row. You'll then want to connect one side of the button to the positive rail of the board. do this for each button.
Next you will want to plug a resistor into the opposite side of the button. do this for each button also. the resistor is there to make sure there is no feed back going into the other buttons and messing up your piano.
Plug in your piezoelectric buzzer on your board. Make sure that the side opposite of the speaker is plugged into ground.
Once all the buttons and resistors are plugged in flip you breadboard around. This positioning will be easier to handle and avoid the wires connecting it to the board.
Step 2: Connecting to the Max32


When connecting buttons to the board you want to remember where each button is plugged into. The way I connected the buttons, from left to right, into the pins on the board goes as follows:
- 22
- 23
- 44
- 27
- 28
- 31
- 32
- 35
- 36
- 39
- 40
- 43
On the third button I had to move it from pin 24 to 44 because that pin was not working on the board I was using.
Also, I connected my piezoelectric speaker to pin 52. Make sure that you plug the positive rail on the breadboard into the 5V0 pin and the negative rail into ground.
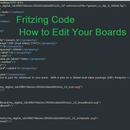
Step 3: Coding


To code the Max32 you will need to use MPide program which can be down loaded here. The program codes in C++ which is fairly easy to learn and quite useful.
To begin programming you'll want to define each of your pins that you plugged your parts into. To do so you need to initialize a variable and give that variable the pin number.
Ex. int piezoPin = 52;
I would name each variable for your buttons after the note that they will be playing. So the far left button will be named BttnC and the far right button be named BttnB or something along those lines.
Next you'll want to define the frequency of your notes. Each note has a specific frequency to it. To find out those frequencies I used this website. So once you have your frequencies figured out you can plug them into some variables. Since we are working with the middle octave of the piano I gave my note variables a 4 attached with it.
Ex. double C4 = 261.626;
Once you have your notes defined you need to set up the pins on your board. To do so create a void setup function and use the pinMode() function and set up the speaker as an input and the buttons as outputs.
Ex. pinMode(piezoPin, OUTPUT);
After that you'll need to program you actual piano. In the void loop function I used if statements to check to see what button is being pressed. There are other ways to do this and recommend that you go check those ways out but I just used if statements because they were simple to make. You will need to check to see if a button is high or not so the digitalRead function will be used here
Ex. if (digitalRead(btne) == HIGH)
You will also need a function that can turn frequencies into output values for the piezoelectric buzzer. I found a function called playFreq on the Digilent Learn webpage. This page also shows how to use piezoelectric speakers if you would like to know more about the.
I will attach my code down below so that way you can see how I did it. I highly encourage you to find your own way to program this and maybe even make it better.

Step 4: Running the Code


Once you have your circuit set up and code working it's time to test.
Plug your Max32 into your computer and then upload your program through Mpide. Make sure you have the correct board selected. You can change the board in the Tools window. If your code is correct then it should upload correctly. If you get an error go back and double check your code.
Once your code is uploaded to the board test your piano. Press the buttons on your piano and see if you can make some music. If no music is coming out or some buttons aren't working go check your circuitry. I had a problem where I didn't have a button connected properly and I a resistor in the wrong spot.
Also make sure you have your piezo buzzer connected. I forgot mine once.
Step 5: In the End
You did it!
You're making music!
Sure it's nothing like Beethoven of Mozart but they had to start somewhere just like you are.
I hope this was a fun simple project for you. I also hope you found it some what educational. If you have any ideas about how to improve this project or even ideas you would like to try please tell me and go give them a shot!
Maybe you could try adding more notes or finding a way to switch octaves.
Any comments are much appreciated. Let me know what you think!
Enjoy the music!


