

Introduction: Simple, Single Folding Key


Now that it's summer, I go out running everyday. Before I leave, I have to make sure I get my house key so I can lock up the house. While running, I had to hold my key in my hand (I blame my pocketless shorts), and I would frequently drop it. I dropped it so much that my key actually bent a little bit! To stop this, I made a folding key holder which would not only protect my key, but make it much cooler!
This is a short and easy project, so I'm glad to say that each step requires very little description! Hope you like making it!
Step 1: Get Materials and Tools

Luckily, not too many pieces are required for this simple project. Most of the metal parts I used were from some pieces I found from an Erector Set (excluding the washers). For this project, you will need the following pieces:
- 2x 2.5 in. flexible blue flats
- 2x 1 in. screws
- 2x 1/4 in. washers
- 4x thick rubber spacers
- 2x thin clear rubber spacers
- 4x square nuts
- 1x your house key
You will also need the following tools:
- Allen wrench (for screws)
- Wrench (for nuts)
- Pliers (optional but helpful)
That's all you need!
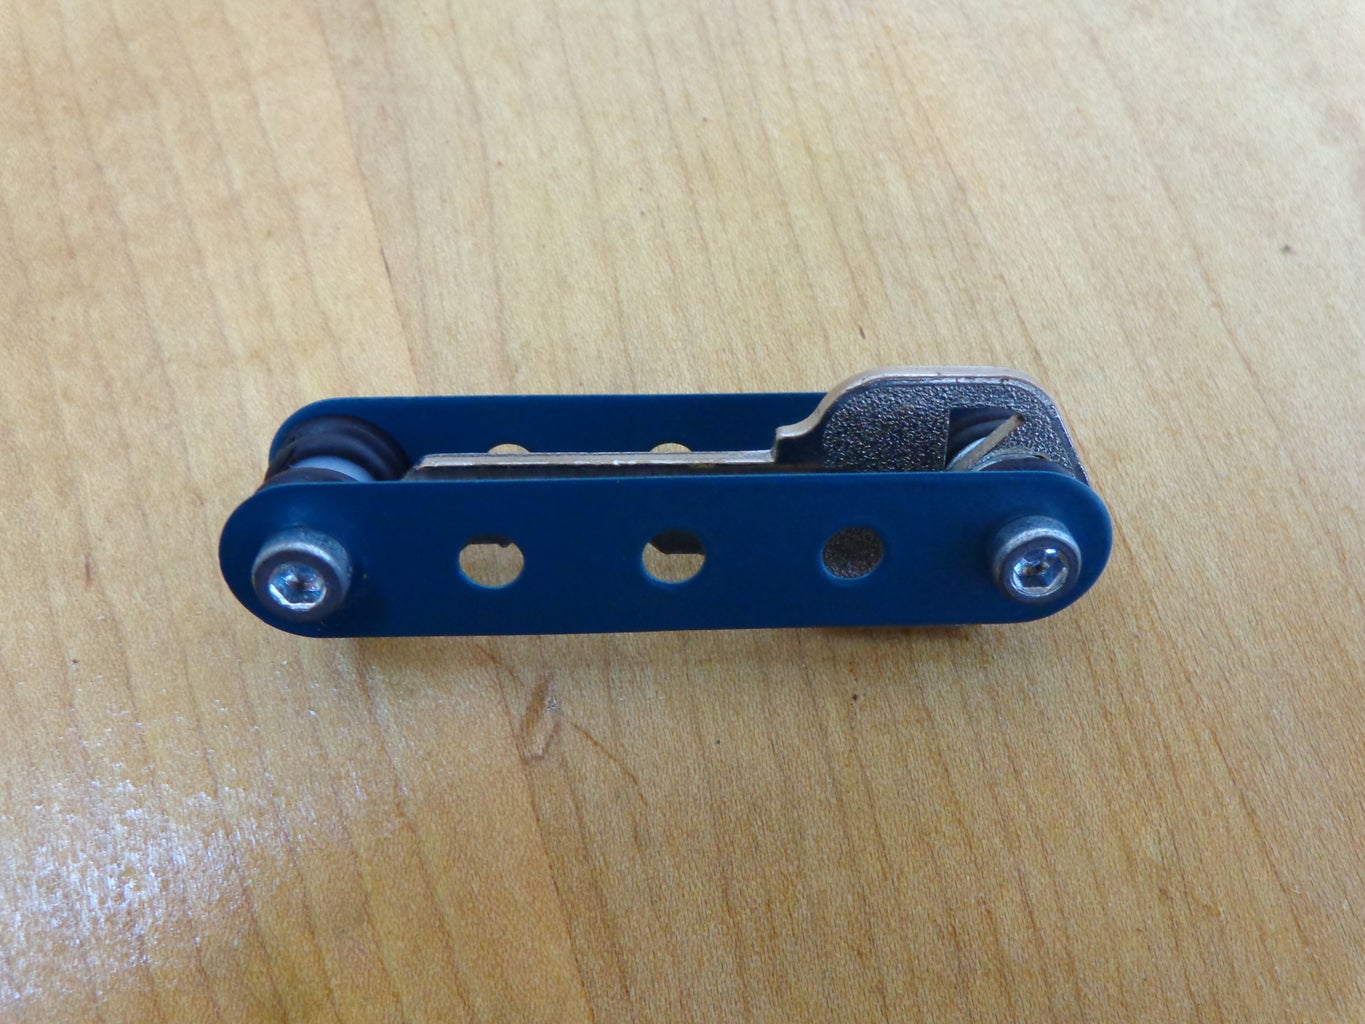
Step 2: Begin Assembly


First, put the two screws through the two end holes of one blue piece.
Step 3: Put on the Spacers


Next, get two of the thick rubber spacers. Push them down on the screws as far down as they will go. Make sure to do it on both sides!
Step 4: Put on Clear Spacers on the Right Side


Now, get your two clear rubber spacers. Push both of them onto the RIGHT screw. Make sure they are down as tightly as possible.
Step 5: Put on the Washers and Key


For this step, you'll need the two washers and your key. Put one washer onto the LEFT screw. Next, put the key on, and the second washer on top. Check the last picture on this step to make sure everything is stacked correctly as of now.
Step 6: Put on the Last Two Spacers


Now, put your remaining two spacers onto the screws. Push them down as far as possible, and make sure there is still extra room at the top of the screws.
Step 7: Put on the Flexible Piece


All you have to do in this step is put on the last flexible piece on top. Make sure the holes on the piece align with the screws.
Step 8: Put on the First Nut Layer


Now, we need to secure all the pieces down together. To do this, we'll need two of the four square nuts. Using the Allen wrench as well as the normal wrench, tighten the nut down so that about 2 millimeters of the screw can still be seen.
Step 9: The Final Nut Layer


To finish off this project, put another layer of protection by tightening down the remaining two nuts. You may notice that the nuts are misaligned. Use the pliers to align them. Make sure you do this on both sides.
After this, you're done!
Step 10: Conclusion and Extensions
This is a really useful project, because not only does it protect your key, but it also allows you to get a good grip on it! When I ran, I used to drop my key all the time (so much that it got a little bent), but now I can hold onto it without worrying about it dropping and getting bent.
For modifying, you can use longer screws and put more keys on. You can also add a lanyard so you can put it around your neck.
I hope you enjoyed this brief project! If you have any suggestions or questions, feel free to comment!

Participated in the
Summer #mikehacks Contest

Participated in the
Metal Contest

Participated in the
Epilog Challenge VI


