

Introduction: Simple Tasty Bread


I love bread. I love it more than anything except maybe bacon. I have been wanting a simple, easy to make loaf that was dense and flavourful without having to care for a sourdough culture, I just don't have a knack for it. So, I made this bread recipe wanting something in between a dense, chewy loaf of Challah and a flavourful but still white-bread loaf of French Bread (yes, capital letters, they're that good!) and I think I came pretty close. It's not sour but it's tasty!
Now, I like to make my bread by hand. I don't make it very often and when I do I usually find myself needing some tactile stress relief from working in the office on a computer all week. I find that working with elements from the earth (flour, water, yeast) is incredibly grounding and de-stressing after a busy week. Punching that dough and feeling it come to life really works wonders!
You don't have to make it by hand, but if you don't you're gonna have to wing it on the machine kneading times because I have no idea. I'd start with 5 minutes on high after bringing the dough together on low and seeing how that works.
Bread++:
830 ml – 1 L (3 1/2 - 4 C) All-purpose flour
125 ml (1\2 C) Whole wheat flour
300 ml (1 1/4 C) Warm water
15 ml (1 tbsp) Active-dry yeast
60 ml (4 tbsp) Sugar
2 Large Eggs
60 ml (1/4 C) Olive oil
7 ml (1 1/2 tsp) Salt
water and butter to coat
Equipment:
A big bowl
A medium bowl
A small bowl
A teaspoon
A baking sheet (or two)
Your own two hands
Image: A lovely plain loaf of bread++
Step 1: Getting It All Together


The first thing you'll have to do is bloom your yeast in the warm water.
To bloom yeast, make sure the water temperature warm but is not too high for your yeast; check the package and use a thermometer.
What's that? You don't have a thermometer? It should be about body temperature or a little lower and should not feel warm to the touch of your wrist. (Just below the temperature of your blood.)
The yeast blooming process will start with the yeasts swelling with water and hydrating themselves before they fall to the bottom of the bowl. After they hydrate and fall they will "bloom" and rise to the surface on the CO2 wave they created and start getting lively. If you're kind of distracted like me you can add a teaspoon of sugar to the bowl when you add the yeast because if you leave the yeast for too long they might peter out and give you a weak rise.
Just sprinkle the yeast over the warm water in a small bowl and give it a wee stir. Wait 10 – 15 minutes until most of the surface is frothy.
Meanwhile, mix the dry ingredients with the smaller amount of flour together in a bowl and make a well in the center then mix the olive oil and eggs in a small bowl, beating to combine.
Images: Yeast just added to a bowl and starting to swell and hydrate, yeast rising to the surface on a bubble of CO2. These guys are almost ready to add to the dough, in one more minute they'll be ready to go! (note: the yeast no longer look egg-shaped and separated in this picture but are living in one smooth colony now)
Step 2: Making the Dough

Add the egg and yeast mixtures to the well in the dry ingredients and combine to form a rough dough. The dough should be a little bit sticky, add some of the extra flour if you need to, but leave a little bit for kneading.
Let the dough sit for 15 minutes. This will let it relax and be more tender in the final product; it’s worked hard enough for now. This period is called the autolyse and allows the dough to hydrate as well as relax.
Knead for about 20 minutes or put in the mixer with a dough hook on high for about 5 minutes or until it has the right elasticity. You cal tell by stretching a small piece out – if it becomes semi-transparent and light shines through without breaking it’s ready.
Let the dough proof, put it in an oiled bowl covered with a cloth or some oiled saran wrap and wait until it’s doubled. When you poke it, the dough should not bounce back all the way and leave a finger hole.
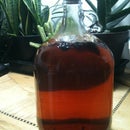
Image: A living, proofing, transpiring (yeast don't breathe!) ball of dough. Weird, right?
Step 3: Proofing and Baking

When the dough has doubled, punch it! Yeaaaa! Knock the air out of it and knead it a couple of times. Yeah. Then, when it’s had enough, form it into loaves and place it on your baking pan with some cornmeal underneath it.
(Optional) Now is the time to brush it with egg wash or water if you like, before it rises. After it rises it might fall and lose volume with washing. Wait until it doubles again.
Pre-heat the oven to 180° C (350° F) and when the loaf has doubled, bake it for about 30 minutes or until golden. When you tap the bottom it should sound hollow. If you take a temperature reading it should be around 94° C (200° F).
Now is the hardest part, wait patiently for those proteins to calm down for 15 minutes. I know it’s hard! But do it, the bread will still be warm and the loaf will have a better texture. He's tense right now, I mean you did just beat him up and toss it in an oven. (Did I go from calling the loaf it to he? Whatever. He's gonna get eaten either way.)
Now slather the outside in butter (if you didn't already egg-wash it). It will soften the crust and add flavour and shine, who doesn't want that? I guess some people... :( If you don't want to slather them in butter you can make an egg-wash and coat them before putting them in the oven. If you egg wash them you can even cover them in sesame seeds, poppy seeds, caraway, cheese or... whatever. You can do everything loaves by mixing poppy seeds, sesame seeds, and onion flakes! Pretty tasty.
Congratulations! You now have two lovely loaves of bread++.
Image: Two lovely loaves of butter-glazed bread++.

Participated in the
Baking Contest

Participated in the
Potluck Contest


