

Introduction: Simple Minimalistic Design Lamp


Hello I'm Thomas Van den Langenbergh. I'm a Belgian design student and together with Pauline and Katrijn, we designed a minimalistic lamp. We will make it simple to construct a minimalistic lamp with wood and plexi (PMMA).
Step 1: Chose Wood.


I chose American oak for the construction of the lamp. You can buy pieces of wood in your local wood store. The wood is planed, this is cheaper. Notice that wood will never look the same, the woodprint can be different.
Step 2: Make the Wood Part


The instructables come with a full plan for making our lamp. Please, read this plan carefully. You can choose the method of making it. Notice that this is a vital part of the lamp so some experience with woodworking is needed.
Attachments

Step 3: Connecting System


This part will connect your lamp to a wall.
You will discover a laser file and 2D drawing from this part in the file above
You also need 2 pens with a diameter of 10 mm, you can buy this in your local DIY store.
Attachments
Step 4: Bending PMMA (plexi)


In this step we bend plexi to a radius of 750 mm. The machine is designed for bending plexi. In the link below you see how this machine was made. All user instructions for the machine can be found on the blog.
Note that the plexi is just 4mm thick. If you want that some parts in the plexi light up, you need to be aware of the fact that transculent plexi will not light up. You have to scour the edges with sand paper.
The design of the plexi lamp is can be very personal. So be creative! You also find a laserplan above.
https://www.instructables.com/id/Bending-PMMA-plexiglass/
Step 5: The Light Source


A lamp without light is just an object. We need light ! You have to use small 3mm LEDs and a small resitance. Most shops will assist you in buying the leds and helping you with chosing the right resitance. After you find the components, you have to solder it together.
If you don't want to spent money on a transfo you can obtain for an old nokia adaptor. There is always someone in your neighbourhood who has an old crappy nokia or a adaptor.
Step 6: It All Comes Together ...

In this step you have to slide te plexi into the woodpart. Make sure it stays in place! if it doesn't apply some tape on the surface.
Step 7: Let the Lights Burn

Install the light into the wooden part. Again you can glue it or apply tape. Make sure it stays in place ! The Leds needs to be placed horizontally. Otherwise the light won't diffuse and the effect wil be minimal.
Step 8: Assembly


In this step you slide the two components into place. Note that you first have to srew the connecting part to the wall.
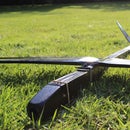
Step 9: Check the Result of Your Work


Runner Up in the
Make it Glow!

Participated in the
Wood Contest


