

Introduction: Single String Double Gutbucket


Hello, this is my version of a washtub bass. I call it a single string double gutbucket.
The washtub bass is an old folk art instrument often found in jug bands.
The resonating chamber is a combination of two old washtubs and a piece of used plywood paneling.
The neck of the instrument is a vintage Louisville Slugger baseball bat.
The single string is actually a piece of heavy duty weed wacker line.
Step 1: Joining the Tubs.


The two washtubs were joined to form a cello like shape.
I used an angle grinder to cut a small section out of the larger tub. Start with a smaller area than you think you will need. Then test fit the tubs together and adjust the opening until you get the fit you want. Remember, you can always cut away more of the metal, you can’t put any back. Leave an inch or so on the sides of the cutout and bend it back to be used to connect the two tubs together.
I bolted the two tubs together before cutting the second tub. I used steel bolts and nylon lock nuts, to keep them from vibrating loose. I then cut the second tub even with the first one. I left about an inch from the bottom so it could be bent back to cover the seam. Bolts and locknuts secured this area as well.
Step 2: Building the Neck and Backbone.


I glued two lengths of 1” X 2” wood together to form the backbone. I could have used a precut 2” X 2”, but I already had the smaller boards.
A 14” cut was made lengthwise in the thick end of the baseball bat, and half of the cut area was removed. The bat was then glued to the backbone using a wedge made from a piece of the excess 2” X 2”. This wedge allows the bat to clear the lip of the washtub, and angles it slightly back. The backbone and wedge were scorched lightly with a blowtorch to get the tiger stripes, and then varnished once the bat was glued on.
“U” shaped cuts the size of the backbone were cut at the very top and bottom of the tubs. The uncut part was bent inward and wood screws were used to secure the backbone to the tubs. I also used small angle braces to add strength to the connection.
Step 3: Putting the Plywood on the Tubs.


The plywood fits inside the lip of the tubs. It is secured to a bunch of 1.5” pieces of 1” X 2” wood. These pieces are spaced evenly around the inside of the tubs. They are also spaced a distance equal to the width of the plywood below the lip of the tubs, so the top of the plywood will be flush with the top of the washtubs. Predrill the holes in the tubs and the holes for the woodscrews in order to keep the small pieces from splitting.
I made a cardboard pattern before cutting the only piece of plywood that I had. When I was happy with the fit, I cut the plywood, and then cut out the F holes. The wood was then varnished, and attached to the washtubs. Again predrill the holes to avoid splitting the wood.
Step 4: Attaching the String.

I wanted this instrument to be played using the same method as a traditional washtub base. This involves pulling back on the neck to increase the tension on the string and change the tone. Since the neck is firmly attached to the tubs, the bottom of the string is connected to a hinged footplate.
A hole was drilled through the upper part of the neck, and top of the string was secured with two radiator clamps.
A crude bridge was made, and the first notes were plucked… Not too bad.
Step 5: Improvements Were Made.


I originally placed the hinge to the back of the footplate. I had planned to use my foot to hold the instrument steady while playing it. But that was an uncomfortable position, and without my foot holding it, I had to push the entire instrument down because it wanted to rise due to the tension on the string. So I moved the hinge to the front of the footplate and taking advantage of the new leverage, let the weight of the instrument hold it down.
Several different strings were tried including, steel cable, cotton clothes line, nylon rope and paracord. In the end I chose heavy weed wacker line.
I also changed how the line was attached. At the top, I removed the radiator hose clamps and added a bolt that went through the same hole as the string. Two fender washers were bent to the shape of the neck, and they are pulled tight using a wing nut. I also made a little wooden tool that makes it easier to turn the wing nut. This set up not only looks better, but makes adjusting the tension of the string a lot quicker.
The bottom of the string was originally tied in a loop to attach to the footplate. Not only was it difficult to tie a loop in the stiff line, but the knot took a long time to pull tight, and the tension on the string had to be adjusted multiple times. I now use a wire rope sleeve to create a loop in the bottom of the weed wacker line. It is very quick, it does not stretch, and it adds a little bit of usable length to the string.
Step 6: Building a Bridge.


I experimented with different bridges to find the height, width and thickness that worked best.
The height was important, the string had to clear the neck. But it could not be too tall because in addition to stretching the string to change the tone, I wanted to be able pinch the string against the neck like you would on a cello, or double bass.
The thickness was also important. The lengths of string above and below the bridge are not equal. So when the string is stretched, the bridge rocks and needs a deep footprint from front to back in order to keep from being pushed over by the pressure from the string.
The width was actually based on what I thought looked right.
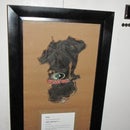
Speaking of looks… While searching for a pattern to make the bridge, I thought that the ones for cellos looked like short headless men. The four strings going across the tops of the shoulders. Since I am only using one string, I could add the head. So I created a pattern for a ‘Squat man bridge’.
The pattern was printed on plain paper and glued to piece of scrap wood that was the right thickness. A scroll saw was used to cut it, and a belt sander was used to taper it. I’ve been told that it looks like a gingerbread man, and I am thinking about painting one in that fashion.
Step 7: Give It a Stand.


Because of the narrow and hinged footplate, this instrument will not stand on its own. So I built a simple stand to support it when it is not being used.
Step 8: Make Some Music.

First Prize in the
Reclaimed Materials Contest


