

Introduction: Slightly Risque Trophy


I recently sent a book of war stories from the world of food service to a friend. She was very taken by the tales, which she felt were very representative of her own experience.
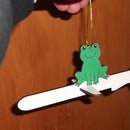
The cover of that book featured a picture of a fork which had been bent into the shape of a hand "flipping the bird."
This Instructable covers the making of a wooden wall plaque with such a fork mounted on it.
The photograph above has been bowdlerised for those of a delicate sensibility. Be aware that later steps will show the unexpurgated version.
Step 1: Preparing the Fork


I would suggest that you NOT use a fork from your cutlery drawer. People will become upset.
I went to the local charity shop (op-shop, thrift store) and bought a variety of single forks. No matching sets were broken up, a good cause benefited by a couple of bucks and I was able to get a range of flatware.
The fork shown in the first picture is a very high quality one (fifty cents!) which was 3.5mm thick stainless steel (about 1/6 inch). Having made a few of these, I'd recommend a slightly thinner one as it easier to bend without marking the surface finish.
Having chosen the fork, while it is still flat, put some masking tape on the handle and mark the positions for a couple of screw holes. I was using #6 screws to mount the fork, so I drilled 4mm clearance holes.
The finish of the holes isn't great, but there is no need to tidy up as they will be completely hidden by the screw heads and the wooden backboard. However, do be careful of sharp edges and swarf while handling the workpiece.
Step 2: Bending the Fork


I've tried doing this on a small anvil, and it is a lot easier with a bench vice.
Hold the fork in a vice, and then bend the "fingers" with a pair of pliers, starting at the end and then moving down. Each bend should be about one quarter of the length of the tines and about 120 degrees. Remember to leave the "index finger" alone, as if you inadvertently bend it and then straighten it, it will be obvious.
The "wrist" bend is a lot harder in this thick fork. I had to persuade it with a hammer. This got the bend OK, but it did damage the wood covering the vice jaws. That isn't really a problem since it is there to protect the workpiece.
The bend from the "forearm" to the backboard was also quite tough given the amount of metal which would need to be distorted. To give a better bend, I put some scrap tool steel (redundant allen key) on the inside of the bend and applied the hammer to the outside. That gave a good, and much tighter, radius.
After all that, the fork is in the right shape for mounting.
Step 3: Cutting the Wooden Plaque


I tried a few terms for google before managing to get an outline for a shield which I felt I wanted to copy. The address which I used is visible in the first photograph. The file said that it was useable royalty free, but I'm sure that there are many other such. I would recommend that you use a shield which has straight sides, at least for your first stab at this.
I printed a couple of copies of the shield on one page, having scaled it so that it was almost as wide as the 150x25mm (6"x1") nominal plank which I was going to use.
I cut each shield separately and this allowed them to overlap slightly which saved a bit of wood.
Spray contact cement was used to fix the paper to the timber. This is going to be the back of the shield, so the fact that the paper will never be removed isn't too much of an issue. I would use a different method the next time, possibly a self-adhesive sheet. It is important that the paper be very firmly attached though, as the jigsaw will move anything which isn't.
I cut around the line with a jigsaw, which worked very well. The fifth photograph shows a close up of the line on the paper, and how I was able to follow it even though it was rather pixelated. The offcut is interesting: the polishing on it indicates that my jigsaw blade was blunt. I replaced that for the rest of the cutting which resulted in much faster and cleaner work.
The reason for suggesting a straight-edged shield is that I wanted to ensure optimum support at all times for the jigsaw, so I cut up towards the table half-way up the side, then cut back towards the end of the previous cut. It was much easier to get a clean join on a straight edge, and also easier to smooth the interface afterwards.
Step 4: Edging the Shield


Before I started routing round the edge of the shield, I used a couple of fairly coarse grades of sandpaper to smooth the edges, especially on the cross-grain pieces. The router bit will follow the edge, so it's important to get any real ugliness from the jigsaw removed.
It would the not have been possible to circle the shield in one pass and also clamp it firmly to the bench, so I used the fact that the back of the shield will be hidden to allow me to put a couple of small holes in it, which I then used to fix the shield to a bit of scrap plywood. This sheet is large enough to be clamped firmly down, while leaving sufficient clear space around the shield for the router to pass.
I have a few edging bits for the router, but just used a simple 45 degree cutter, and that worked surprisingly well. I think that a more complex profile would have been quite unattractive on such a small piece, and even more so if I'd used a more complex shield shape.
Step 5: Finishing the Shield


I gave the wooden shields a couple of goes over with fine sandpaper, then gave them two coats of a water-based combined stain and varnish. This stuff emphasises the importance of stirring (not shaking, that introduces air bubbles) and they really mean it: all the pigment settles out over as little as a couple of hours.
One trick was that the screw holes on the back were very useful at this point: they allowed me to hold the shield while also applying varnish all the way up to the edges.
Another fine sanding between coats, and the wooden bit was done.
Step 6: Mount the Fork

A couple of pan-head screws fix the fork to the shield and also cover the roughness of the drilled holes.
One trip to the local key cutter and I had an engraved brass plate, and a much lighter wallet. I intend to find an on-line source for future work. Double sided tape held the brass on to the wood.
All ready for wrapping and posting.
Step 7: Lessons Learned/Crimes Concealed


Paper on the back of the shield:- it has to be well stuck down, but the contact cement was overkill. Even thought the back will be hidden, I didn't want to leave the pen markings visible on the paper, so I did a quick go-over with a black Sharpie: it doesn't look great, but I think it looks better than the random notations which had been there.
The router bit which follows the edge has a small bearing. The bolt which attaches this sticks a couple of mm lower than I thought. The third photograph above shows how this bolt fouled on the scrap ply which supported the shield. Next time I will check that clearance and shim the shield a little.
The fork was too thick for a good model. It was too hard to bend which meant that the force required marked the surface. This could be ameliorated by using a scrap of leather between the workpiece and the hammer. Harder to solve is the problem that bending the "fingers" accurately is very difficult when the metal is this thick. Pick a nice fork which isn't too thin, but is also not 3.5mm thick.
The jigsaw cut surprisingly cleanly, but a good blade is essential, not an option.
If you have read this far, then thank you for your patience and attention. The book which inspired this project is titled "Prick With a Fork" and is extremely funny, although it may put you off dining out. ISBN 978-1-9252-6605-4


