

Introduction: Stovetop Photo Studio


So, you need to take pictures for your latest Instructable, but every horizontal surface in your house is piled high with other incipient 'Ibles in various stages of progress? (Of course not. You keep things neat and tidy all the time. ...Me, too, of course.)
But just in case there's some unnamed person out there whose creativity sometimes gets ahead of his or her orderliness, this Instructable is about how I set up a product/macro photography "studio" on one of the few flat surfaces in my apartment that tends to stay uncluttered - the top of my stove.
I was surprised at how well this worked - the stovetop/underhood light was great for lighting, and I was able to hang my drape and so forth from the vent hood.
(Note: Do Not Attempt this using a gas stove with burning pilot lights.This set-up may not be one that can be made safe for any type of gas stove. The type with igniters at each burner instead of pilot lights might be okay, but I don't think I'd try it myself. If you have actual pilot lights with little burning flames, please just skip this whole idea.
More precautions against fire are covered in Step 3.)
('Nuther note: It may also be unwise, or at least inconvenient, to do this if you share living space and/or cooking facilities with others who may want to use the stove for more conventional purposes. I leave the judgement call, and any relevant negotiations, up to you.)
Step 1: The Stuff You're Gonna Need


(Again,Do Not Attempt this using a gas stove with burning pilot lights.)
Other stuff you'll need:
- Large cutting board, or other large flat board that will fit on top of your stove.
- Background drape.
- Masking tape.
- Various clips, clamps, hooks, holder-thingos, etc.
- Camera & photographic subjects. :)
- Depending on how tall you are, a stepstool may be sometimes be handy for getting a better photo angle.
Step 2: Get the Stove & Vent Hood Reasonably Clean

You'll have to clear off the top off the stove, and (this is the hardest part) clean the vent hood if you have one. At least make sure that the flange around the bottom of the hood is clean - it's a great place to attach clips for hanging your background drape and other stuff. Then (it's always better to do this after cleaning the vent hood) wipe down the stovetop so that it's reasonably clean too.
Step 3: Avoid Burning Your House Down -


- the firemen would laugh at you.
(That, and your house would get burnt down.)
The best reason not to use your stovetop for a photo set-up, or for anything else other than heating and cooking, is the risk of starting a fire. Putting potentially flammable drapes and other stuff on top of concentrated heat sources is generally a bad idea - unless you're going to be very smart and careful about it.
And please don't try this at all if your stove is gas rather than electric.
With an electric stove, nothing's going to heat up (barring serious electrical malfunction) unless it gets switched on, so I taped all the switches securely in their "OFF" positions. Now I know that nothing's going to get turned on accidentally.
Having a fire extinguisher within arm's reach is probably not strictly necessary, but it doesn't hurt.
Step 4: Hanging the Background Drape


This is where that wonderful flange on the vent hood comes in. The exact details will depend on your specific clamps and drape (& flange) - I've set out how mine works in the image notes below.
Step 5: Supporting the Foot of the Drape


It's better for your drape to be too long than for it to be too short. But, if left unsupported, the weight of any extra length can pull all that graceful curvature out of the drape.
Exactly how you support your extra drape will depend on the details of your drape; your various clips, clamps and holders (or, in a pinch, masking tape); and your stovetop & oven door. Just be sure to leave a short loop at the front for ease of curvature and adjustments.
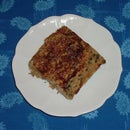
Step 6: Break Out Your Camera & Photo Subjects


As you can see, I'm not the best product/macro photographer in the world. But this stovetop set-up is so easy and convenient for me that I hope to be getting lots more experience, and maybe even to improve some. :)
Participated in the
Digital Days Photo Contest


