

Introduction: THE COVID KILLER BOX


My wife has a background as a pathogenic microbiologist and organic chemistry which turned into a love of teaching children. I have a background in specialized technologies. One could only assume we would own a disinfecting company. One with an emphasis on odor removal using only variations of oxygen by manufacturing star-like plasma in the most powerful portable machines in the country!
If you're reading this blog on https://www.stopmyodor.com/ you already know all of this because you're already ahead of the curve!
The rest of you, we suggest you check out our website at https://www.stopmyodor.com/
That being said we treat her classroom, just like we do for our other clients property listings, offices and vehicles often!
Why?
Kids are germ and virus factories!
Now the only downside is plants, people and pets cannot occupy the space while treating.
What's the problem?
What if she just needs to treat small things like linens, toys or in this crazy time of quarantine food being delivered to her elderly parents outside their house.
That's right! You can transmit disease just by passing groceries through the door.
Well how do we fix all of these issues at once?
Simple!
Stick with me to learn how you can make your own disinfecting box that uses only oxygen to kill 99.99% of all viruses, bacteria and fungi that's not only food safe but is also portable.
Supplies
Box: https://www.homedepot.com/p/Husky-37-in-Rolling-To...
Disinfecting Unit: https://www.amazon.com/Ivation-Portable-Ozone-Gene...
Glue: https://www.amazon.com/E6000-237032-Craft-Adhesive...
More information on our website:https://www.stopmyodor.com/
Step 1: Box Shopping


Well considering the majority of you are in quarantine and likely practicing social distancing for the next few weeks, jump online and get to shopping for a box that fits your needs.
Things to look for:
1: A box small enough to easily transport. That's right! it's no good to you if it doesn't fit in your vehicle!
2: A box big enough to fit your needs now or potentially at a later date while still allowing air flow around objects placed in the box. A 5 gallon bucket or a Tupperware container may just be the perfect size.
3: Ask yourself "Where will my box be used?" this may open a whole other world of unforeseen factors.
4: The box should be semi to partially air tight. Not perfect but also not a cardboard box with breathing holes like you get when you bring home a pet from the pet store.
5: Where can I store this box when not in use?
Now locate that perfect sized box, bucket or container!
I chose mine due to the seal around the edge and the fact that the box can be locked with two keys. This will reduce any child from opening the box as it's now locked and prevent children, animals and stray and possibly ferrell humans from entering during or after treatment. Having two keys lets one disinfected key to remain inside with the in-laws and one key to remain with us or because we like to lose keys.
Step 2: Quality Control

Ensure the assistant manager is happy with the box/ container.
Step 3: Disinfecting Unit

While you're busy fumbling around between Youtube, Facebook and Instagram, jump over to Amazon and get an ozone machine.
Isn't ozone bad?
One of my favorite questions! Depends on the type of Ozone!
There are two types of Ozone Tropospheric and Stratospheric ozone. Tropospheric ozone is made when UV light binds pollution and NOx this is bad ozone! Like "Go to your room young man" type of bad!
Stratospheric ozone on the other hand is naturally occurring and keeps us safe. In fact Stratospheric ozone breaks down Tropospheric ozone by destroying the VOC's (Volatile Organic Compounds) that make up pollution. It also deflects solar winds from destroying the planet, but that's a different class...
Keep in mind that Stratospheric ozone is used in sterilization of medical equipment and water treatment. That's right! Depending on where you live in the country you likely drink ozone in every glass of water, coffee, tea or soda.
Now back to finding and ozone machine Here's what you're looking for:
1: Minimum 400 gm/h output
2: Flexible output tube
3: A compact size to mount on your box.
Step 4: Ozone Disclaimer

Let's get the scary part out of the way.
Ozone is an Oxidizer!
Stratospheric Ozone in low concentration is safe!
In high concentration ozone is an extremely powerful disinfectant. It will destroy any organic compound. This means it will kill fungi, bacteria, viruses, as well as topical mold and its spores.
This means it will also kill plants, pets and people!
Ozone is most effective when used in high dosage for short durations.
This is known as a shock treatment.
Step 5: The Build

If you can call it a build...
It's more sticking stuff together
Figure out how you want to mount the ozone machine and plan accordingly.
For me this was the front of the box under the handle. I
t's out of the way and just happens to fit perfectly over the structural ridges.
Step 6: Tape, Mark, Drill


Once you've chosen a location lay down some masking tape where the mounting holes are located.
Mark that location on the tape and drill the holes accordingly.
Step 7: Output Tube Location


Pick a desired location for your output hole.
Close is best.
Just make sure the hose doesn't kink as this will prevent proper ozone output.
Drill the hole for the hose ensuring a tight fit without compressing the hose when being inserted into the box.
Step 8: E6000


Time to make this thing stay put.
After a quick test fit of all components pull off the masking tape and get out the trusty E6000 glue.
If you like blurry photos this and the next few steps are for you!
Glue the screws into the back of the ozone unit and apply a liberal bead where the unit will rest along the box.
This will prevent the ozone unit from coming loose and prevent vibration.
Step 9: Align, Mount, Glue


Insert the bolts into the box, add a washer, a lock washer and put a bit of E6000 into the nut and tighten.
Ensure the unit is firmly embedded into the glue.
Step 10: Hose


Pull the hose through the box to ensure there are no kinks.
Here is the most essential and crucial step to this entire box.
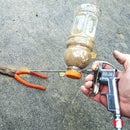
Using pink handled flower scissors to cut the tube is not required but is extremely recommended!
Step 11: Seal


Glue around all bolts and hoses and let glue cure.
Step 12: Final Inspection


Check with your supervisor. Try not to catch him after his nap. He's not super happy after naps.
Step 13: Use


1: Place unit outside or in well ventilated area
2: Plug unit in
3: Place desired objects in box
4: Turn on unit and set the timer 30 min is best
5: Check for proper flow
6: Close and lock
7. Let box sit for 30 mins after treatment is completed
8: Remove disinfected items
9: Unplug until next use
For more information check out our website at https://www.stopmyodor.com/


