

Introduction: Tarahumara Inspired Huaraches


If you've read Chistopher McDougall's bestselling book, "Born to Run," then you're probably familiar, (or at least have heard of) the indigenous "Tarahumara/Raramuri Indians" that live in the copper canyons of Mexico. Throughout the book, it makes reference to the sandals, or "huaraches," that these people wear. Since the publication of the book in 2009, there have been a few companies that have started up that sell huaraches. Companies like Luna Sandals, (started by one of the characters in BtoR, and named after another) and Xero Shoes, (formerly known as Invisible Shoes) are two prominent ones. From either of these websites, you can buy an already made pair, or order a kit to make your own. That's awesome! The only thing about it that I don't like is that buying a pair can be expensive, (up to $125!). It's a bit ironic, really. Here's a quote from Caballo Blanco, (another prominent character in BtoR) who lived among the Tarahumara for years. "Running is not supposed to be about getting people to buy stuff.... Running should be free, man..." So what do you do if you want to wear Tarahumara style huaraches, but don't want to pay to do so? Well, I decided to try and make my own.
Note: This instructable is not the documentation of my first time trying to make huaraches, but more like my 7th or 8th. Each time I do it I feel like I get a little better, but there's always a bit of experimentation. If it doesn't work out perfectly the first time, don't get discouraged. Make note of things that you think could have gone better, and then when you feel up to it, try again.
Step 1: Supplies


Here is the list of the supplies you will need for this project:
- A used tire. Can include steel belt or not, since we will be going over how to get around that in this instructable. Preferably the tread should have straight grooves down the middle
- A stanley knife or similar cutting implement. You want something that's sharp enough to cut the tire rubber, thin enough to fit into tight spaces, and something that you don't care about getting dull. Stanley knife blades are cheap and fairly durable
- A towel, (optional). So you don't have to sit right on the tire and get your pants black
- A 3/16inch punch and/or drill bit for making holes in the rubber
- A Sharpie, or similar marker
- Some sharp scissors or kitchen shears
A piece of paper, (probably more then one)
Deer hide/leather. This was just to put something between my feet and the rubber. You could use memory foam or some other type of soft cloth
- Cotton rope. Long leather strips would be ideal, but leather is expensive, and I don't know where you would find some in the right dimensions. Cotton rope is cheap and easily accessible, (I recommend cotton rather then nylon just because cotton "holds" better, and is less prone to slipping
- Time and Patience. Both two very important things
- An ability to not care what other people think, as they will probably think you crazy
Not pictured, (most likely because I forgot I needed them until I needed them)
- Gloves, (I forgot about these until I started developing blisters)
- Drill
Step 2: Obtaining the Rubber


This step shouldn't be too hard for most people. If you live anywhere close by a tire shop, you can go around asking for old tires that they aren't interested in anymore. Chances are, they won't be too opposed to you taking on off of their hands. Be sure to try and get one that at least has the straight grooves down the length of it. No fancy mud-gripping tread.
Make sure that the tire you get isn't too old. If the tread looks all cracked and brittle when you look at it closely, try to find a different one. We're looking for one that's been used, but not sun-dried and cracked.
After you've gotten your tire, it's a good idea to hose it off before you start working on it.
Step 3: Initial Marks and Cuts


If you were lucky enough to find a tire without the steel tread in it, (golf cart, atv) then you can skip on to step #6.
Once your tire is dry, start by marking the edges of the tread with a sharpie. This will be our guideline and will help us to know where we want to cut it.
Once both sides are marked along the whole circumference, it's time to cut. Place your towel on the tire, (if you don't want your pants getting black) and sit on it. Then, choose the spot where you want to make your first incision, and press down into the rubber hard. Then, slowly draw the blade towards you, and cut upwards towards yourself until the knife reaches the edge of the towel. Then, dismount your tire, roll it a bit, move the towel to desired position, remount, and repeat. Keep this up until you have made one continuous cut along the whole edge of the circumference. Then, dismount, flip the tire around, and do the same thing along the other side, taking care to go slow and not injure yourself. Also, I learned that it hurts your hands a lot less if you wear gloves :) That way you don't form blisters form gripping the knife as quickly.
Step 4: Horizontal Cut and Filleting of Rubber


We are now approaching the hardest part. Filleting the rubber. Why do we do this? Well, most tires come with steel belts in their tread that make them tough to cut if you don't have the proper power tools, and also leave lots of sharp edges on the sides that need to be sanded down afterwards. If you don't have access to the equipment needed for that, you can go another route: filleting the rubber.
In order to do this we will need to first make a horizontal cut across the tread, connecting the two cuts on the sides. Once this is done, try to make that cut wider. Once it's wide enough, try to cut under the rubber. Getting started is really hard. It helps if you start at the corners, and then work your way inwards. Try to have one hand hold the rubber up while the other cuts at it with the knife. I don't have any good pictures of getting started, because it would've been really tricky to work the camera without using my hands. Hopefully you can get a good enough sense of what it should look like by perusing through the pictures. Even once you've gotten started, it really helps to go along the sides first and then work your way inwards towards the middle. This part might take you the longest out of the whole thing, so don't feel like you have to rush it. Take your time, and with persistence it should turn out looking good.
Once you've made it halfway around the tire, (or maybe even before that) you can go ahead and cut most of it off if you want. I was originally planning on going all the way around, but since I was pressed for time I stopped at just about halfway through.
When you are cutting it off, leave a bit of a flap on the tire. This way you don't have to start all over again if you decide to cut the rest of it off.
Step 5: Measure Your Foot


Now that you've got your rubber cut out, go grab a piece of paper and your sharpie. Trace your foot, putting a dot in between your big toe and the one next to it, and make two marks on each side, right in front of your ankle bone. Try to get these to match up. After you've taken your foot off, draw two lines each about a quarter inch in from the marks you made by your ankle, and put a little dot at the end of each of them. These will be the two other holes for your strap to go through.
After you've traced your foot, cut it out and punch some holes where your dots are. Since most peoples feet are symmetrical, instead of tracing your other foot, you can just mark one side with an "R" and then flip it around and mark the opposite side with an "L" for "right foot," and "left foot," respectively. Once this is done, you are ready to transfer your design onto the rubber.
Step 6: Transferring Your Foot Shape Onto the Rubber


Put your paper foot onto the rubber, trace it again, and make sure to mark the dots where the holes will be. Try to center your foot as much as possible, and make sure that it's pointing straight, and not at an angle. That way the tread will be in line with your foot. Also, make sure that you line up the hole by your big toe with a corresponding groove in the tire on the other side. This will help because when you tie the knot on the finished thing, instead of having it grate against the ground, (as much) it will gradually fit into the groove, (sort of, it's never a perfect fit) thus reducing the amount of wear that is placed on the knot, and extending the life of your rope. Again, refer to pictures for better clarity. Once you've traced one foot, just flip over your outline, place it a bit farther up on the rubber, and do the same thing.
Step 7: Cutting Out Your Rubber Outline

I forgot to take pictures of this part, (so only the end result is shown) but all you need to do is cut out your rubber outline with a pair of scissors. The rubber I had wasn't super thick, so it wasn't too tricky, but that might vary based on what kind of tire you got.
Step 8: Punch/Drill Your Holes


Originally I was planning on punching out the rubber, but that didn't work as well as planned, so I ended up just drilling them. A word of advice though, be smarter then I was, and use at least a 1/4 inch sized drill bit. I used a 3/16 size, and while I was still able to get the rope through, (eventually) it was a bit of a pain and could have been easily avoided.
Step 9: Tracing and Cutting Your Leather


Now get our your leather, (or substitute cloth-whatever you want your foot to rest on) lay it out, (make sure that the side facing up is not the side that you want to have your foot on) flip your rubber soles onto them, (having the bottom of the soles facing up) grab your sharpie, and trace another template out onto the leather. The reason that we use the soles themselves as templates and not our paper one, is just so that they fit the soles better.
Once you've traced your sole designs onto the leather, take your scissors again and cut along the inside of your tracing. This will make it so that the leather is less prone to hang over the edge of your soles.
Step 10: Punching Holes in Your Leather and Gluing the Soles Together


Once you've got the leather soles cut out, lay them on top of your rubber ones. Feel around until you find the indentations where the holes in the rubber are. Mark these with your Sharpie, and then punch them out. Now we are ready to glue the two together.
Again, I don't have any good photos of actually doing it, because my hands were too occupied in throwing themselves at the shoe-goo in an effort to prevent any of it from reaching the soles, (not actually). Really all you need to do is make sure that the holes line up on each sole, while also making sure that they, (the holes) don't get clogged with shoe-goo. An easy way to do that is to leave a small area around the hole untouched by shoe-goo so that it doesn't have a chance to get in.
Step 11: Measure Your Rope


I'll be honest. I don't have a good way of doing this. I literally just take the rope, pretend as if I'm lacing it up on myself, and then allow for a little extra. If you're doubling up your rope, (which I highly recommend) either measure it out with one strand and then double it, or double the hole thing and measure it out. Whichever your prefer. I can kind of cheat because I know from past experience that it's approximately 6 feet for a single strand to go around my foot, 12 feet if it's doubled. Try to make sense of the photos, and hopefully you'll be able to understand what's going on.
Step 12: Threading Your Laces


Refer to the pictures on this one.
Step 13: That's It!
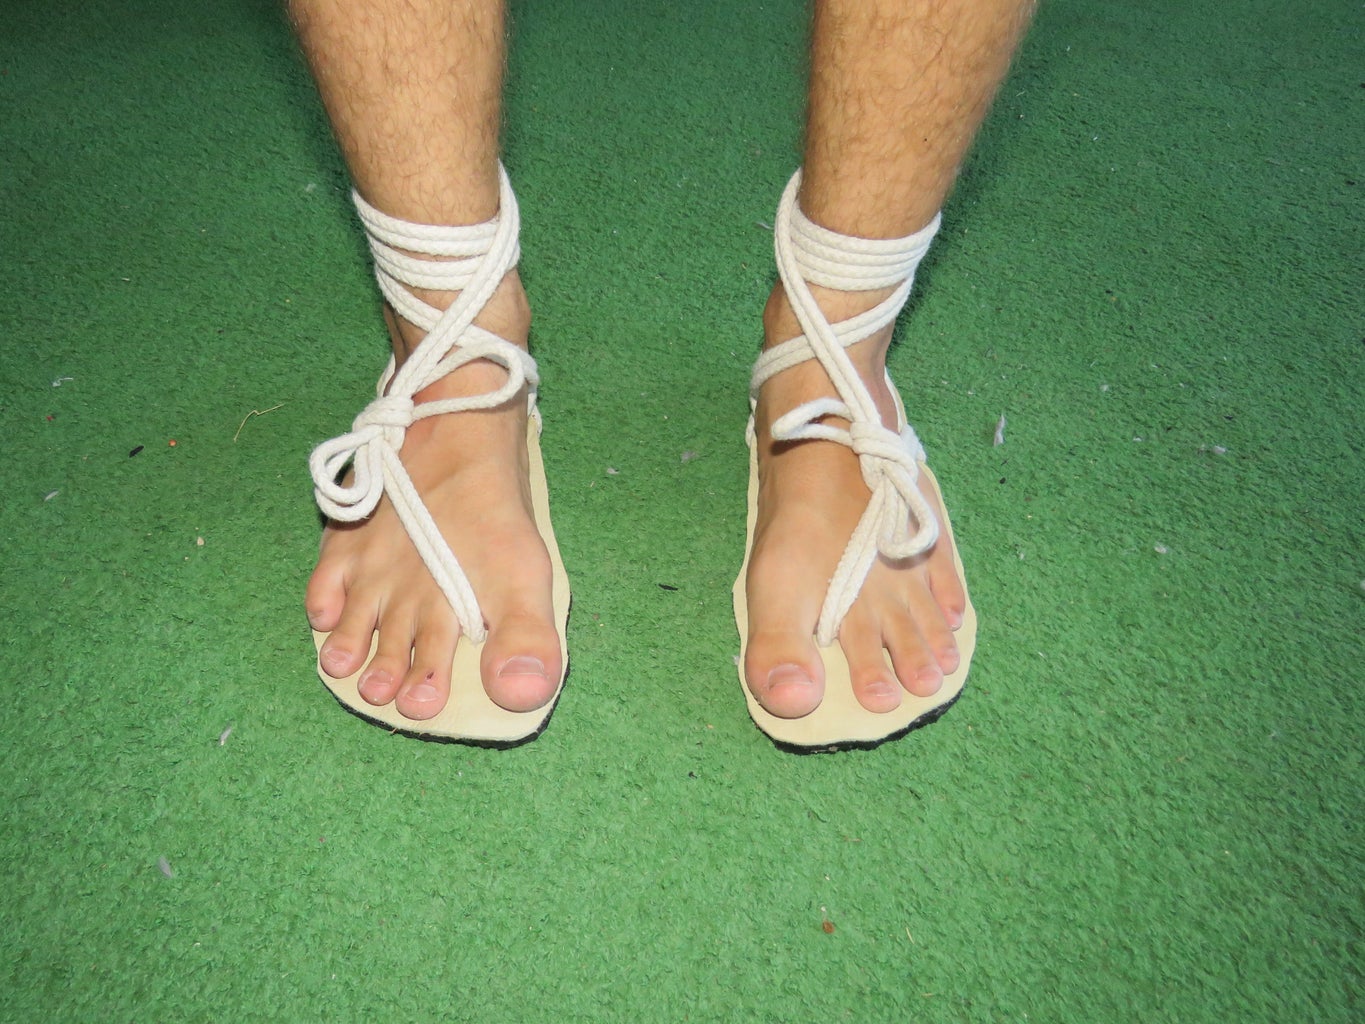

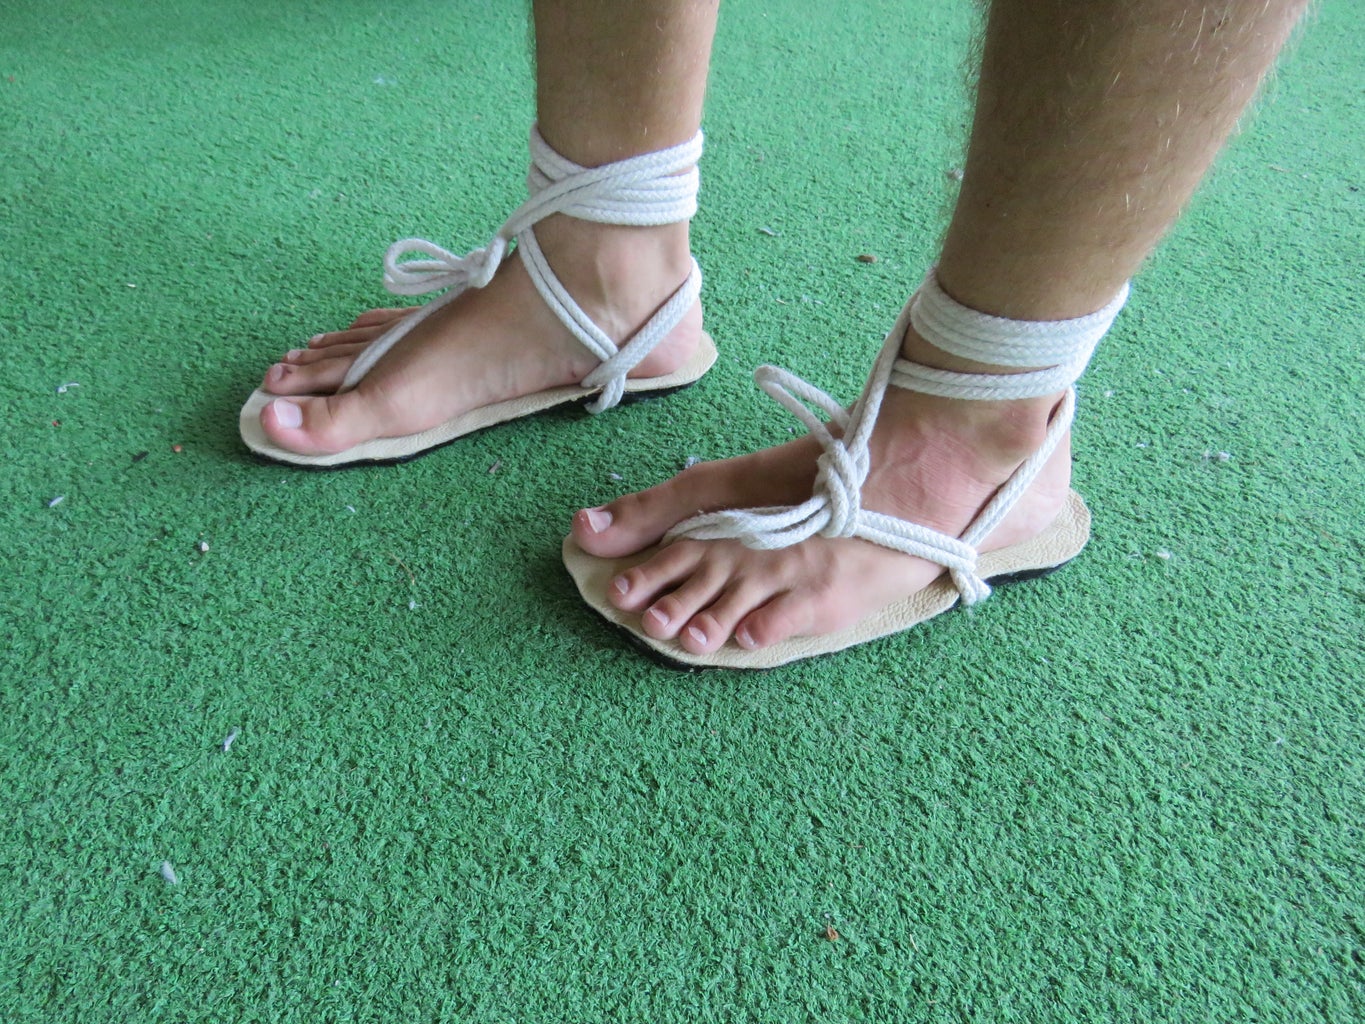


Congratulations! You've just made your own awesome-looking huaraches! And if anybody asks, you can proudly say that you made them yourself!
If you think that there's a step that needs some further clarification, don't hesitate to suggest improvements by leaving a comment below.
I'd like to send out a HUGE thank you to everyone that voted for me in the Footwear Challenge, as well as to the Instructables staff for hosting it. Because of you guys I was selected as one of the winners! Thank you so much!!!

Runner Up in the
Footwear Challenge


