

Introduction: Toddler Interactive LED System (in Progress)


I'm working on two projects in parallel and I want to organize what I have on this project before I start documenting the other project.
Toddler Interactive LED System (in progress)
Estimated: 50% complete.
When finished the project will:
- Consist of:
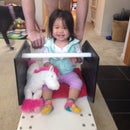
- the cardboard barn, see Instructable
- a "random" array of 72 LEDs (as opposed to an HxW grid array)
- a 9-Charlieplexor to control the 72 LEDs, see Instructable
- a "random" array of 6 LEDs that will also act as switches
- a 3-Charlieplexor to control the 6 switch LEDs separately from the 72 LEDs
- touch switch circuits (like a touch lamp) wired to each switch LED metal housing
- The 72 LEDs will respond with different patterns based on input from the 6 switches
- First goal - four shapes will light up or turn off when the center switch LED is touched
- Second goal - when all four shapes are lit - a cascading light show starts
- Light show will include LEXIE written on the back wall
- The "game" will reset when the light show finishes
- Third goal - a "sleep" mode
- where the LEDs wink on and off 2 or 3 at a time (like a screen saver)
- can be turned off (made dark) manually with switch or after 10 min of idle time
- System on and off control
The shapes I chose were circle, square, triangle, and cross.
Step 1: Plans and Parts


I already mentioned the plan. Let me put in some specifics.
The LED system will be configured primary in a ring at (child) shoulder height, so that the "light show" will travel in an orbit if you are laying down in the barn. The system will consist of 3 panels - referred to as Stern, Port and Starboard (with the door at the bow).
- The circle and square are in the Starboard panel.
- The triangle and cross are in the Port panel.
- LEXIE is spelled out in the Stern panel.
- Switch LEDs are at the center of each shape
- A switch LED and one LED from the 72 array will be on each side of the Stern panel.
- The letters for LEXIE need diffusion covers to make the LEDs light up the letters.
- The four shapes will need diffusion covers
A quarter inch thick waxy nylon (possibly HDPE or LDPE - translucent) panel would be perfect for the LED diffusers, but all I have right now is 1/2" thick plates of the stuff. I may still go with that. I already cut out tinted polycarbonate, and even sandpapering the surfaces doesn't increase the diffusion at all. I'm trying a silver paint spray and light sanding. If that doesn't work, I'm going to my plastic supplier's recycle bin again... Styrene, acrylic and polycarbonate are crap so far. Home depot "light diffusion panels" suck too. (I took the LED tester in the store and shined it on every piece of plastic I saw, including storage boxes.) Nothing "glows" like waxy nylon.
Each panel will need:
- holes in the barn walls to let in the LED light
- LEDs, LED holders, and wiring that are child proof
- covers to protect the panels from prying fingers.
I discovered the best way to do this is to shape and cut the panel, then use the panel as a template for making holes in the barn and the panel back cover (also cardboard).
Using a normal drill bit on regular cardboard creates ugly holes. I don't know what the bit in the images is called, but it cuts a very nice hole in cardboard walls. (See images.) Basically you need a bit that cuts a circle instead of digging a hole. I did use a normal bit for the 4 to 6 mounting holes on each panel. Those should be snug, but you want clean holes for the lights.
Step 2: Panel Wiring


Since this is a "random" array, you have wire the 9-Charlieplexor LEDs together. That's n*(n-1) or 9x8 or 72 LEDs. That means 72 jumpers and 72 leads that will go back to the Charlieplexor. It's not that difficult, it just takes time. I used LED holders for all LEDs and backed them with heat shrink. About half the cheap plastic 3mm LED holders cracked when I inserted the LEDs with the plastic backing. The Stern panel is all metal LED holders.
Use a system and you'll be fine. The system I use is:
- Use some rough numbering system to keep track of testing in the next step.
- With my left-right orientation of my 9-Charlieplexor (see that Instructable for layout)
- I start with 9.8 on the starboard bow and work my way back in pairs (9.8, 8.9, 9.7...)
- I start with 8.7 on the port bow and work my way back in pairs (8.7, 7.8, 8.6...)
- With my left-right orientation of my 9-Charlieplexor (see that Instructable for layout)
- Label the panels with your numbering system.
- Mount the LEDs in pairs.
- Orient the LED pins so each pair is opposite orientation
- Orient the inner and outer pair jumpers to point towards the planned panel connection point.
- Don't worry too much about LED connections beyond trying to make sure they are opposite orientations.
- You're going to test all this stuff in the Assembly sections.
See notes in images for my questionable soldering techniques. I recommend larger gauge wire if you have plenty of it. I've had two leads break off so far, mostly from a 2 year old helping while testing and mashing the panels when sticking on the letters. And the fact that it's about 30 AWG.
For each panel, I route the leads to a ribbon pin connector. And then I'll connect the panels with ribbon cables.
Step 3: Stern Panel Assembly


This is the general method of assembly (some of this repeats):
Note at some point you will want to partially set up your Charlieplexor to have an idea how your pins will need to be oriented. Label the connections, connect the pins, then you'll be soldering straight into the connectors.
- Find plastic large enough to hold all the LEDs (the Stern LED panel was cut out of a cheap piece of plastic)
- Plan, measure, mark and drill the LED holes.
- Use the panel to mark the barn walls and to prepare the back panel for mounting over the LED panel
- Install all the LED holders (without the plastic insert), tighten nut with pliers if needed.
- Install the LEDs with the plastic backing, orienting as mentioned before.
- Jumper the LED pairs
- Attach jumpers long enough to go about 3 inches past your intended connector location.
- Test the LEDs and determine orientation
- Connect leads from an LED pair to the pin/ribbon connection.
Let me go into specifics on step 8, using LED pair 6.1 as an example (see images)
I think of it like this: LED --- 6.1 --- LED is a jumpered pair of LEDs labeled "6.1".
So when I refer to LED 6.1, when pin 6 is +5 V and pin 1 is +0 V, LED 6.1 (the left one) should light.
When I refer to LED 1.6, that is the paired LED. When pin 1 is +5 V and pin 6 is +0V, the right LED "1.6" should light. This way the numbering system will be [+pin].[-pin] when I get to more into the programming section.
I simply test the pair with an LED tester (shown) then attach the LEDs to the connector per the numbering scheme.
The goal is that when you plug in your connector, it lines up with the pinning of the Charlieplexor. And I know which LED will light simply by it's address.
Step 4: Stern Panel Testing


I do two rounds of testing:
- I use an expanded version of the random "snowflake" program on my Arduino to verify all LEDs light.
- This way I can check wiring fast, and not lose my place in the next step.
- Then I go back and jump the LED tester to the Charlieplexor and walk through the LED address.
Note that if you power up an unused address, multiple LEDs will light up. This is okay - until you complete all 72 connections. But for wired addresses, only 1 LED should light.

Step 5: Port and Starboard Panel Assembly


Shown in the images are the current status of the Port and Starboard panels.
Things to note:
- All LEDs used in the 72 set are 3mm and 20 mA.
- LEDs on the Stern panel are matched Green and Blue (3.4 V)
- On the Port and Starboard panels, I'm mixing LEDs:
- White: 3.6 V
- Green: 3.4 V
- Blue: 3.4 V
- Red: 2.2 V
- Yellow/Amber: 2.2V
- The shapes - circle, square, triangle, cross - will be four different colors with white lights between.
- I have added 100 Ohm resistors to each pair of Red and Yellow LEDs to help match the voltage drop. I will change the values later if necessary. But since my LED calculator says I only need 70 Ohms for a normal circuit and I'm putting 120 Ohms on each Charlieplexor pin (net 240 Ohms per lit LED), I figure 100 Ohms for 1.2-1.4 V should be in the ballpark. Other Charlieplexor systems have 100 Ohm/pin (so 200 Ohm on a lit LED) which is why I chose 120 for the Charlieplexor connection.
- The six "switch" LEDs are diffuse yellow 5 mm LEDs rated 2.6 V and 30 mA. They will be wired separately to avoid any extra "amp-stealing" complications.
Next is lead attachment and connection to the pin connector (in progress).
Step 6: Port and Starboard Panel Testing
Coming soon. Final assembly is still in progress.
This will be similar to the Stern panel testing.
Once all 3 panels are connected, I want a program at this point that can walk through all 72 LEDs.
Step 7: System Integration


I first contemplated wiring each LED pair to the Charlieplexor. Not only would that have been a Medusa nightmare, it would also be difficult to keep from curious prying fingers.
So I learned how to build ribbon cable connections. I only broke the first 3... At the end I used a vice and a broken header back to punch the ribbon with the header. Then I reassemble with an unbroken connector back and strain relief bar. I assume there's a fancy ribbon cable crimper out there. Trying to punch a 50 connector ribbon with a pair of pliers just snaps your (cheap) connector back into short little pieces.
And why did I cover the ribbon cables with duct tape? Well, my wife is pregnant. And she said the ribbon cables stank and gave her a headache. I, however, could barely smell a slight vinyl odor with my nose stuck in a large roll of the ribbon cable. She didn't have a problem with the duct tape. So I covered the ribbon cables with duct tape. Problem solved.
Connecting the Arduino will simply be a 9 and 3 strand ribbon for LEDs, then 4-6 wires to the touch switches (18 total connections). (Details will be included.)
I have circuits for the touch switches, but have not built them yet. (To be included. They look pretty simple, but I'll include everything.)
Step 8: Programming and Functionality
I am currently using the "snowflakes" program here (expanded as needed for larger LED sets) for testing.
The program gives a clear method to assign addresses that I may use in my final program. To expand, I simply replaced the colors (GREEN, BLUE) with numbers (ONE, TWO...) then added numbers as needed.
For now, I'm just using it to check that all LEDs light before the address test. I let the snowflake program cycle until I've seen all the LEDs turn on at least once. And it looks pretty cool too (see video).


