

Introduction: Tool Box Stereo


I needed a new radio for my workshop building. My requirements were simple, had to have good AM and FM reception and the ability to either play CDs or connect to my phone. Turned out that the deal breaker was AM, few radios include AM (which we use for traffic/weather/emergency information) and even the one we tried had horrible reception on both AM and FM. I know that car stereos typically have very good radio reception so my thought was to just build a box to hold one. I had a supervisor back when I worked in IT whose favorite saying was “once started all projects grow hair” meaning that the finished project always has a lot more stuff than you originally intended (feature creep) and such was the case here.
Step 1: The Plan

My basic plan was to buy a cheap car stereo and power it with an old computer PSU that I had laying around. Stick in a wooden box and there you go, a new shop radio. As I was looking for a box the right size (I did not have a big place to put it) and I stumbled on a Milwaukee drill box on eBay for $10 that was an exact fit. That should have been all I needed but then I got to thinking that it would be nice to have a clock, plus I do a lot of paint and glue work so knowing the current temperature would be nice as well. Finally it would be good to have a USB charger for my phone. A quick search on Amazon found me all the parts I needed for about $20 so off I went.
Step 2: Prepare the Tool Box


Since this was a box that held a power drill I first had to cut out all the internal supports and dividers (if you get a plain box you get to skip this step). In general I did all the cutouts with either a cutoff tool or a dremel with a cutoff disc. Round holes were drills and holesaws.
Step 3: Cut the Openings

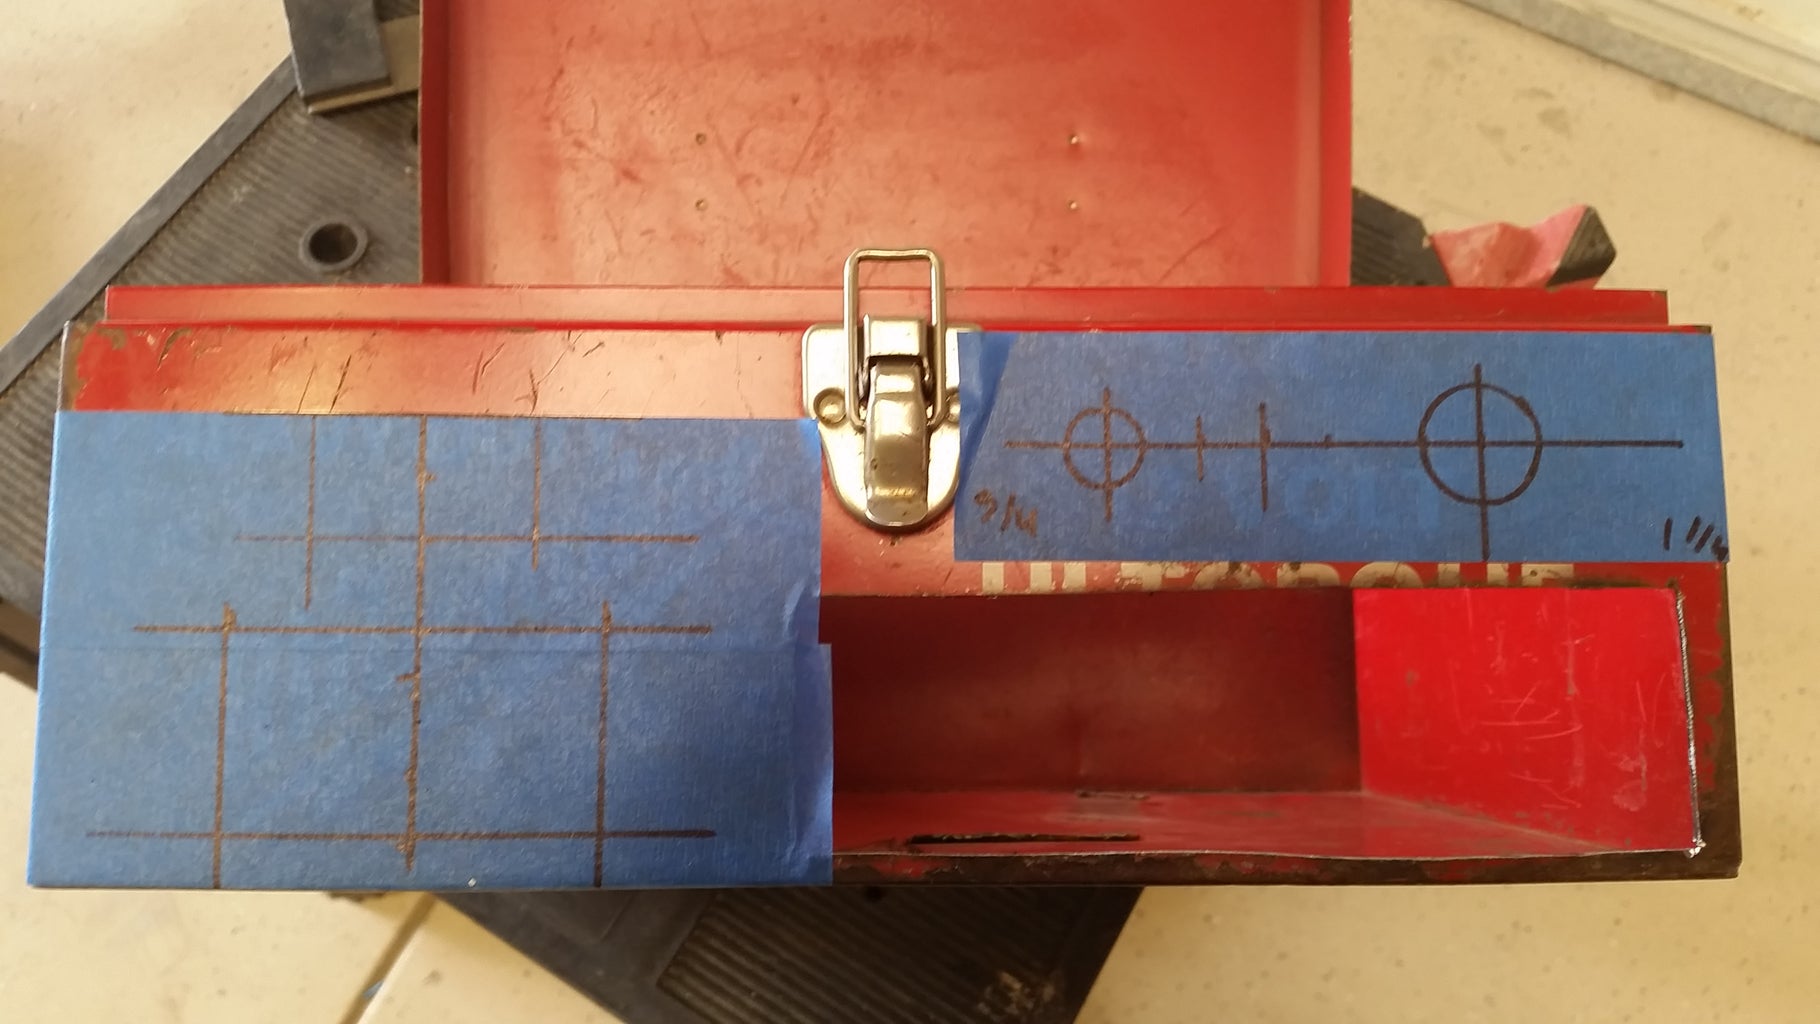


For the outside of the box I started by marking all the cutout locations and dimensions for the components as follows:
Front lower right corner - stereo
Lower left - temperature readout
Centered above temperature - clock
Above the stereo unit for the on/off switch, standby power led, power led, USB charging port
On the left panel of the tool box a square cutout for the PSU
On the back panel of the tool box a cutout for the speaker connections and hole for the antenna and temperature probe
On the bottom of the tool box a round cutout for the PSU exhaust fan
After making all the cutouts debur the edges with a file or a small stone mounted in the dremel.
Special note: when choosing a mounting location for the PSU be aware of the venting requirements. I knew that this box would be on wire brackets so a bottom exhaust was not a problem. If it was going to sit on a shelf I would have changed the orientation.
Second as part of the cutout for the front of the PSU you need to drill mounting holes. Finding a template on the internet was an issue because they are JPGs and all my various print programs resized the image before printing. I took one of the JPGs and corrected the size in Photoshop then exported it as a PDF so you can print it at the actual template size. Included here as PSU_template.pdf
Attachments

Step 4: Components for Build

- JVC car stereo from Best Buy - $45
- 400w computer PSU – surplus
- Digital clock - C 4.5 ~ 30V Digital Clock from eBay – $6
- Digital thermometer - DIGITEN 12V Red Digital Thermometer - $8
- USB charging port – local marine store - $8
- Miscellaneous switches, connectors and LEDs – Radio Shack $9 total
- Antenna extension - Pep Boys $5
Note: there is a 5V - 12V converter shown, I did not end up using it.
Step 5: Mounting Components


I started by mounting the Stereo. It included a friction sleeve so I just mounted that to the floor of the tool box with a single screw (so it could pivot slightly).
Next mount the PSU. Set it in the planned location and install with 4 short 6x32 screws. Make sure the exhaust location is unobstructed.
Lastly install all of the other components that you have decided on. In addition to the components listed I decided to make the unit self contained so I added spring style speaker connectors and a short antenna extension so that all of the connections are made on the outside of the box (pictures tell a better story).
Step 6: Wiring

First a little about computer PSUs. They are perfect for many electronic projects as they have a decent amount of wattage, multiple voltages and all the wires are color coded consistently. I’ll give a quick rundown of the wiring used for this project and let you know what I used to power the various components.
Standard wires
- Yellow: +12V
- Red: +5V
- Orange: +3.3V
- Black: Ground
Specialty wires
- Purple: 5V SB - standby voltage – always on
- Green: PSON - Power supply on when connected to ground
I used:
- 12V (Yellow-Black) pairs to power the radio, USB port and the thermometer
- 5V SB (Purple-Black) pair to power the digital clock – so as to have power as long as the unit is plugged in. I also wired a red LED to this pair just so I know the power is connected, not really necessary but why not.
I also wired an on/off switch to PSON (Green-Black) pair to turn the unit on and wired a green LED to a (Yellow-Black) pair to indicate power on, again not really necessary.
The radio wiring has the most connections, wire both the power and accessory (typically Yellow and Red) wires from the radio to the 12V PSU Yellow and the radio ground (black) to a PSU black. Any other radio wires connect according to the radio manual, for me it was just the 4 speaker pairs.
You could cut and terminate all the unneeded PSU wires but that is a lot of work so I just decided to live with the "rats nest" of wires.
Another note: It would have been nice to wire the radio accessory wire to a constant voltage but it requires 12v and the only “standby” power on the PSU is 5V. I tried a step up converter (5V – 12V) but the results were not good (wild fluctuations in voltage).
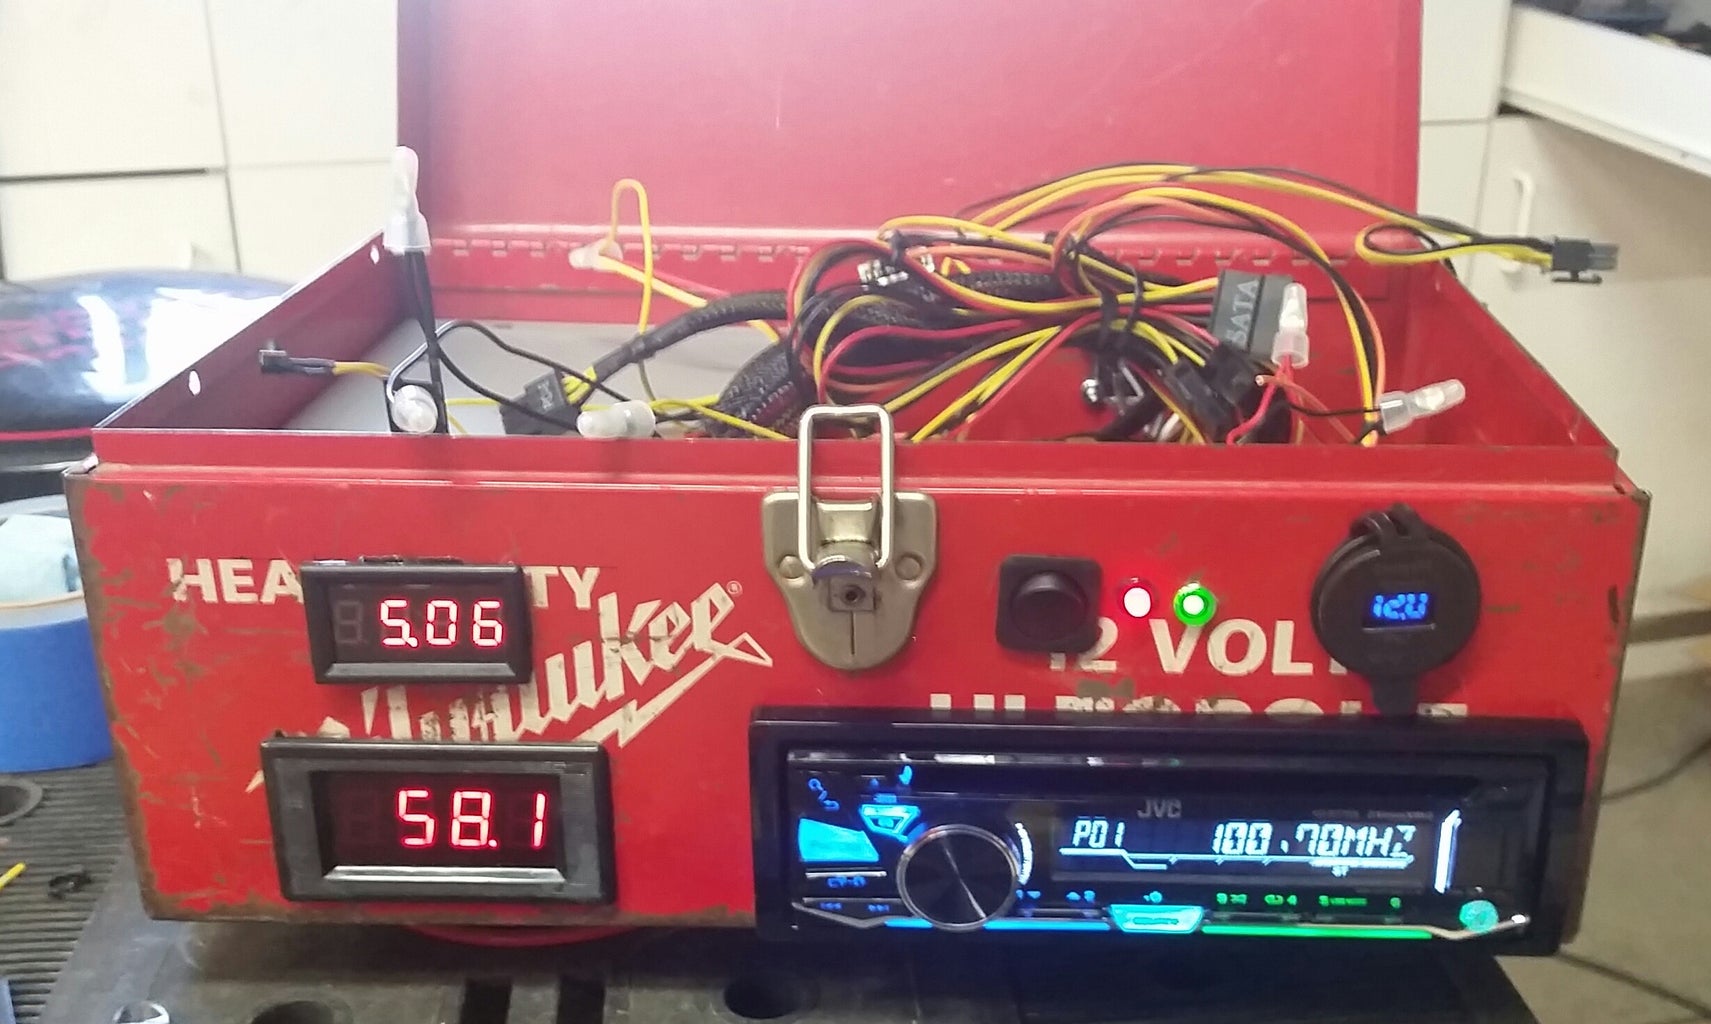
Step 7: Finished Product

All in all I have less than $100 invested and have an AM/FM radio with great reception. As a bonus I also have CD, USB and Bluetooth connections for music, time and temperature readouts in a unit that looks kinda cool (at least to me!)


