

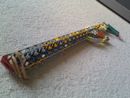
Introduction: Triple Barrel Sipriani Rifle


This is an "upgrade" to the Sipriani Rifle. I honestly think it is one of the strongest guns on this site. Both by power and durability. It now has 3 barrels and 3 ratchets which allows more rubber bands to be put on and not break the ratchet pieces. It can also load 3 bullets at once. I personally prefer to use 1 bullet at a time because it's easier, safer, and more accurate. More rubber bands will now make that 1 bullet go farther. THANKS TO VICCIE FOR THE SIPRIANI RIFLE!! :)
Well i hope you build my gun and rate 5 stars and like the new design. i have a bunch of versions of the sipriani rifle. ill show my "ak-47" version of it and my sniper version. i have a instructable on the sniper version.
p.s. when loading only 1 bullet, still use all 3 ratchets
Positives:
VERY powerful
Triple shot
VERY STRONG STOCK!
Durable/Reliable... it wont break when dropped :)
Comfy, perfect length stock
Perfect working, easily detachable bipod
Negatives:
Lot of yellow connectors
Breaks bullet if shot at hard surface
Piece Count:
Yellow Connectors- 135
Red Connectors- 8
Green Connectors- 5
Orange Connectors- 32
Light Grey Connectors- 5
Whites Connectors- 12
Red Rods- 7
White Rods- 45
Green Rods- 213
Yellow Rods- 20
Blue Rods- 20
Blue Connectors- 4
Purple Connectors- 4
Metallic Blue Clips- 4
Step 1: Handle and Trigger


1. Gather and make these.
2. Put them together like so.
3. Build 2 of these.
4. Build one of these.
5. Add the yellow rod and the white rods as marked.
6. Add the smaller panel and a white connector. ( mines black )
7. Add the last panel and put a white connector on both sides of the yellow rod.
8. Connect the trigger to the handle.
9. Make 2 of these panels.
10. Attach on both sides.
Done with the handle/trigger :)
Step 2: Barrel


1. Make 2 of these
2. Make 3 of these ( there are 10 orange connectors )
3. Take one of the orange connector strips and make this. Close up in next picture.
4. Close up of how to make it.
5. Push them together into the middle and connect them with green rods.
6. Add the other orange strips on like so.
7. Snap yellow connectors on each yellow rod like so.
8 and 9. Take the pieces you made in step one and connect them on like in the picture.
10. Connect the handle/trigger to the barrel.
11. Add 2 yellow rods on the back of the gun.
12. Add 2 yellow rods onto the front of the gun.
13 and 14. attach 2 white rods with a metallic blue on the gun as shown. next picture helps
15. Slide a yellow rod through the 2nd yellow connector in the front. then add a red connector on each side
DONE WITH BARREL!
Step 3: Bipod


1. Gather and make these.
2. Put together like this.
3. Attach to red connectors on the front of the gun
Step 4: Stock


1-4. Gather and make.
5-8. Gather and make 7 of these.
9-12. Gather and make 1 of these.
13-16. Gather and make 1 of these.
17-19. Gather and make 1 of these.
20. Take the link you made in step 1-4, and take 5 of the other 7 links, and the link you made in step 13-16 and make this. Not too hard.
21. Take the last 2 links and the link with the red connectors and make this.
22. Connect the piece you just made with the long stock you made in step 20.
23. Add the last part like so.
24-25. Connect it to the main gun as shown.
YOU'RE FINALLY DONE!!! :) RATE 5 STARS AND LEAVE COMMENTS PLEASE!!! :)
Step 5: Rubber Bands and Loading


1. Detach the front of gun as shown.
2. Add rubber band where shown. add as many as you want.
3. Another view.
4. Re-attach front.
5. Add 2 or 3 small rubber bands under the gun, where the white rods are.
6. Take the one side i talked about in the other picture and pull it over to the trigger and wrap it around where i have it.
7. Another view.
8. Pull the main rubber bands to the white connectors on the top of the gun and wrap around the like i have it.
9. Make sure all the white connectors are at the same spot before you fire.
10. This is a bullet.
11. Put the bullets in the gun where i have them.
NOW GET READY, AIM, AND FIRE :) please rate and comment ;)


