

Introduction: Truly Semi-auto Revolver


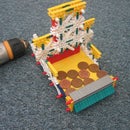
Hi all. This is my new semi automatic k'nex revolver. I have searched instructables for days and I have found no gun like this. Hope you enjoy.
Don't forget to rate and subscribe!
Pros:
Semi automatic
8 shot
comfy
decent power (for a semi auto gun) 15-20ft. Sometimes it only goes about 10ft but that doesn't happen often.
Removable mag
Reliable
Looks pretty cool
Cons:
Slowish reloading
quite difficult to pull the trigger as this is where the power comes from.
Some modded pieces.
I did try to upload a video of the gun in action but I tried everything and it wouldn't upload. Sorry.
Step 1: Barrel/mag


1. This is what you will make.
2. Make
3. Make
4. Add
5. Add
6. Add
7. Add
8. Add
9. Add (Do process 3-9 8 times)
10. Make x2
11. Do
12. Do
13. Finish
If you have enough k'nex you can make several of these so you have a few removable mags!
Step 2: Handle


- This is what you will make
- Make x2
- Add
- Make x4
- Attach
- Attach
- Make x4
- Attach
- Attach
- Attach
Step 3: Back End of Body


- This is what you will make.
- Make x2
- Get
- Do
- Attach
- Attach
Step 4: Ammo Stopper


- What you will make
- Make
- Make (wrap some tape around the end) This is essential
- Attach
- Another angle
- Attach
- Attach
Step 5: Hammer


- What you will make
- Make x2
- Do x2
- Do x2
- Make
- Attach
- Attach
- Attach
- Add
- Do
Don't add the washers to the hammer!
Step 6: Trigger


- What you will make
- Make
- Make
- Attach
- Add
- Attach
- Add
- Attach
- Add
Step 7: Front of Body


- What you will make
- Make x2
- Make
- Attach
- Attach
- Attach trigger
- Another angle
- Another angle
- Finished
Step 8: Putting It Together


- Get
- Attach
- Get
- Attach
- Get
- Attach
- Attach hammer
- Another angle (Switch the tan clip on to the other side)-essential
- Get
- Attach
- Another angle
Step 9: Elastic Bands


- Get
- Attach
- Another angle
- Another angle
- Get
- Do
- Another angle
- Another angle
- Get
- Do
- Attach
- Attach
- Finished


